Kuksa cups are
traditionally carved from Birch wood, this is what I have chosen to
use too.
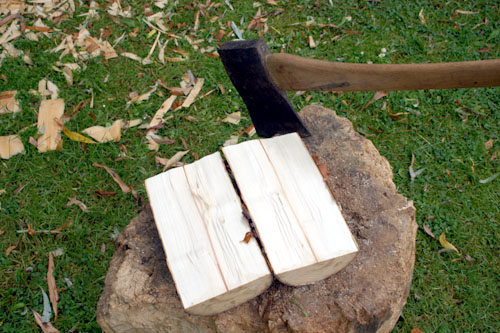
Take a log of fresh wood and chop it down the centre with an axe.
Take one
half and carve the chopped surface smooth and flat with your knife.
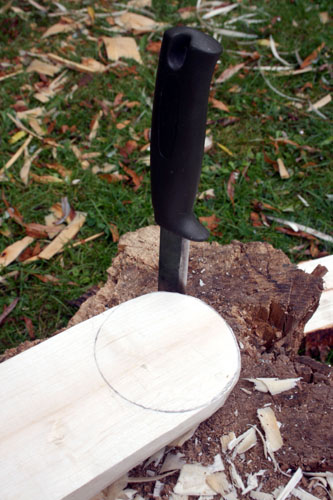
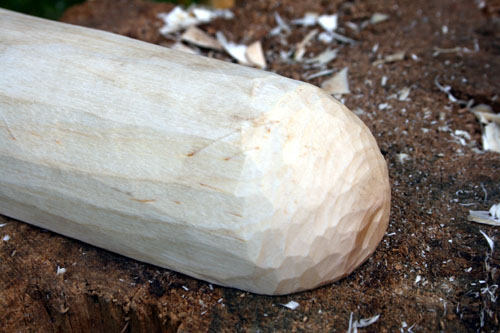
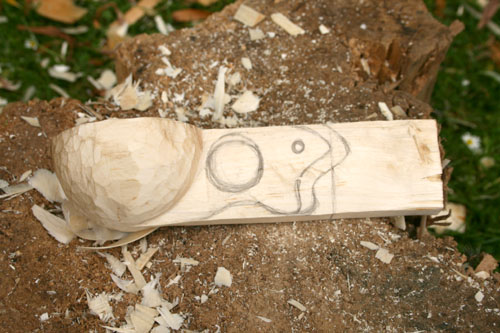
Draw around a cup or round object onto the flat surface at one end.
Carve around one side of the circle.
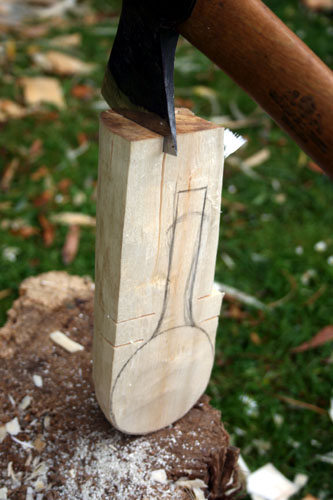
Now carve
the underneath to make half the cup shape. As there is quite a lot
of wood to remove, a sharp hatchet will make the job a lot easier to
rough out the shape to begin with.
Now draw on
the handle shape connecting to the bowl.
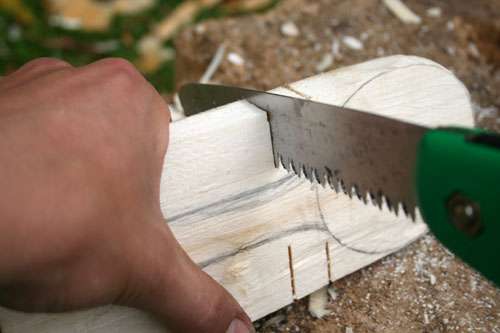
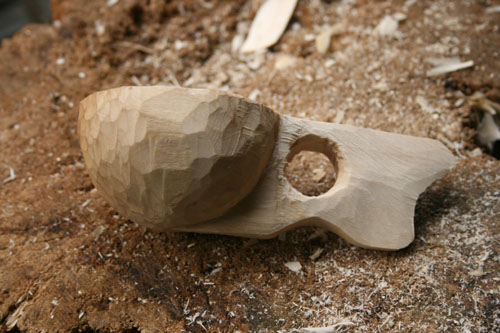
To easily remove the bulk of wood from
either side of the handle make a couple of 'stop cuts' with a saw.
Simply split away the surplus wood.
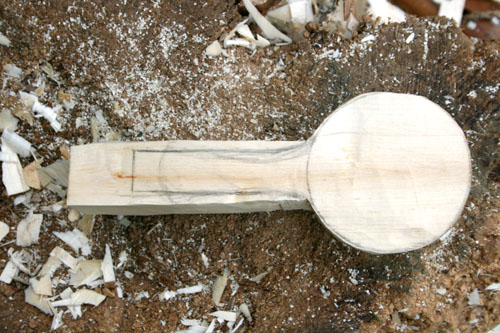
Tidy up the
split edges with some smooth cuts from your knife. Carve fairly
close to the lines but leave some excess wood for now.
start to
shape the bowl on the other side of the cup. If the knife slips and
goes onto the handle area it will only damage the excess wood which
you'll remove later...
Now you can
draw on the profile shape of your handle. There are many possible
designs.
I used a
Brace and Bit to drill the hole. You can tidy the job up more with
your knife
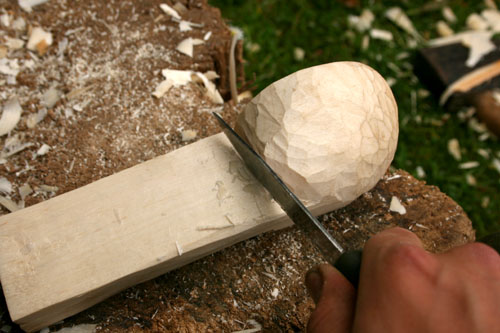
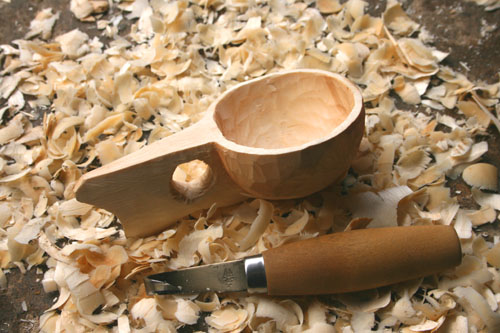
When you
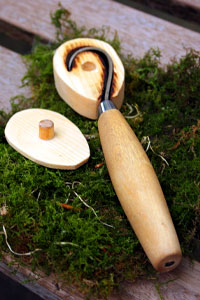
are happy with the form of the cup, move on to carving out the bowl.
For this you'll need a Spoon Knife. I recommend the 'Frosts Spoon
Knife' (the single edged version), I have found this knife to be just as good as some of the
more expensive brands you can buy.
The spoon knife will make the tidiest cuts
when cutting across the grain, but you'll eventually need to carve
from many angles and in many directions. Use your fingers like
callipers to gauge how thick the walls of the bowl are as you go.
Perfect the
shape of your cup, smooth off any rough areas. When you're
completely done with the carving work place it in an open
bag (paper bag is best) for a week or two to let the wood dry. Have the bag on its side,
this stops moisture evaporating too fast and should prevent the wood
cracking as it dries.
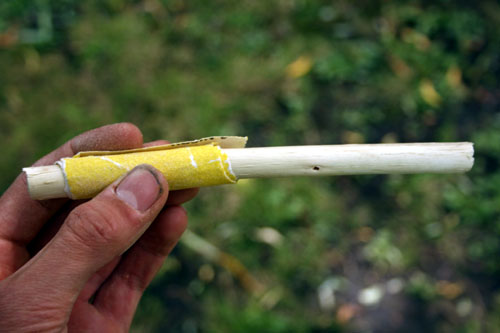
Sanding your cup nice and smooth will be easier when the wood is dry.
Start off with a fairly coarse grade of sand paper until the cup is
smooth all over, then repeat with medium grade paper and finally a
fine grade.
You can wrap a small piece of sand paper around a dowel and use this for
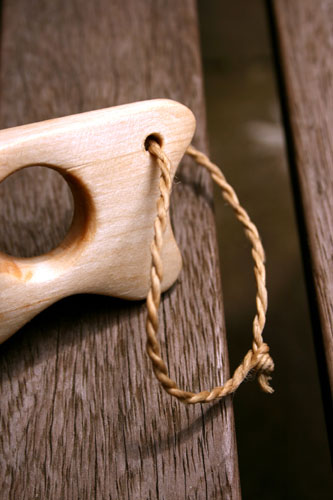
sanding around the hole in the handle.
You can also drill a hole
and attach some cord for hanging your cup.
Once sanded
and totally finished; oiling the wood will enhance the colour and
grain. You can wipe it over with vegetable oil but mineral oil is
preferable as veg oil can sometimes go rancid (although I've never
had this happen)