| |
Also, Take your time when making
the set. Make it as well as you can the first time, if you take a
slap-dash approach you'll just have to do it all again; which
takes more effort and time in the long-run.
The basic set-up |
|
| |
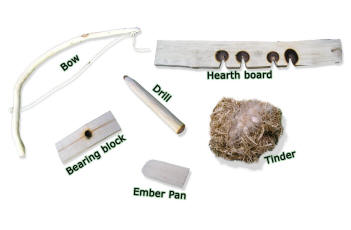
| A bow drill set should include
the following: A Hearth board, a drill, a bow with string, a
bearing block, an ember pan and some tinder |
 |
|
|
| |
|
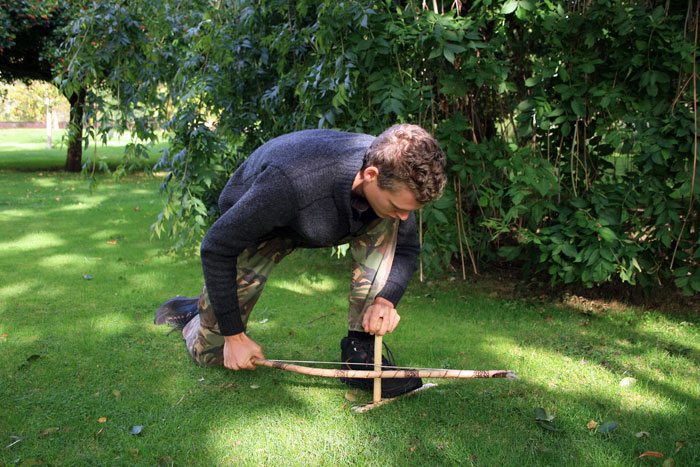
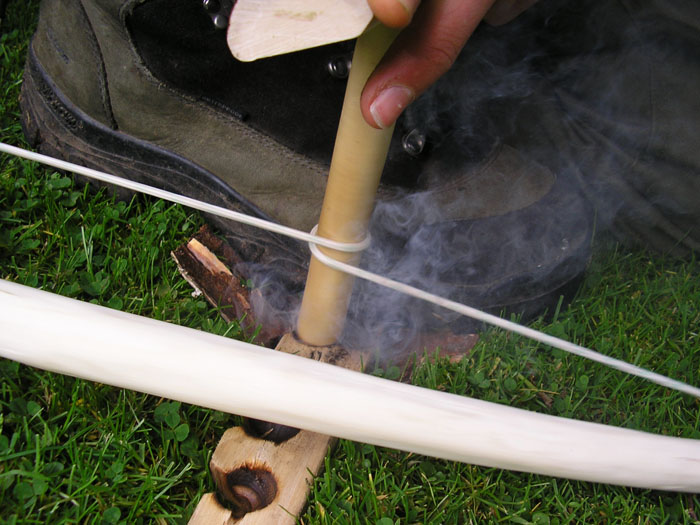
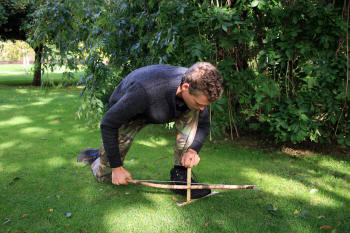
The drill is
twisted into the bow and is held between the hearth board
and bearing block. The assembly is kept secure and sturdy by
securing the hearth board to the ground with your foot and
by holding the bearing block tightly against your shin as
shown. The bow is then moved backwards and forwards quickly,
making the drill rotate and rub against the hearth board
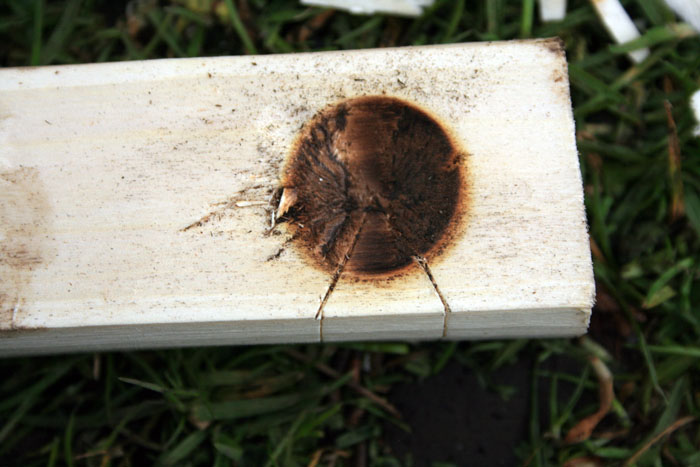
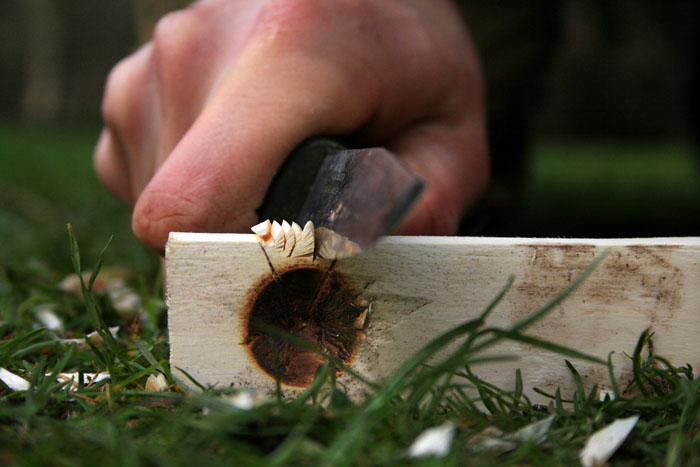
causing tremendous friction. A notch is cut out in the
hearth board where a small pile of black charred dust
collects underneath the drill. This dust becomes so hot that
it eventually ignites and begins to smoulder, this smoking
ember is then added to the tinder and blown until it bursts
into flames. |
 |
|
|
| |
|
|
| |
Making the components
Getting the right
types of wood for the hearth board and the drill is
essential, so before we get started, here is a list of
suggested wood combinations...
(drill
wood written first for each combination)
|
my 4 favourite combinations:
- Willow on Lime (Basswood)
- Willow on Willow
- Hazel on Lime (Basswood)
- Willow on sycamore
|
Other suggested combinations:
(some are harder than others...)
- hazel on poplar
- Spruce on Spruce
- Ash on Willow
- Elder on Pine
- Hazel on Cedar
- Hazel on Ivy
- Hazel on Pine
- Hazel on Sycamore
- Poplar on Cedar
- Sycamore on Sycamore
- Bird Cherry on Alder
- Wild Rose on Alder
- Willow on Aspen
- Willow on Poplar
|
Experiment with your own combinations too! Wood that is dead and dry when
found will act differently to wood which is cut fresh and then seasoned.
NOTE: just listing that lime wood is 'suitable' does not necessarily
mean that all lime wood will be brilliant. It depends on the conditions
it has grown in, for example it may have grown very slowly, resulting in
wood which is too dense; conversely it could have grown very fast,
meaning it will be too soft. This goes for all types of wood. Usually
it's best to get something in-between. You can test the
density of wood using your thumb nail.
Making the Hearth board
First of all you
will need to select a suitable wood to carve your hearth board from.
Experience has lead me to believe that Lime (Basswood), Willow & sycamore are some
of the best woods to use. However many more can be used, and part of the
fun is choosing and experimenting with your own choice of wood and getting
familiar with the properties of each kind.
Dry dead wood is obviously more suitable than
fresh wood. Either cut wood and leave it to season, or select already
dead pieces.
Dead wood found on the forest floor will be
damp unless the climate is very dry. Instead search for dead-standing
wood, or wood caught up in other tree branches and so suspended off the
ground.
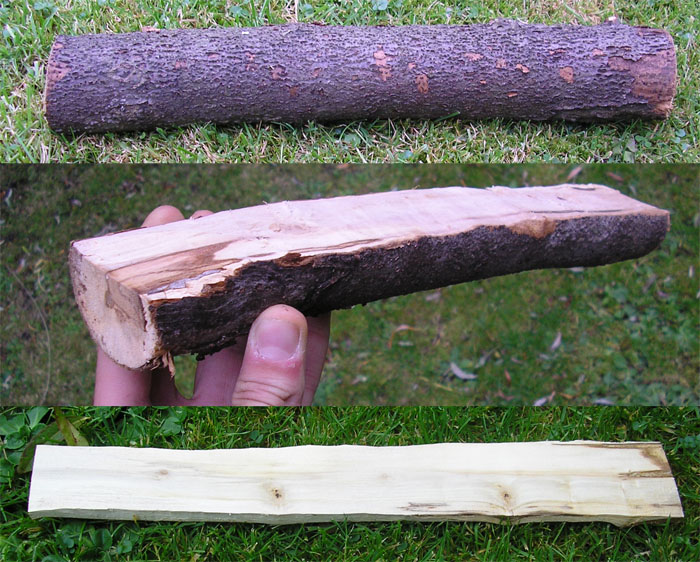
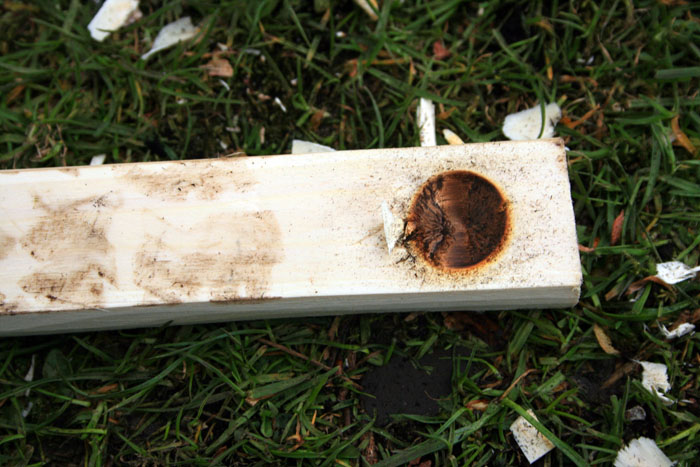
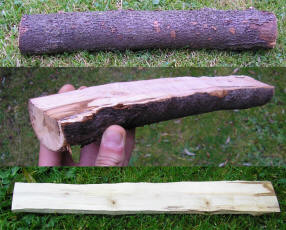
Cut a section of wood about a foot long and
three fingers wide. There should be as few knots as possible; knots are
too hard.
Carve the wood down so that it resembles a small plank.
You could start by splitting a round baton of wood in half and then
carve the round side flat. A small hatchet is great for this.
I never measure anything when i
make the parts, but just to see, i measured the thickness of
a few of my hearth boards, they are all about 15-16mm thick.
This thickness works very well for me.The width should be at
least twice the thickness of the drill (about 4cm). |
 |
|
|
| |
| The Drill For the drill I look for shoots of wood that are already
about the right thickness Strip the bark off.
Then carve one end pointed and
the other end into a blunt point as shown. your drill should be perfectly
straight and about 6 or 7 seven inches long.
The bottom of the drill is
carved to a blunt point so that there is a lot of surface area to cause as
much friction as possible; whereas the top end ideally needs to be as
friction free as possible.
I tend to make my drills pretty much always about 2cm thick (do this by
eye).
Note: The wider the drill the less
full rotations it will make for each stroke of the bow. Also I find it
harder to apply as much downward pressure with a wide drill. |
 |
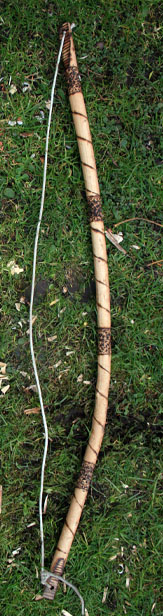
The bowMany beginners automatically think that the bow should be bendy, but
actually it should be rigid and pretty much as thick as a broom handle. If
the bow is springy, this can allow the string to slip around
the drill. A bow about 85cm long is a good length (from your
armpit to your fingertips). A slightly bent shape is nice,
although this doesn't have to be much at all.
There are various natural materials from which you could
make the string,
such as, buckskin, rawhide, sinew and also some plant fibres, however I admit that I
have not experimented with such materials enough to give advice about
them. For practice, I recommend sticking with something that is very hard wearing,
such as nylon cord. Personally, I use the cord
which is used on the pull-start of garden machinery, I have found that this
material is virtually indestructible for bow drilling. If you were in a survival situation
you could try using your shoe lace, although I have found that many boot laces are not usually strong
enough for repeated use. If you wanted to be a super prepared survivalist,
you could always use pull-start cord as laces, then you'd
always have good cord at hand :-)
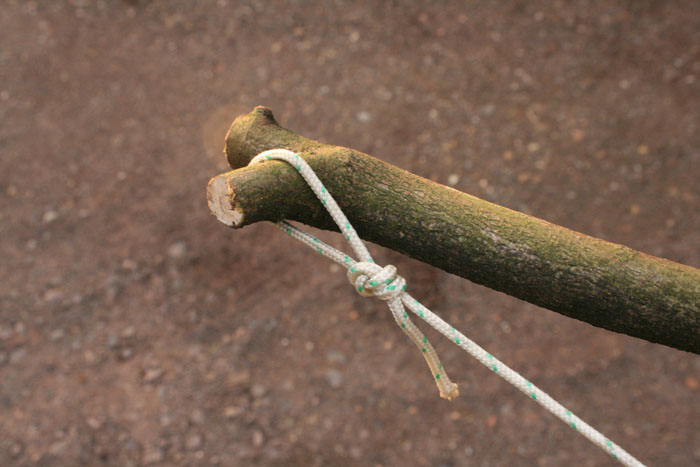
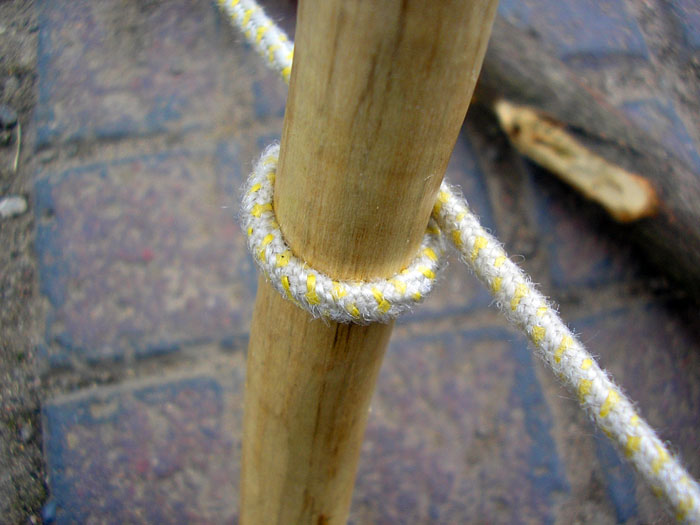
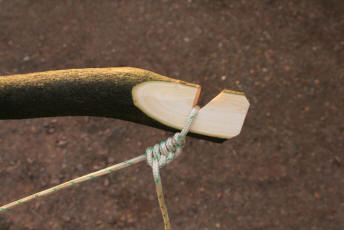
You can tie the ends of the cord to the bow in many
different ways. I personally just use a few overhand knotts.
Just for fun I personalised this bow by
burning patterns on to it using
a metal kebab skewer.
|
  |
|
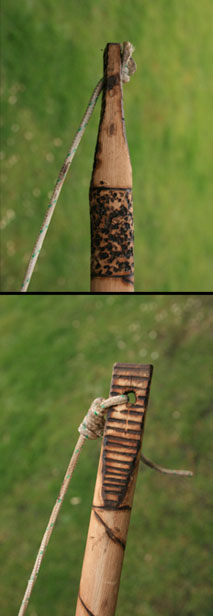
Other
suggestions for attaching the string... |
 |
 |
|
|
| |
|
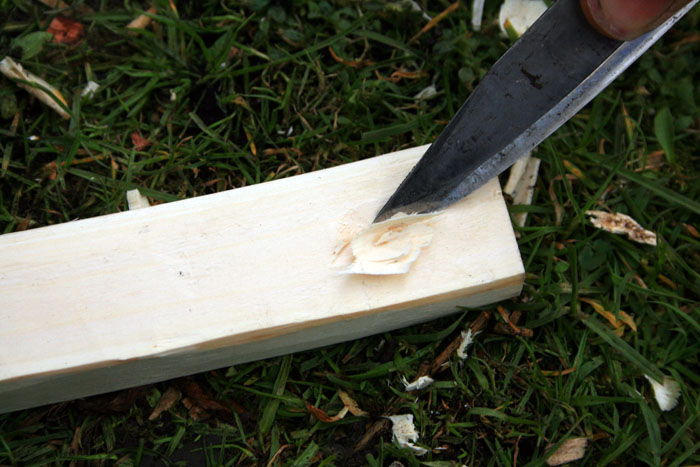
Bearing block The bearing block should be as friction free as you can
make it, some tough hard wood is best. I like to use Yew, elder, holly,
oak. The old weathered oak branches that look like bones are
pretty good.
A small section of wood is all that is needed, I often just split the
wood down the centre to produce 2 possible bearing blocks and carve a
depression in the centre using the tip of my knife. This small depression
will hold the pointed end of the drill in place.
You should make the bearing block comfortable to hold. Carve off any
sharp corners etc.
stuffing some fresh leaves into the depression acts as a lubricant to
help reduce friction. Ivy leaves are my favourite for this (not poison
ivy). |
|
|
|
| |
|
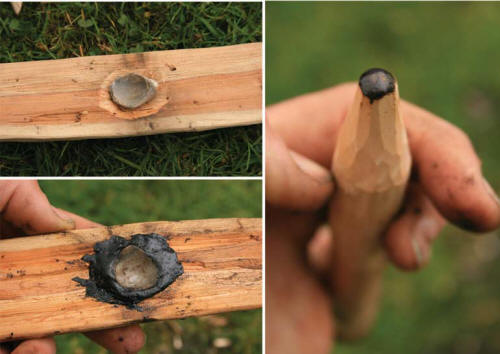
These photos show an experiment of mine where i glued a
'devils toenail' fossil into the bearing block using birch
tar. This made an amazingly good friction free
surface and you can see that the top of the drill has polished off nicely.
However due to the friction and heat caused, the tar glue
does become too soft... More experimentation needed, I'd
imagine hide glue would work a lot better. |
|
 |
|
|
| |
|
|
| |
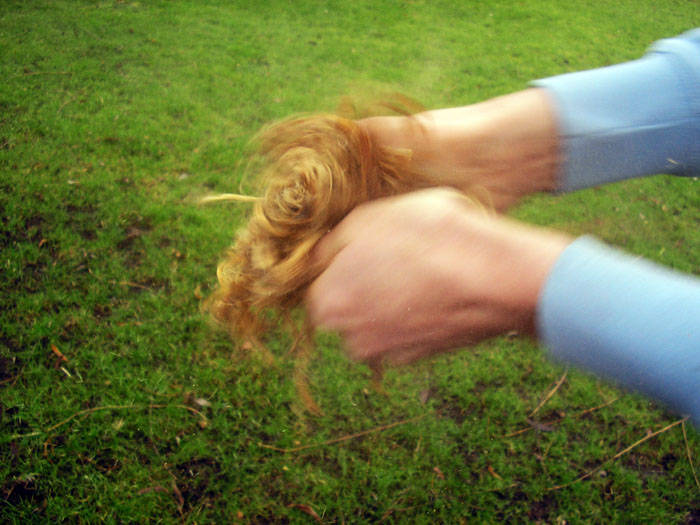
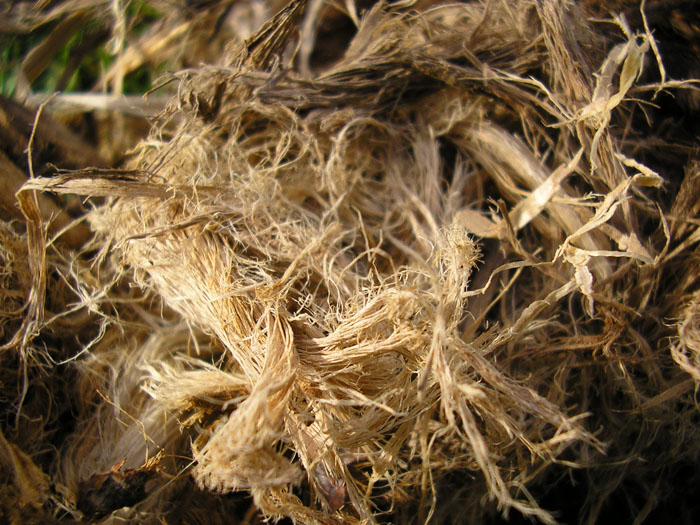
| Tinder:
There are many possibilities for
tinder. My
personal favourites are Lime (Basswood) bark, Clematis bark and Honeysuckle Bark, but
there are so many other materials that you could use. Just look around for
fibrous materials that are as dry as you can get.
A lot of tinder takes preparation. Buffing it between your hands will
break the fibres down and produce fine fluffy tinder. Keep your tinder somewhere
dry, in a pocket for example. If it's damp, keeping it against the warmth
of your body will help to dry it. You can add a small amount of downy tinder
to the centre of your tinder bundle where you plan to introduce the ember.
For example, the downy seeds of thistle & reedmace work well. This acts as an ember extender.
This is not necessary though |
|
|
|
| |
|
|
| |
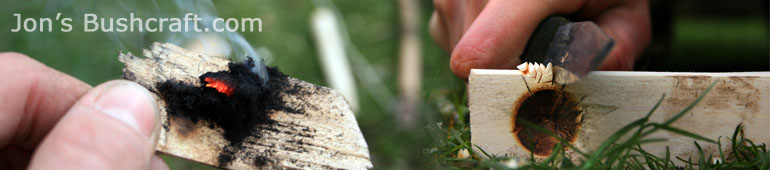
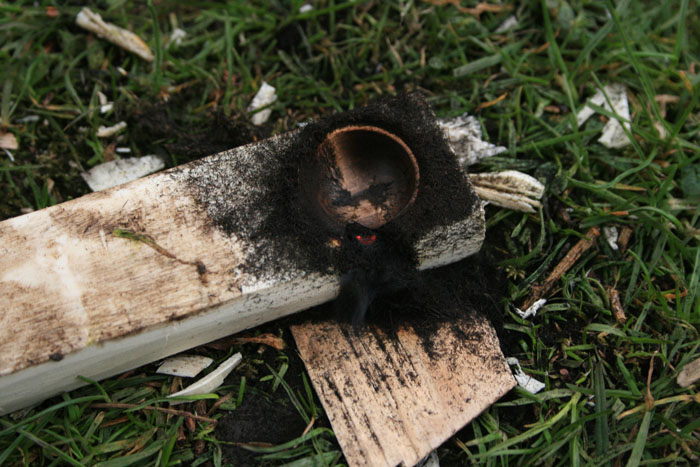
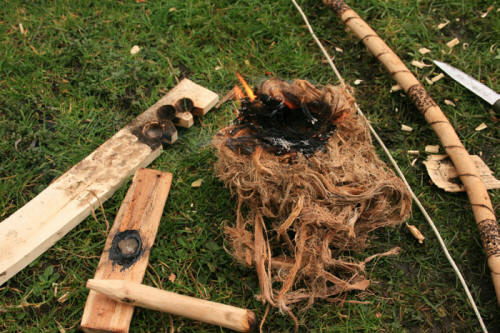
| If your technique
is good (which usually takes lots of practice), and all the
conditions were right, then you'll most likely get an ember.
It will likely not be as easy as this sounds though.
If there is an ember, the pile of
black dust on your ember pan will continue to produce smoke by itself.
Stay calm, you have some time (although not a huge amount). Encourage the ember a little by
gently wafting air over it with
your hand. This short time also allows the ember to 'solidify'. If left
longer you'll see the hot glow rise to the surface.
Peel back the
hearth board away from the ember. Now you're ready to transfer it to the
finest part of your prepared tinder. |
 |
 |
| |
|
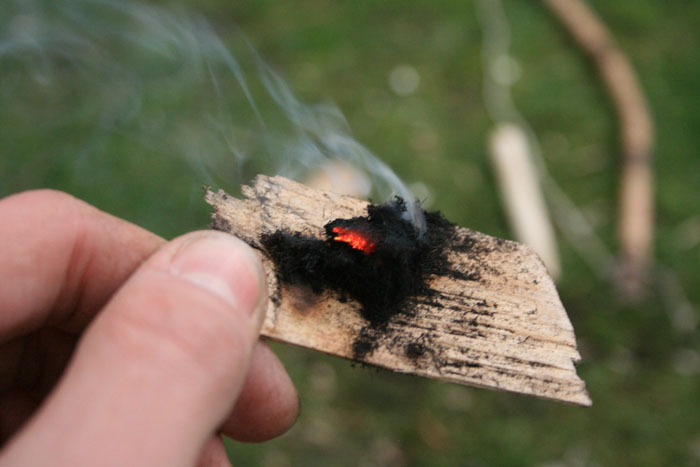
| Once you have the
ember on your tinder, fold the tinder around it gently but
confidently. Now hold the bundle and begin to blow. Don't
blow too gently, this little smouldering pile of dust needs
feeding with plenty of oxygen if it is to burst into
flames... Also, do not blow too close, otherwise the
moisture from your breath can discourage it. With more and
more air the ember will grow stronger and the tinder will
begin to burn, then eventually burst into flames! |
|
 |
| |
|
Congratulations
if you achieved fire!
If you liked this article, you may also like my
eBook on the hand drill method: |
|
 |
|
|