|
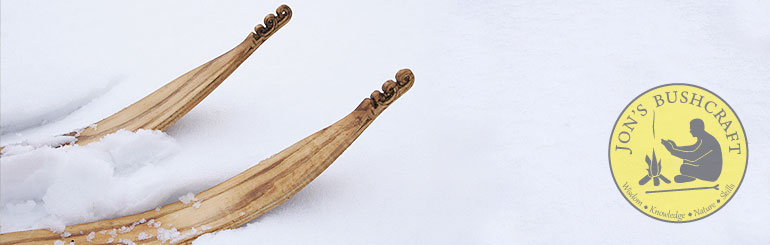
Make your own
Traditional Wooden Skis
|
| |
 |
|
 |
|
| |
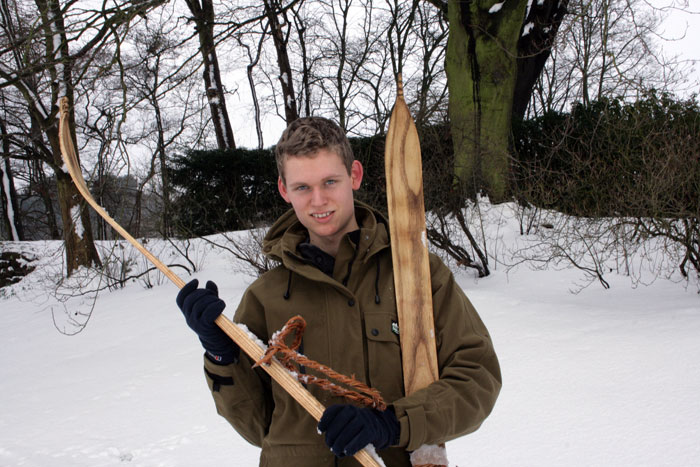
I had never been skiing before or even held a pair of skis, but making a
pair seemed like a fun idea! Even in England where snow may only be
around for a few days of the year, the fun that can be had on those days
makes the effort in making them well worth while! This article shows how
I made mine.
My imagination was first sparked when watching a Swedish film about
native Reindeer herders. For such people skis are not all about fun and
high speed downward slopes, in northern climates skis provide a means of
moving across the top of deep snow which can potentially be meters
thick. Without such equipment as skis or snowshoes, travel across the
landscape would be incredibly difficult.
Unlike most modern skis, traditional
wooden skis like those which were made by our ancestors can vary hugely
in size. It's wise to make skis according to how and where they'll be
used. A large surface area is better suited for situations where snow is
very deep and powdery. In Siberia the natives made skis which could
exceed a width of 12 inches each! On well used ski runs where the
snow is more compacted, narrow skis can be used for more speed.
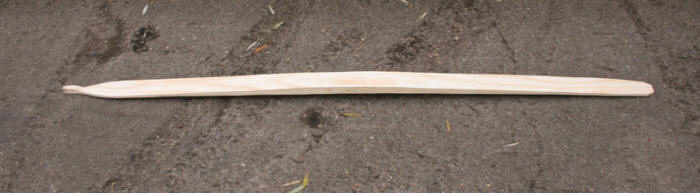
One of the first things I learnt about skis
is that generally they are not just flat pieces
of wood with a bend at the end, they are also bent
from one end to the other meaning that when not in use the centre of the ski will stand off the
ground slightly. This bend serves to spread the weight
of the user more evenly over thick snow; Instead of the centres dipping down the skis
just become flat.
|
|
| |
picture showing an overall bend in the ski, see how it
stands away from the ground slightly at the centre. |
|
| |
|
|
|
|
| |
For my timber I was lucky enough to find a trunk of Ash wood
left by loggers on a fire heap, as a bonus the log was
also naturally bent along it's length, this was perfect, I could utilise
this natural shape the achieve the overall bend as explained above.
Scandinavians generally used Hardwoods for skis, typically
Ash or Birch, but also favoured pitch saturated Pine. In Norway it is
apparently true that if you died whilst using skis made of Elm you were
not to be buried on holy ground
since it was considered suicide because they were so slippery! Siberian
tribes frequently used Softwoods like Spruce, Pine or Larch. It's worth
noting that the Siberians nearly always lined the undersides of their
skis with leg skins (of any large animals), this would prevent the
softwoods from weaving out. Also, the flow of fur was aligned backwards
to give excellent traction when moving uphill.
The timber you choose should have as few knots and side branches
as possible. Also the grain needs to be straight and not twisted; you don't want
to split the log in half and it look like a propeller... You can usually
tell if the grain is twisted in a tree by studying the bark.
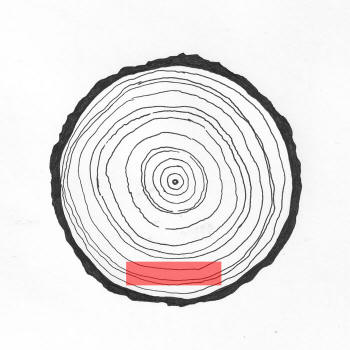
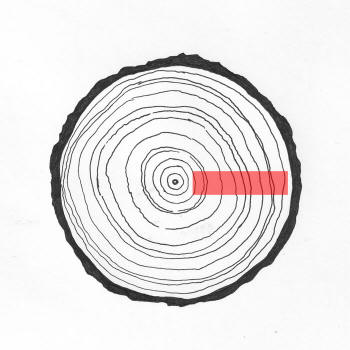
In a log of timber the sections of wood to be used will be
different according to whether you are using hardwood or Softwood. For
hardwoods have the growth rings aligned 'parallel' with the width of the
ski (see fig 1). For a softwood have the growth rings vertically
aligned (perpendicular) (fig 2). |
|
| |
fig 1 |
|
fig 2 |
|
| |
 |
|
 |
|
| |
|
|
|
|
| |
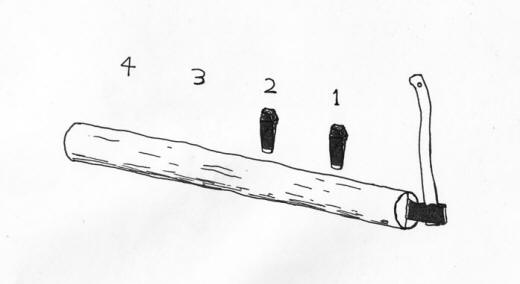
If the skis are to be made the traditional way the log
should to be split into workable staves using wedges. The diameter of
the log will determine how many times it can be split down to
result in workable pieces. The log I used was fairly thick so I could
afford to split it into quarters. Carefully inspect the wood beforehand to Plan where best to make
the split to account for any natural quirks.
I Start with a felling axe, using a sledge hammer I
tap it into the end of the log until the wood begins to split. Then I
place a wedge into the split and hammer it. As the split opens further
the axe will loosen and can be taken out. We now just use
wedges to do the rest. Hammer a second wedge into the split slightly ahead of the
first. The first wedge will then loosen and this can be moved ahead even
further. The wedges are moved one after the other until the other end is
reached and the log falls into two halves. If you're lucky this will
have been as straight forward as it sounds and the split will have run
in a straight line. If the split had run off to one side at any point
the next wedge would need to be hammered in further ahead and off to one
side to encourage the split back to the middle.
|
|
| |
 |
|
| |
|
|
|
|
| |
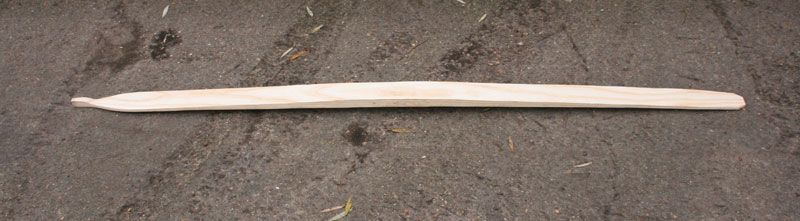
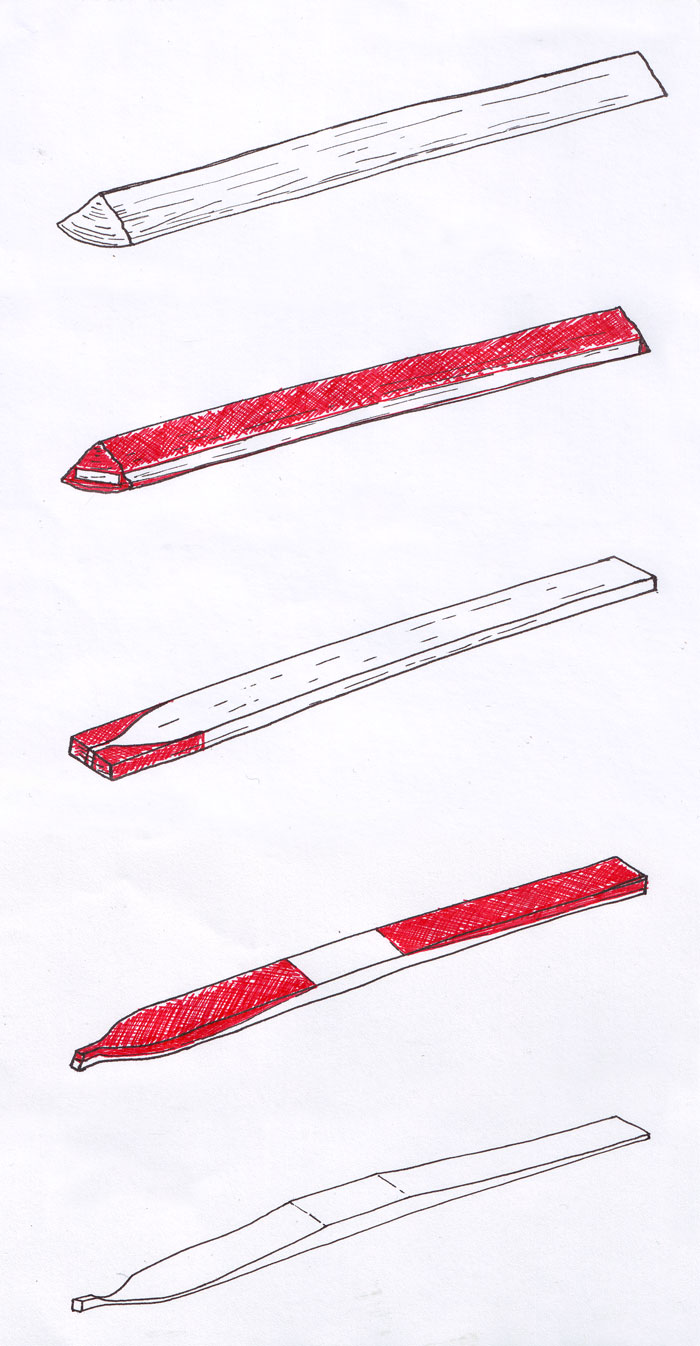
Shaping the woodThe following
shows my strategy for reducing a quarter
log of Ash wood into a ski. (red indicates wood to be be removed.
Drawings not to scale)
|
|
| |
 |
|
| This job will be a lot
easier if completed while the wood is still green.
Firstly the bark is stripped using a regular knife or
draw knife. The rough stave then needs to be reduced to
a regular plank with dimensions to accommodate the
widest and thickest parts of the finished ski. At the
beginning you'll need to remove large amounts of wood,
this can be done by making a series of saw cuts a few
inches apart along the stave, blocks of wood can then be
split away with the axe, chopping through from one saw
cut to the next... (Be careful not to make the initial
saw cuts too deep otherwise you'll be left with wood only
suitable for the fire!). The plank is then hewn with an
axe to refine the shape and surface, a drawknife and
shave horse would also work perfectly. A chalk plumb
line is a handy piece of kit for marking straight lines
to use as guides. |
| |
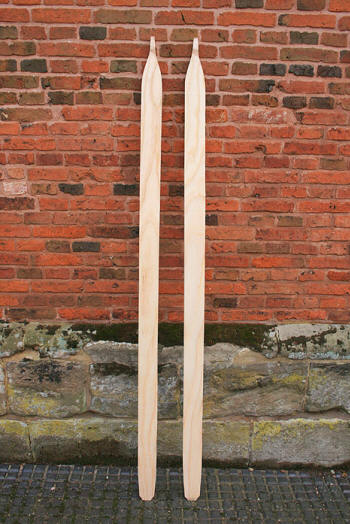
The profile of the ski front is now drawn on and shaped with a
combination of axe and knife. |
| |
| |
| |
A middle section where
your foot is to be placed remains a regular thickness
and the wood tapered away either side down to either
end. |
|
A plane, farriers rasp and a cabinet scraper are also
excellent tools for refining the shape down to final
dimensions. |
| |
| |
|
|
| |
 |
|
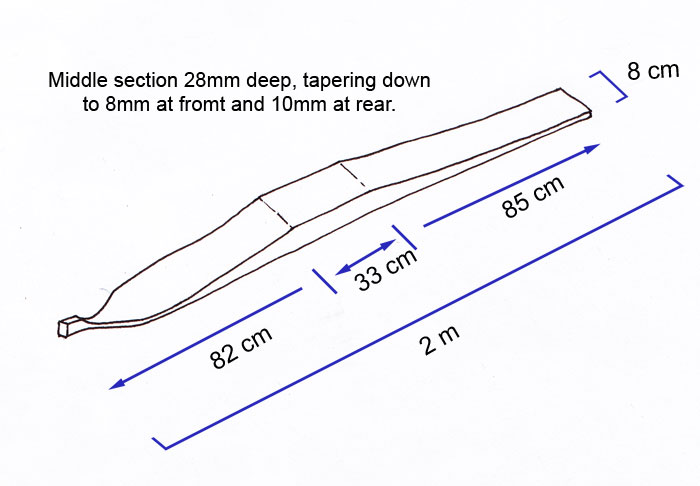
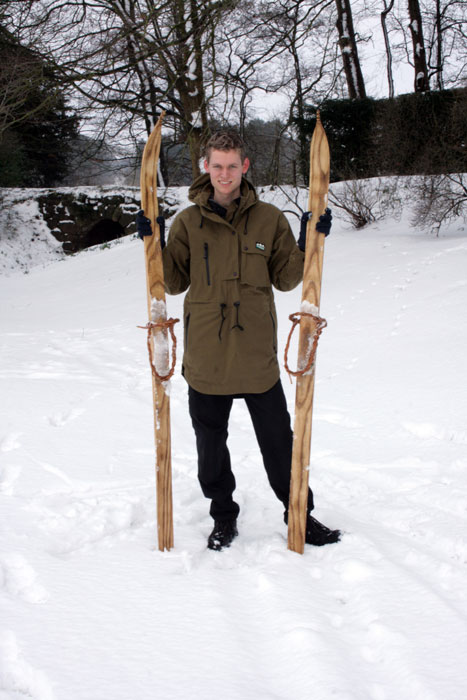
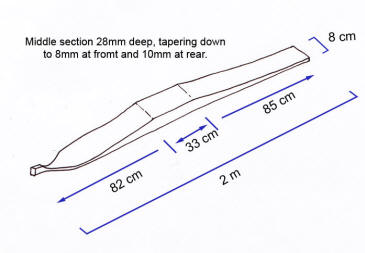
It's up to you to
decide on the dimensions of your own skis, but for reference here's
how mine measure up.
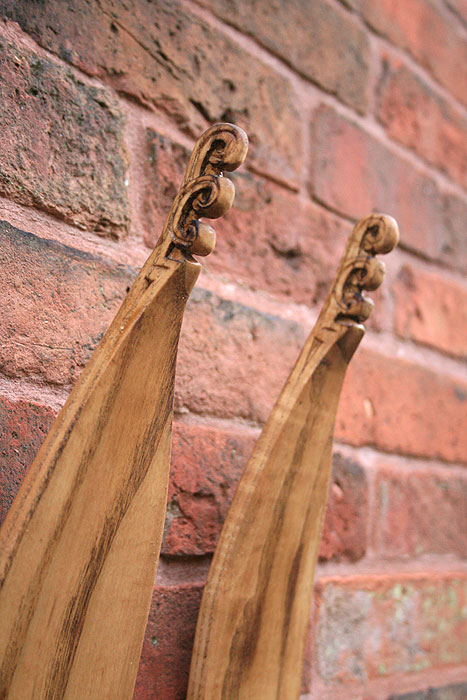
(Notice how a small nodule of wood has been left at the front which
can be carved into a decorative end piece later on.)
|
|
| |
|
|
|
|
| |
|
|
|
|
| |
 |
|
 |
|
| |
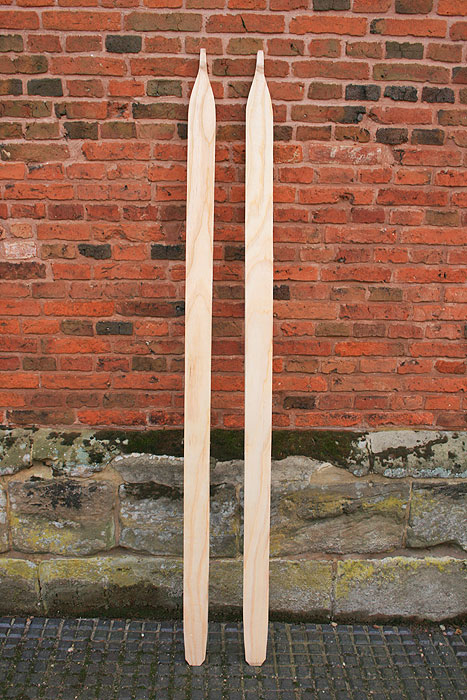
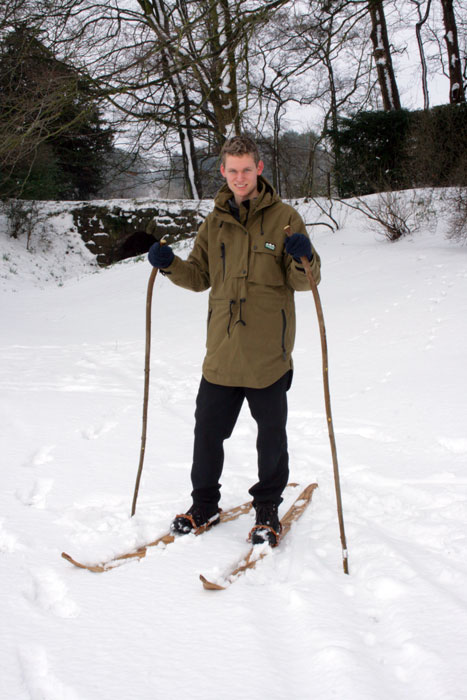
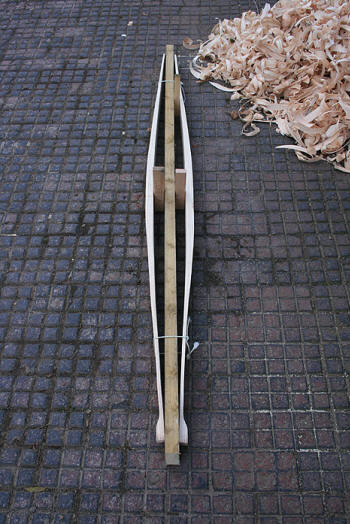
Skis now ready
for steam bending the ends... (Notice how I also shaped the rear
ends a little too; just to take the corners off.) |
|
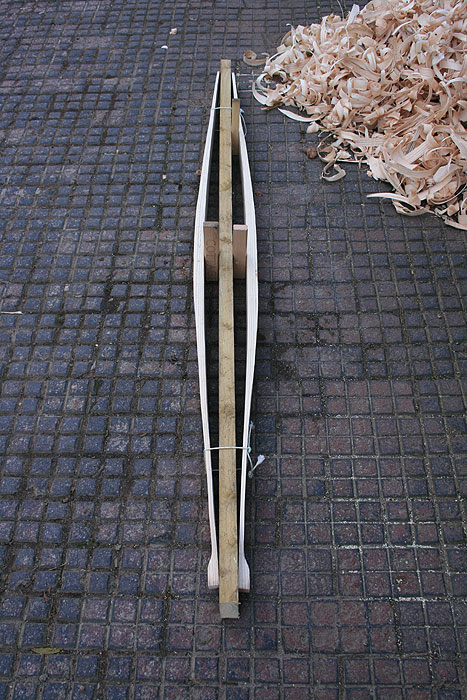
To create the
overall bend in the skis (as explained earlier) the wood can be
strapped to a straight plank and propped open at the centres. As the
wood seasons the
skis will take on this shape, this will only work if the wood is still
green. You may consider propping the wood further out than is
pictured as the wood will settle somewhat when unstrapped.
Note: It is
best to steam bend the ski ends while the wood is still green, so
you can return the skis to this form later after steaming, then
leave until fully seasoned.
|
|
| |
|
|
|
|
| |
|
|
|
|
| |
Steam bending the ends |
|
| |
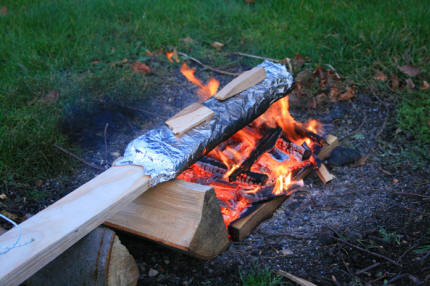 |
To steam bend the
ends I wrapped the wood in hessian material from an old sack, I then soaked
this with water and wrapped the the lot with
turkey aluminium foil. I then supported this
over a hot fire for perhaps 45 minutes
(note how a log shields the unprotected wood
from the heat. The pieces of wood on top of the
foil are just weighing a flap down). |
|
|
| |
 |
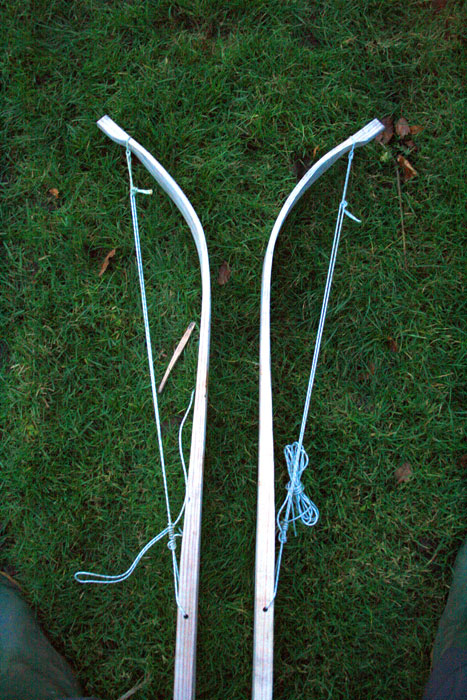
Before steaming I had already rigged up some cord which
would enable me to swiftly make the bends and
hold them in shape. A small loop was tied to the tip and
a separate long length secured at the centre of the
ski. When the wood had been steamed for long
enough, I could then quickly unwrap the wood,
thread the long cord through the small loop at the end, then
pull down with force to bend
and hold the wood in shape.
Note:
the hole
drilled through the ski towards the front of the middle
section (where the cord is tied) will later be chiselled out
into a wider slot through which the foot bindings can be
attached. It is important to note that this point is
forward of the true centre so that in use the ski will be slightly back heavy, this is so
that when your
foot is lifted the front of the ski will rise first.
|
|
|
| |
|
|
|
|
| |
Last stages to be completed:
- Chiselling out a rectangular slot hole through
which I could secure the bindings
- Carving the decorative ends in a traditional
Swedish style
- All surfaces
are given a coat of pure Pine tar to help prevent snow sticking
to the wood. As the tar is brushed on it is heated with a blow torch
to help it go into the wood. Excess tar is rubbed off with a rag.
(Tar made by 'Bickmores', marketed as a horse hoof treatment.
Purchased off the internet).
- Applying Bees wax to the undersides to make the
skis glide better, I simply rubbed it on like a
crayon and whipped over it with the blowtorch to even it out.
Special ski wax can be purchased which will last much longer. I
found that without the wax snow
would clog up the skis (in colder climates where
the temperature is much lower and the snow more powdery, this
problem would not occur, just the Pine tar treatment would
likely be enough).
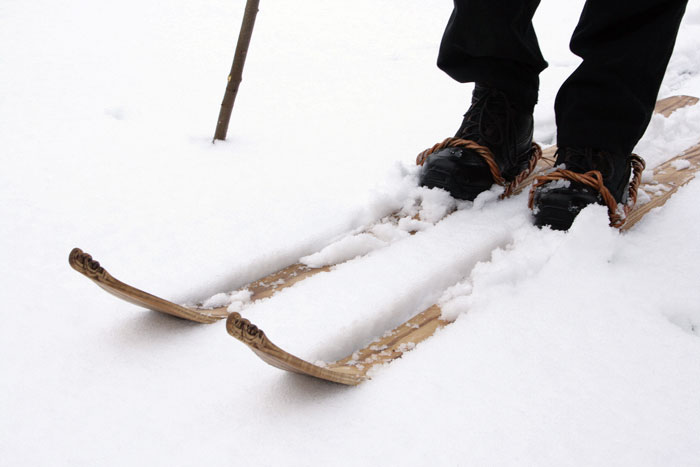
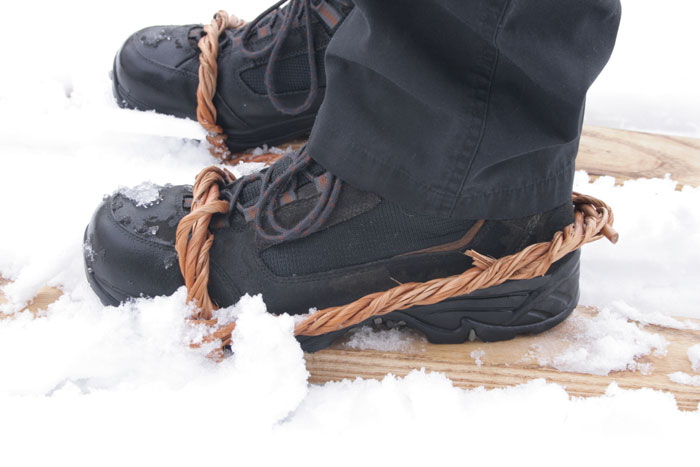
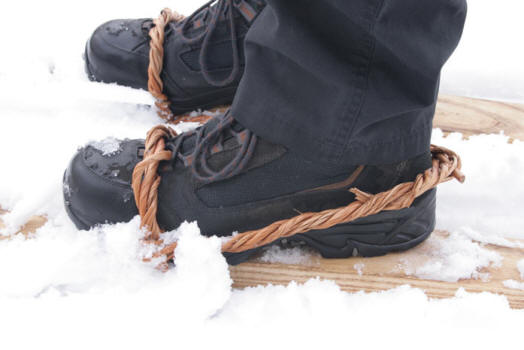
- Finally I had to make the
foot bindings. Again I decided to make these in the traditional
way from withies, which are long thin shoots of fresh or soaked
wood twisted lengthways until the fibres separate, creating
flexible, strong rope-like strands. I used Willow, but Birch
shoots were commonly used. I could not find any instructions on
how to make/ assemble these so a little improvisation was
needed. They had to be a tight fit so I formed them around my
boot while fitting them.
|
 |
|
|
| |
 |
|
 |
|
| |
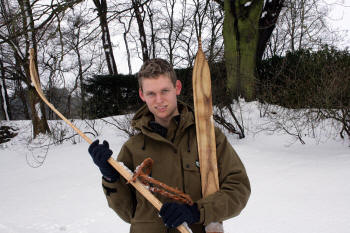
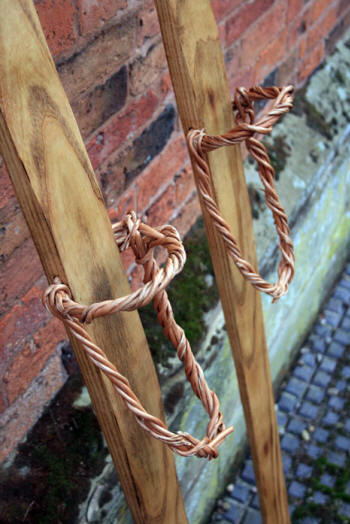
Decorative
carved ends |
|
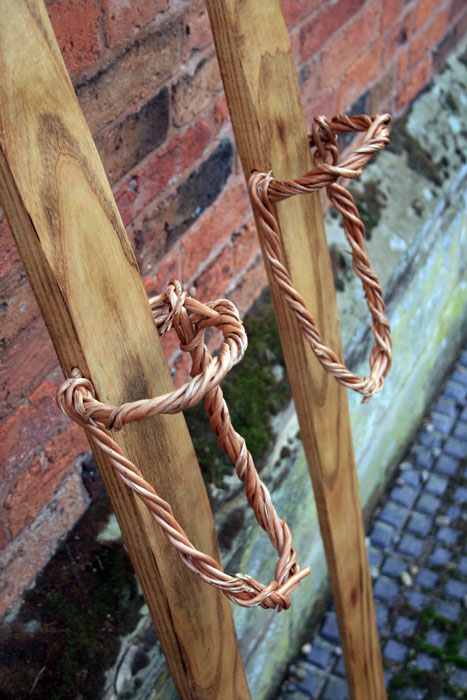
Willow
'withies' as bindings. Several strands wrapped together to make a
strong rope-like structure. |
|
| |
|
|
| |
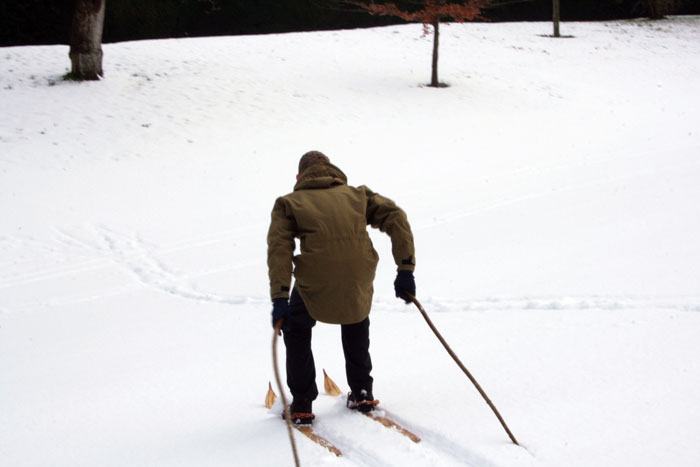
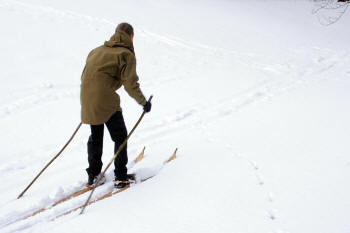
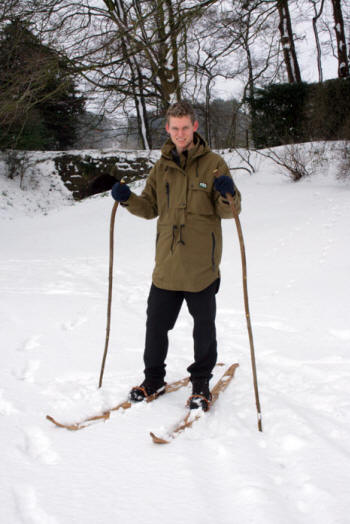
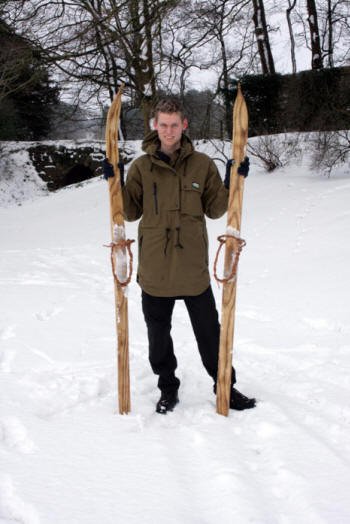
Put to the test... |
|
| |
|
|
| |
This
was my first time using any pair of skis, I'm a total beginner so
with nothing to compare against I can't give a conclusive review of
their performance. However they did seem to work pretty well and
sure put a smile on my face! Since the snow was not very deep I
could just use a couple of suitably straight sticks as ski poles.
After a fair few runs my Willow withy bindings have loosened, so
I'll be replacing these with some thick leather straps complete with
buckles to really get things secure. This will give better control
of direction too.I hope
this article has inspired you to have a go at making your own...
Stay safe and have fun!
|
|
| |
 |
|
 |
|
| |
 |
|
 |
|
| |
|
|
|
|
| |
|
|
|
|