| |
3 methods for cordage making...
|
|
| |
Technique 1
- The Rope Lay
Mostly used for making thick cord and
rope, although I often use it when making relatively thin
cordage because It creates a very tight and even string of high
quality. (To help with the
explanation I have used two different fibres of different
colours)
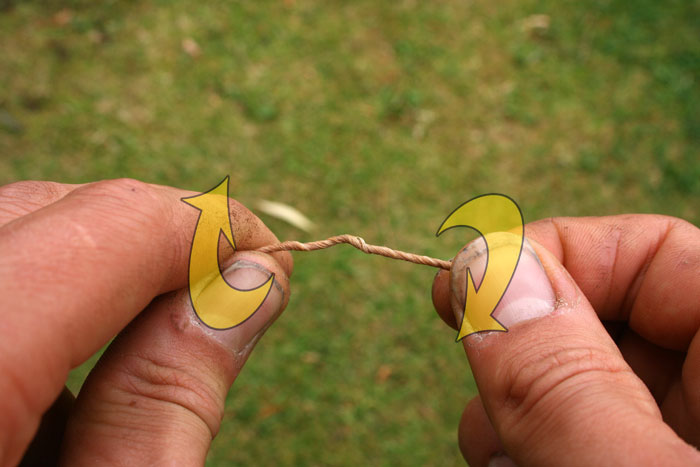
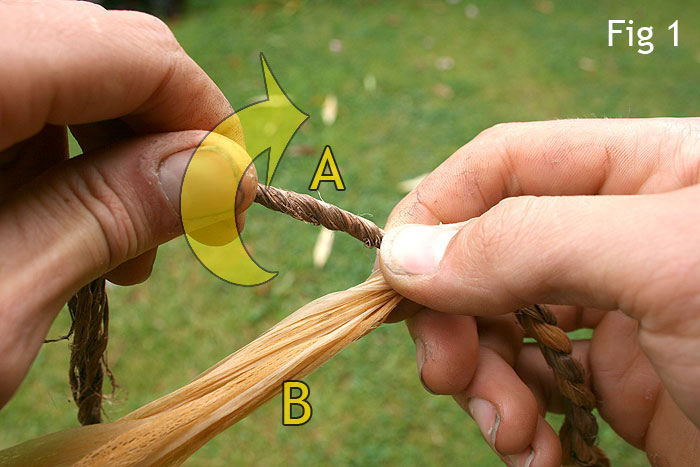
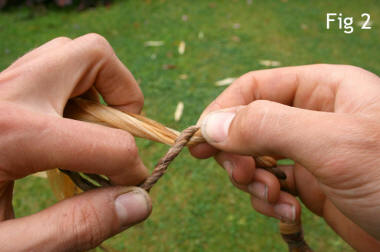
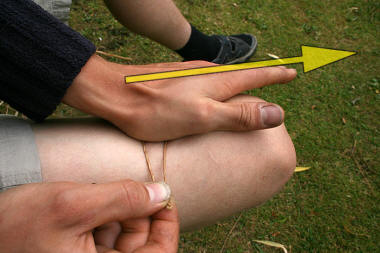
1 - Pinch and hold the fibres at the point
where the two fibre strands meet (or at the 'eye' if just
starting).
2 - Now tightly twist the strand which is furthest away from
you (A), (twisting away from yourself.) |
 |
|
| |
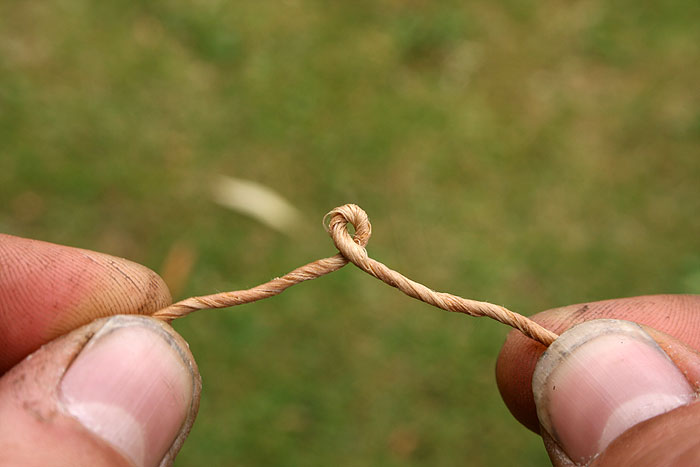
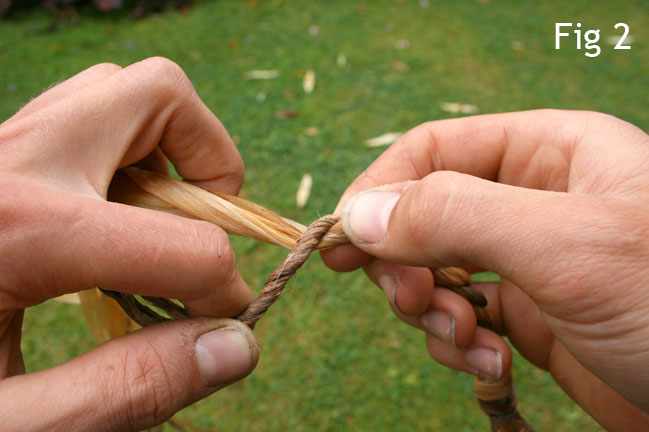
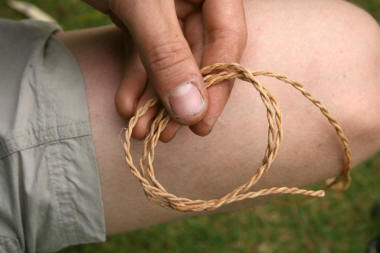
3 - While keeping twisted, bring the strand over strand 'B' so
that the two strands have swapped places (Fig 2.)4 - Repeat
with strand 'B' which is now furthest away from you. With every
new twist re-pinch and hold the cord further along
where the two strands meet. Continue in
this way to make the length of cord needed.
*Adding in new fibres is covered at the end
of the 3 methods* |
 |
|
| |
|
 |
|
| |
With practice you can do the rope lay technique
with quite swift finger movements. I find the way shown in this
video is easier and quicker... |
|
|
| |
|
|
|
| |
Technique 2
- Finger Rolling
An excellent technique for making thin
cordage such as a fishing line
1 - Pinch and hold the fibres at the
point where the two fibre strands meet (or at the 'eye'
if just starting).
2 - Roll both strands at once along the index finger using
your thumb. (the strands must be kept slightly separate to
prevent them rolling over each other)
3 - at the end of each stroke, whilst keeping the tension on
the strands with your rolling fingers, release the cordage from
your non-rolling fingers. You should see the strands immediately
twist together into cordage. You can encourage this twisting a
little before repeating these three stages again and again until
you have made the length of cordage needed.
Note - It can be helpful to pre
twist each strand first, by twisting them between the fingers or
rolling them over your thigh. Moist fingers and fibres give good
grip.
*Adding in new fibres is covered at the end of the 3
methods* |
 |
|
| |
|
|
|
| |
|
|
|
| |
Technique 3
- Thigh Rolling |
|
|
| |
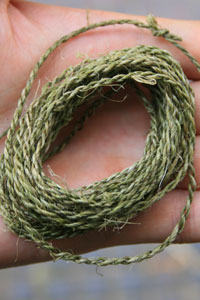
Mostly used to make thin cordage. Relatively long sections of
cordage can be made with each roll over the thigh, this makes it
a fast technique; ideal for situations where a lot of cordage
needs to be made e.g. making a fishing net.
(It is usually necessary to use damp fibres with this technique)1 - Pinch and hold the fibres at the point
where the two fibre strands meet (or at the 'eye' if just
starting).
2 - Using the full length of your hand roll both strands at
once along your thigh. (the strands must be kept separate to
prevent them rolling over each other) |
 |
|
| |
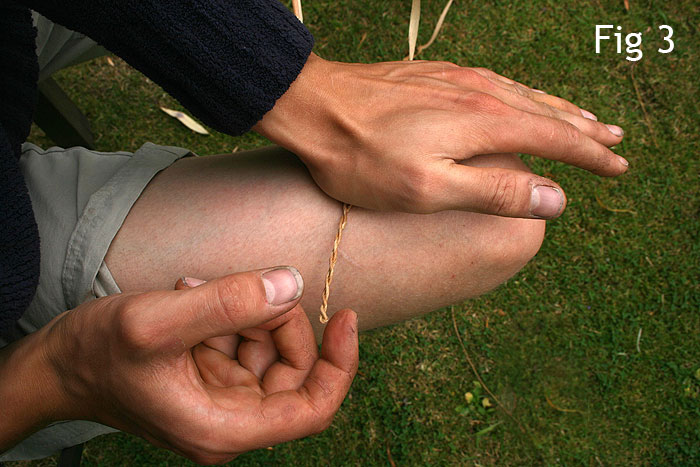
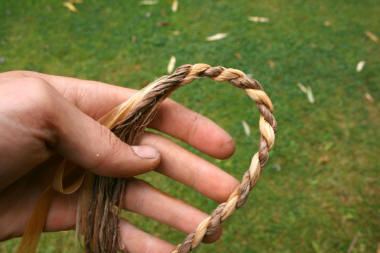
3 - at the end of the stroke, keeping the
strands clamped to your thigh, release the cordage from your
other hand. You should see the strands immediately twist
together into cordage (Fig 3). You can encourage this twisting a
little before repeating these three stages again and again until
you have made the length of cordage needed. *Adding in new
fibres is covered below*
|
 |
|
| |
|
 |
|
| |
|
|
| |
|
|
| |
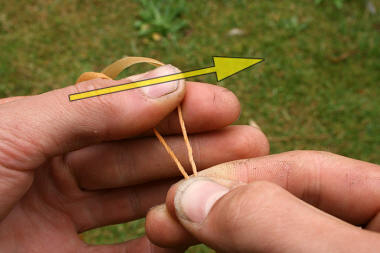
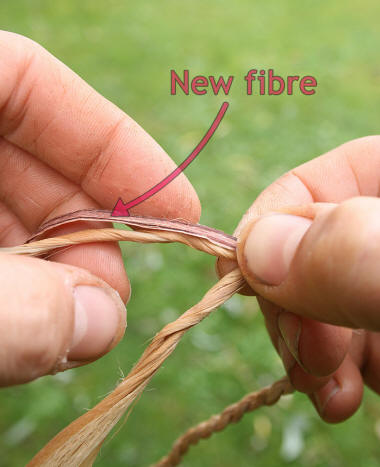
Adding in new fibres |
|
| |
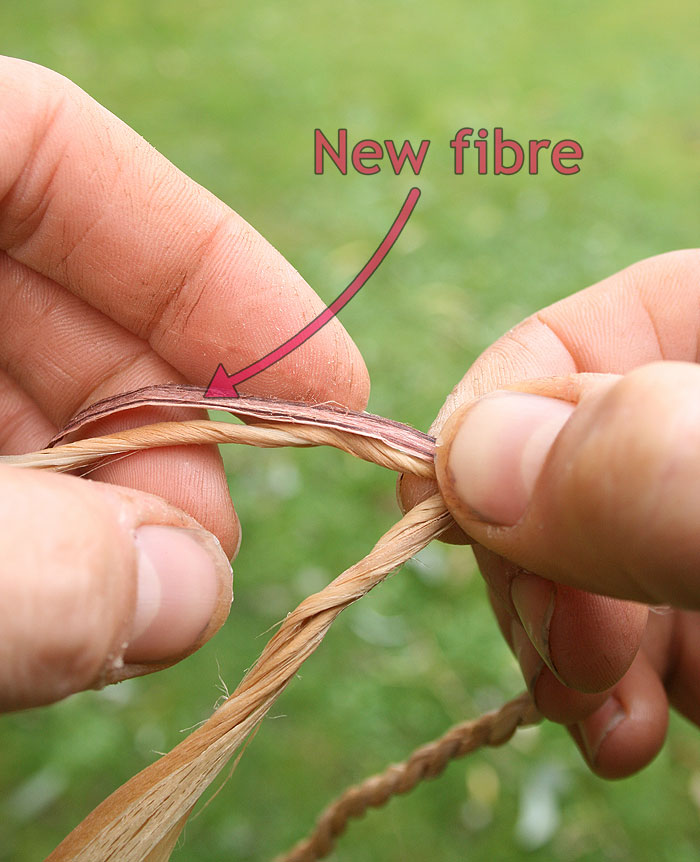
New fibres need to be added in when you can feel that one of the
two strands is becoming thinner than the other. To make strong
cordage of good quality the trick is to keep each strand equal
in thickness.
|
|
| |
(To help show which is the new fibre, I have
used a slightly different coloured material.) When one of the
strands starts to feel thinner than the other, take a new fibre
of suitable thickness, add the end in on top of the thinner
strand at the point where the two strands meet. Pinch in place,
then carry on...
|
|
|
| |
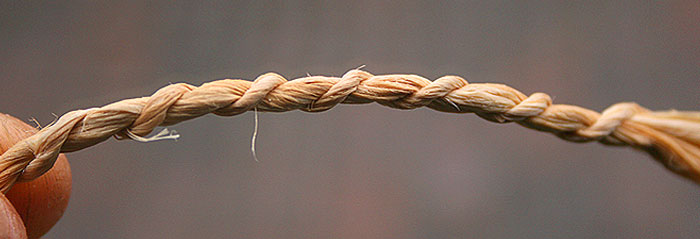
Example of Poor cordage - One of the two
strands has become thinner and is wrapping around the thicker
strand. This results in a weakness because all the strain will
be just on one strand. |
 |
|
| |
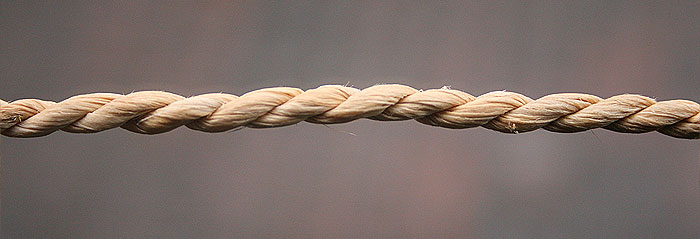
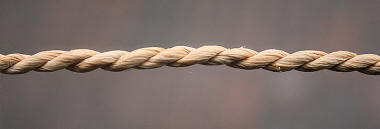
Example of good cordage - Each strand is
of an equal thickness resulting in a strong balanced cord. |
 |
|
| |
|
|
|
| |
|
|
|
| |
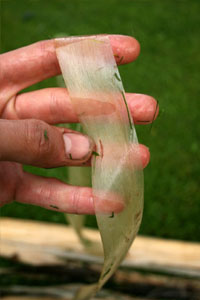
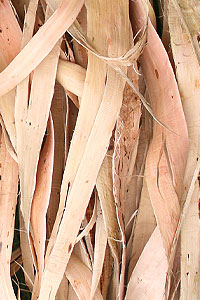
Materials Suitable for Cordage Making |
|
| |
| Strong |
-Stinging
Nettle fibres
(preparation - see
here
-Lime bark
(retted - see method
here)
-Great Willowherb & Rosebay Willowherb
(outer fibres
- prepare similar to nettle, gather in winter)
-Animal Sinews
-Hair e.g. Horse hair
|
| Medium
Strength |
-Inner
Elm bark
-Inner Willow Bark
( inner bark - boiled
in wood ash & water)
-Inner Sweet chestnut bark
-Honeysuckle bark
(Naturally shedding bark fibres)
-Clematis bark
(teased or buffed into
finer strands) |
|
Weak - (serviceable depending on use - Use rope lay
method) |
Reeds such as Cattail AKA Reedmace
(preferably dried)
Rushes
Grasses (use long tough grass - thick grass ropes
can be reasonably strong)
Sedges |
|
|
|
| |
|
|
| |
Related Articles & eBooks
|
|