|
|||||||||||||||||
|
|||||||||||||||||
|
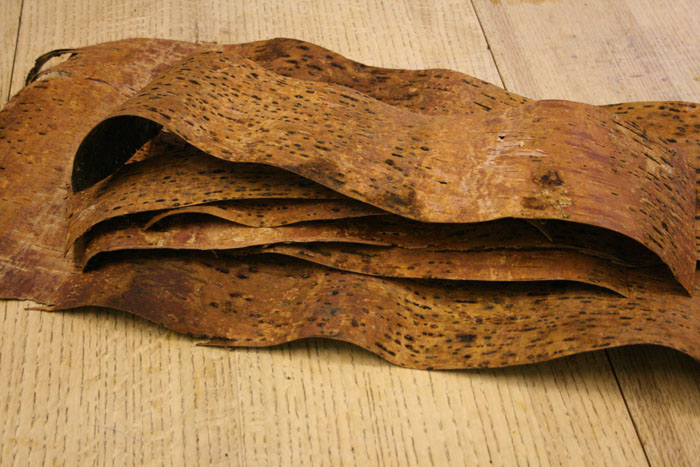
First you need to collect your Birch bark. The bark needs to be quite strong but doesn't need to be that thick. Dead bark like I am using is great for this project, you shouldn't go stripping live trees of their bark! It is a good idea to collect bark with short Lenticells otherwise the bark maybe prone to splitting. (Lenticells are the lines in the bark that show horizontally on birch bark) To collect long strips of bark from wood with a small diameter you can cut around the wood in a spiral fashion. |
 |
||||||||||||||||
|
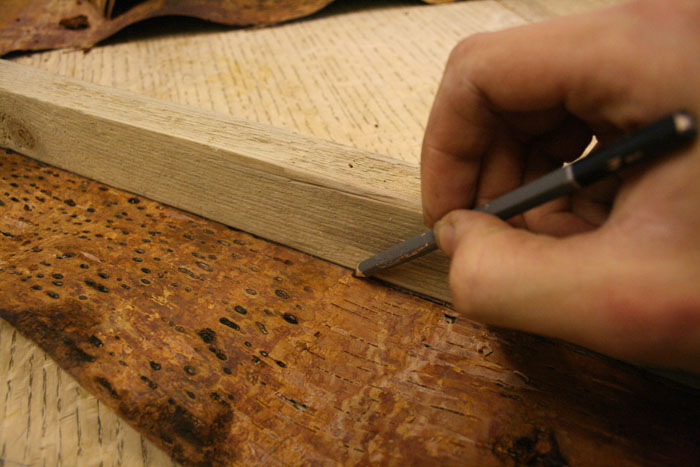
If you have a paper trimmer you can use it to cut even strips of bark but if you want to be old fashioned like me you can draw lines on your bark with a pencil and straight edge, then cut along these lines with a pair scissors or knife |
 |
||||||||||||||||
|
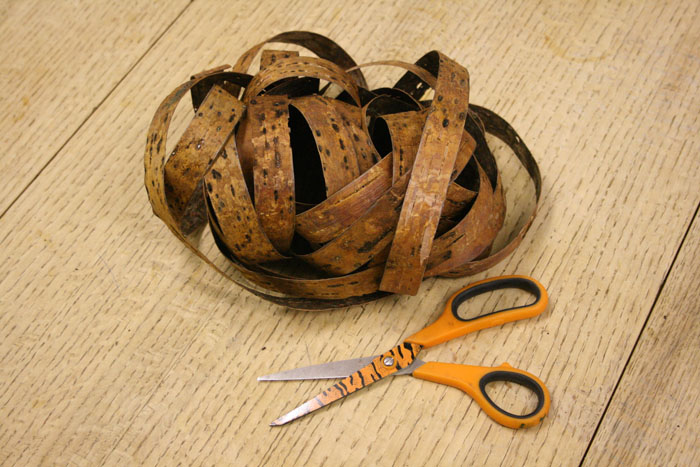
These are the cut strips which sometimes have the tendency to want to curl up which can make life a little more tricky. |
 |
||||||||||||||||
|
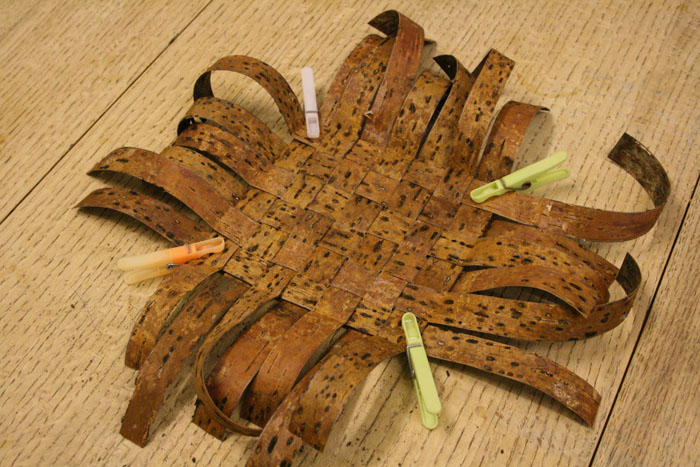
I start off by weaving six strips of the bark and then weave more to make the desired base size |
 |
||||||||||||||||
| Once you are happy with the size of the base you can move onto the walls of the basket. Some of the strips tend to move out of their place, some clothes pegs can be helpful to keep everything in its correct position. |
 |
||||||||||||||||
| Fold up the strips at the edge of the woven area. |
 |
||||||||||||||||
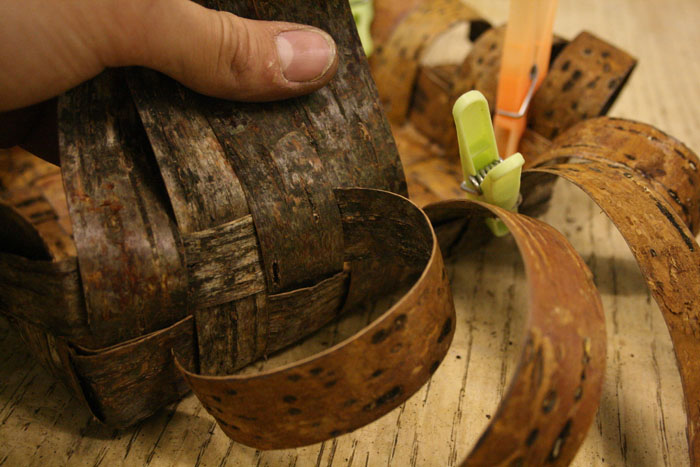
| To make a start on the walls weave strips upright around
the sides. More pegs will be very useful at this stage.
If a strip of bark is too short and runs out, simply take another strip and put it over the top overlapping them by a few inches and then continue weaving. If the vertical strips are too short you can shove new strips down through the weave. |
 |
||||||||||||||||
| When you have woven another row the basket will hold itself together better and less pegs will be needed to temporarily keep things in place. |
 |
||||||||||||||||
| Continue weaving rows of bark around the basket until the walls are the desired height. When the walls of the basket are three strips high the basket will be holding its self together well. |
 |
||||||||||||||||
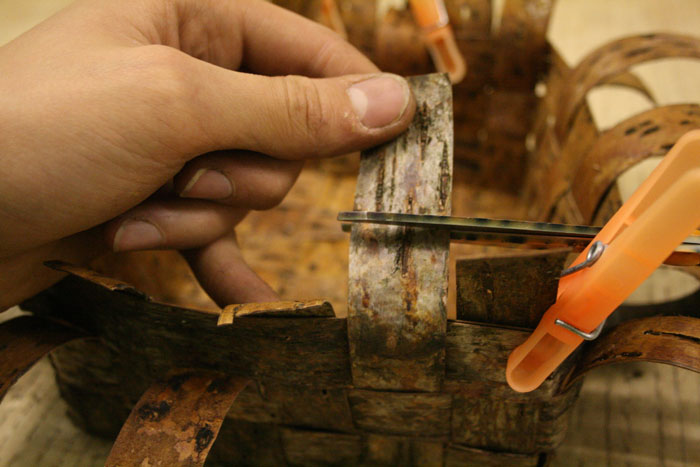
| When you have woven your basket to the desired height it
is time to finish off the top edge. Pull upwards on the vertical strips to eliminate any slack in the basket and to tighten the weave. Now cut the verticals shorter so that only a small section of bark is left above the top of the woven area. A piece of bark as long as the width of a single strip is a perfect length to trim them to. |
 |
||||||||||||||||
|
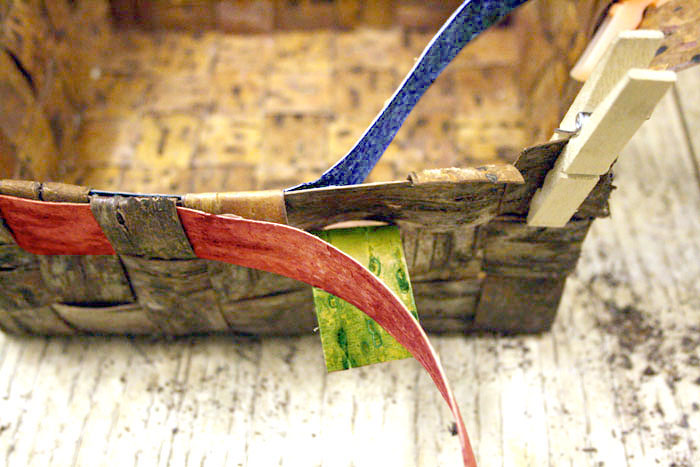
You need two more strips of bark to finish off the rim, one runs along the outside of the rim and the other on the inside. I have highlighted the strips with different colours in the next stage so that it is easier to understand. (The red and blue strips are the two extra strips needed in this stage.) |
 |
||||||||||||||||
| Take the end of the vertical strip (green) and bend it around the outside of the red strip, then over the top of the basket and trap it between the blue strip and the rim. |
 |
||||||||||||||||
| This is what it should look like when the end of the
vertical strip is tucked between the blue strip and the basket. Now move onto the next vertical strip and do the same again but obviously from the other direction. Continue around the whole of the top of the basket until the rim is finished off. |
 |
||||||||||||||||
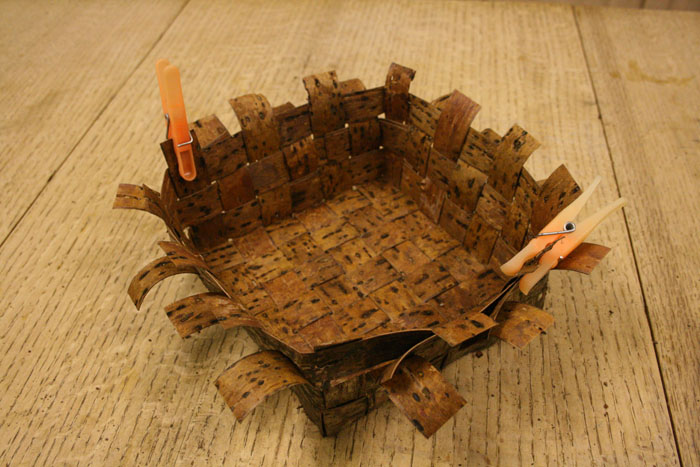
| Basket is complete! A big thanks to Fenlaner (http://fenlaners.blogspot.com/) who taught me the how to finish the rim off properly.
|
|
||||||||||||||||