Jon's Bushcraft Blog...
latest bushcraft projects, crafts,
tutorials, and deep thinking.
|
|
|
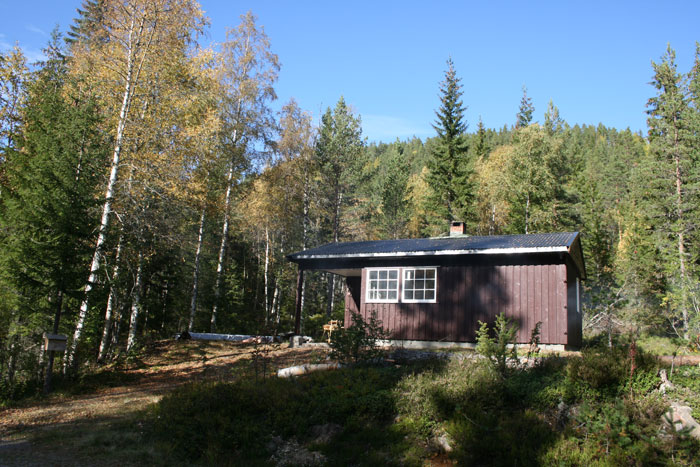
"What is my dream?", I
asked myself that question several years ago. My
answer was: To live in a beautiful place with
nature surrounding me (I visualised a cabin in
the forest), and through a combination of
?hunter gatherer? skills and vegetable growing,
I dreamt of being as self-sufficient as
possible.
Of course, the dream was all about what I like
and find interesting most of all. Basically,
I was dreaming about being true to myself, to
follow what I REALLY WANTED. Not some
?second best prize? of a job that didn?t totally
fit the bill.
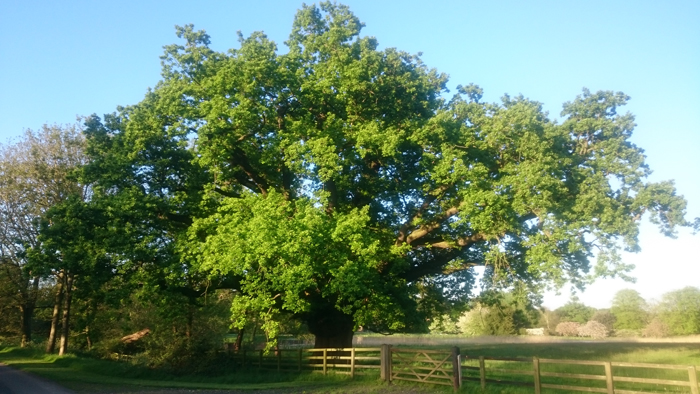
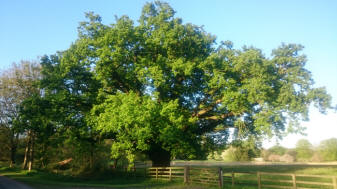
Now then, near my past home in the UK, there is
a big old oak tree that stands in beautiful
parkland. That tree is so old and wise; you can
feel its presence. On one of my daily walks,
thinking deep about life, incidentally passing
by the oak tree, I realised how precious and
important my dreams were, "I must NEVER forget
them" I thought. So I held a branch of the tree
and asked it to remind me to always be true
to myself, and make sure I never forget!
This was my way of ensuring that what was so
precious to me would never be forgotten, and
when making choices in life about opportunities
and ?whatever?, the tree which I passed just
about every day would remind me. And the tree
did remind me? In a way, the tree became a
living symbol for what is truly important for me
in life.
From then on, it was too hard to betray my
dreams; I couldn?t go back on what the wise old
oak was whispering back to me. I was going to
peruse what I wanted and never give in?
So with my dreams set in stone, this was to
influence all the twists and turns and decision
making of my life in the proceeding years. One
thing I have come to realise is that once a
decision like this is made and you visualise it,
and want it without doubt, then the channels of
the universe will align to make your dream
happen. It sounds crazy, but this has been
confirmed to me many times now.
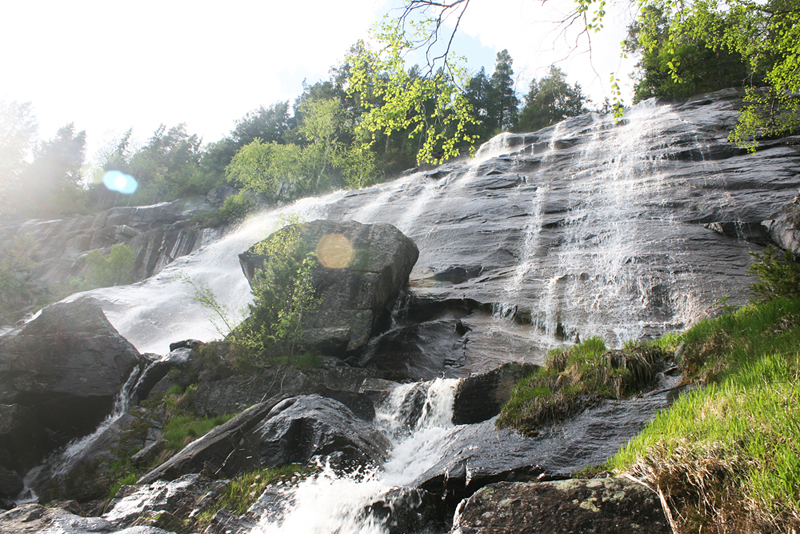
So after a lot of ?stuff? happening since
dreaming that dream, guess where I am now,
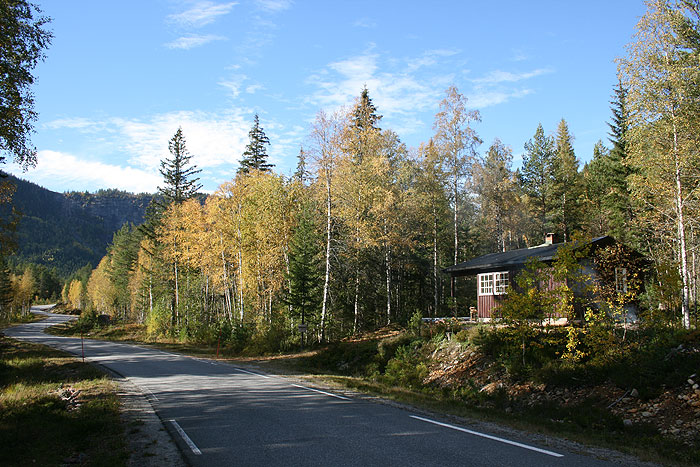
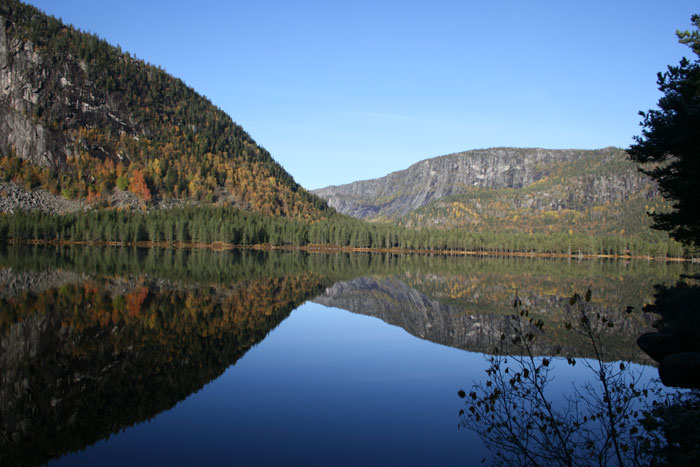
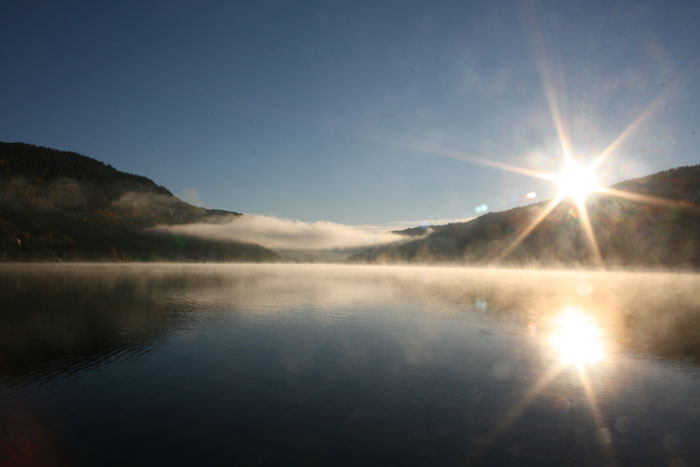
writing this blog post? I?m sitting in my cabin
in Norway, surrounded by forest and beautiful
nature; mountains; lakes; bird song; and a river
running by. I?m just about to head outside and
cook dinner on the campfire, eating fish I
caught in the lake, wild greens I foraged, and
vegetables I have grown. So, you dream a dream,
make a concrete decision that it?s what you
want, and then act. Do this and your reality
WILL transform. Great gifts await?
I
hope this inspires you to dream too.
|
 |
|
The wise old oak |
|
|
|
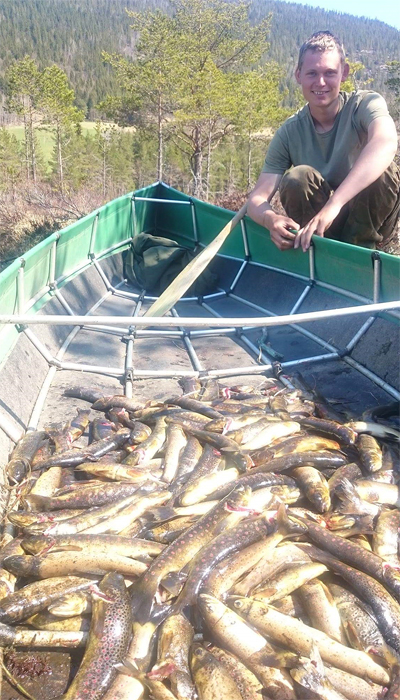
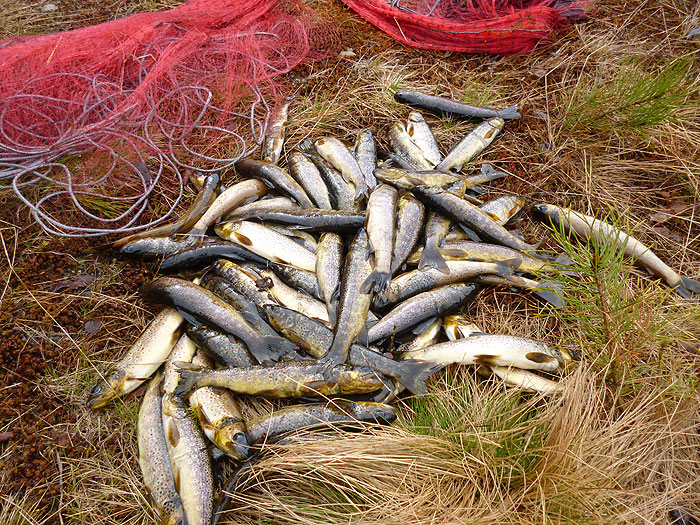
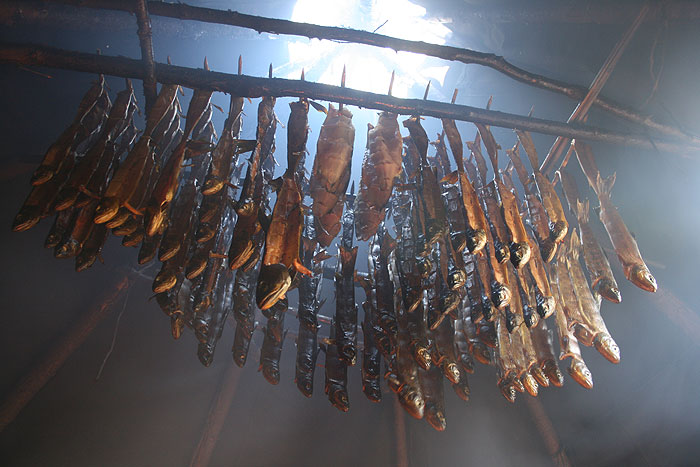
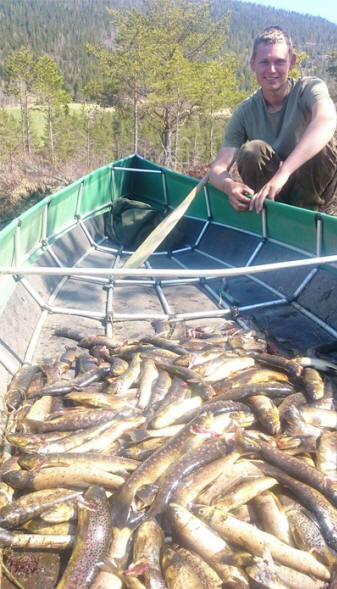
Spring time this
year. Caught these trout with my friend
Torjus Gaaren. Note, it is perfectly
healthy and even beneficial for the fish
population to catch this many fish in
my area. Fish were shared with the
local community. |
| |
 |
|
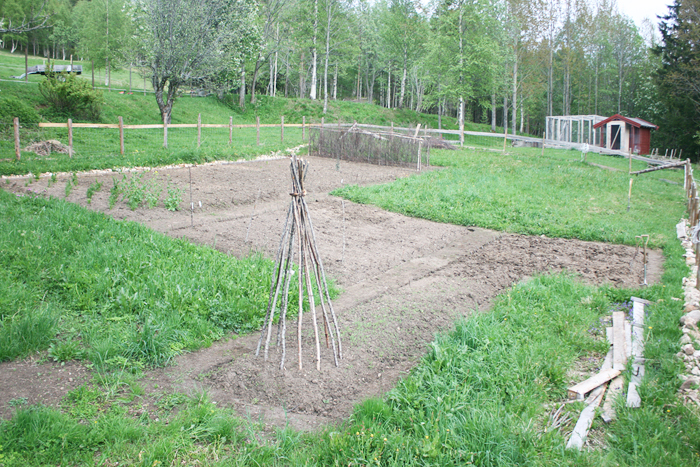
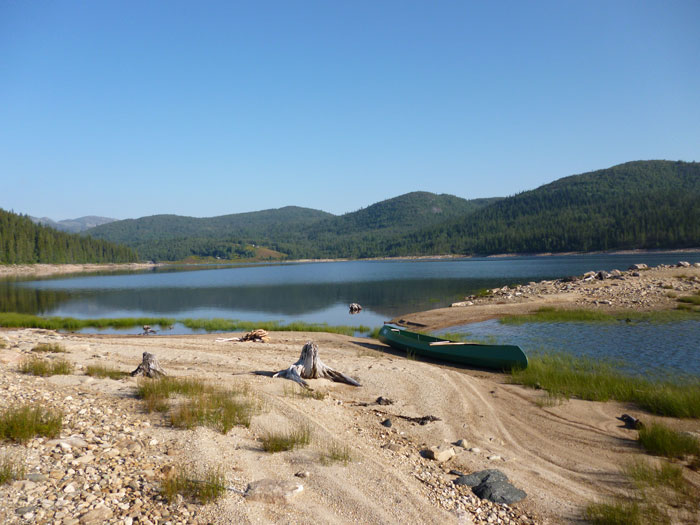
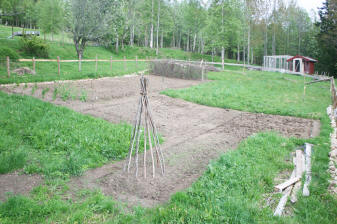
My prepared veg
patch this spring. On a friend's land;
there are always options to get what you
need... |
| |
|
|
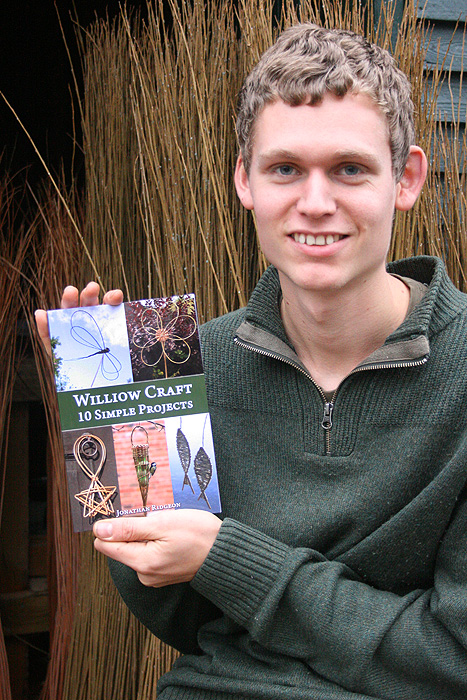
| My latest Book,
titled:
Willow Basketry A How-To Guide |
January
2016 |
 |
| |
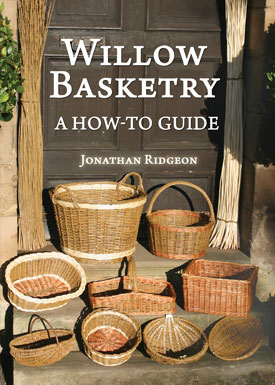
I have just published my third paperback book,
titled:
Willow Basketry: A How-to Guide. I am very
excited and proud to have finally completed
this.
Brief book description:
Through a series of easy to follow step by step
projects, this book will teach you the
fundamental skills and techniques as used in
many every-day baskets. Clear instructions and
more than 280 photos and diagrams will guide you
through every aspect. Projects include ?your
first basket?, a simple bowl; a log basket; a
garden trug; a potato basket; and a foraging
basket.
The book is available as a paperback from
Amazon, or as an eBook (at a reduced price) from
my website.For the product page which
includes a full description,
click here
|
|
|
|
|
That?s right; I am now a resident of Norway!
Telemark is my home county. I moved here from
the UK last year (mid 2015). Wow what an
adventure!
As much as I love Britain and its nature, over
the past years I began to feel like a wild bear
in a cage; particularly with there being no
right to roam in England or Wales. What?s more,
for a long time my dream has been to work
towards being as self-sufficient as possible.
Realistically, I didn?t feel that this could be
achieved in the UK, at least not without lots of
hassle. And so, for my personal freedom and
sanity, moving to another country was the
logical option in my mind.
Apart from the epic landscape and freedom,
Norway is home to one of my best friends: Torjus
Gaaren of
livingprimitively.com . He is a true expert
in wilderness living skills. I saw what kind of
life he has, and thought, "I want that too!".
Torjus has taught me an incredible amount of
skills, which are needed for living off this
land. For that I am very thankful. By combining
these things with my existing skills, I have
already made huge steps on my path towards
self-sufficiency.
I could go on for hours about all the things I
have done and made in the last year. However I
would rather sum things up with the lessons and
realisations which have been most profound to
me; many of which are actually psychological:
Some realisations & lessons from
my time in Norway so far:
-
Community and friends are everything!
This is the case in so many aspects, and is
not to be underestimated.
-
Share what you have without worry that you
won?t receive back in some way. Giving is
receiving as they say?
-
As expected, self-sufficiency is not an
easy life, but it is a fulfilling life.
I have felt many times that no matter how
worn-out or uncomfortable I am (e.g. cold
and wet), deep down I am still happy and
feel that I wouldn?t rather be doing
anything else. There is actually a lot of
happiness to be found in hardship?
-
In the beginning, if you are not used to
this life, there will most likely be
times which are very psychologically
challenging. Any weakness in your mind will
be trying to convince you to give up and
return to the comfortable life? The trick
is to push past this. It can sometimes
take days, but one day you?ll most likely
wake up and feel optimistic again. You will
be stronger for going through these mental
tests and your thresholds will be pushed to
higher levels.
-
Hardship makes you stronger.
-
You don?t have a God-given right to
anything.
You have to make your reality...
-
Determination will get you to where you want
to be.
-
In
life I have learnt to Instinctively try to
follow my 'path'. In terms of direction and
lessons, I have learnt to trust in the
universe to bring to me what I need. My
experience in Norway has confirmed this.
-
Living this way of life which is so in touch
with nature makes you realise how far we
have come from what is natural for us
physically, mentally and spiritually.
All people used to live off the land a
relatively short time ago; our modern way of
life is a mere scratch at the end of a
time-line of human existence.
-
It is easy to underestimate how much food
you need to hunt, gather and grow.
-
Animal parts which most modern people
refuse to eat are actually the best parts,
both in terms of flavour and nourishment.
I am talking about things like: liver,
kidneys, spleen, brain, tongue, nose,
hooves, bones and very fatty meat. People
are seriously missing out! In fact, if you
are a hunter-gatherer and you don?t eat
these things, you will probably die before
long.
-
In order to overcome fears, you have to
face them; for example, believe it or
not, I used to be quite squeamish about the
idea of gutting and butchering animals. But
since just getting stuck-in, I now really
enjoy the task! To overcome a fear is
incredibly rewarding!
-
You cannot live off protein and greens
alone, you need plenty of fat or
carbohydrates too (I choose mostly fat),
otherwise you?ll become ill from protein
poisoning. For example, if you catch a ton
of fish, if they don?t have a good amount of
fat content, then you can?t survive off that
alone.
|
|
|
| My latest
Book (& eBook) -
Willow Craft 10 Bird Feeder Projects |
February
2015 |
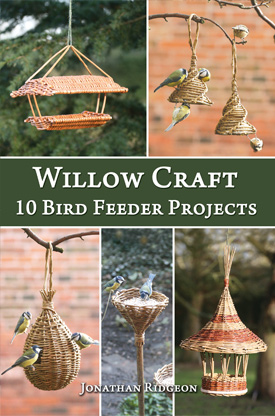 |
| I am very happy and proud to announce the
publishing of my second paperback book! Titled:
Willow Craft 10 Bird Feeder Projects. This
is also available as an eBook (see below). The
paperback book is available for purchase from
online retailer Amazon. See the product page
here:
E-Book version:
(Standard .pdf file) is available for £6.50
HERE
on my eBooks page.
(Delivery to your email within 15 minutes)
Book description:
Through
detailed stage by stage instructions, this book
will show you how to make 10 different bird
feeders from willow using classic basketry
techniques.
You do not need any prior basketry experience to
undertake the projects. Everything you need to
know is here, including guidance on tools and
materials.
"As a basket maker and nature enthusiast, I
have had a lot of fun making the projects
presented in this book; as well as the continued
joy of watching the birds feed from them. My aim
in writing this book is for you to experience
the same, and also be inspired with the
basketry; a craft which can be put to so many
uses!" - Jonathan Ridgeon |
|
| My First Physical
Book -
Willow Craft 10 Simple Projects |
November
2014 |
 |
| |
|
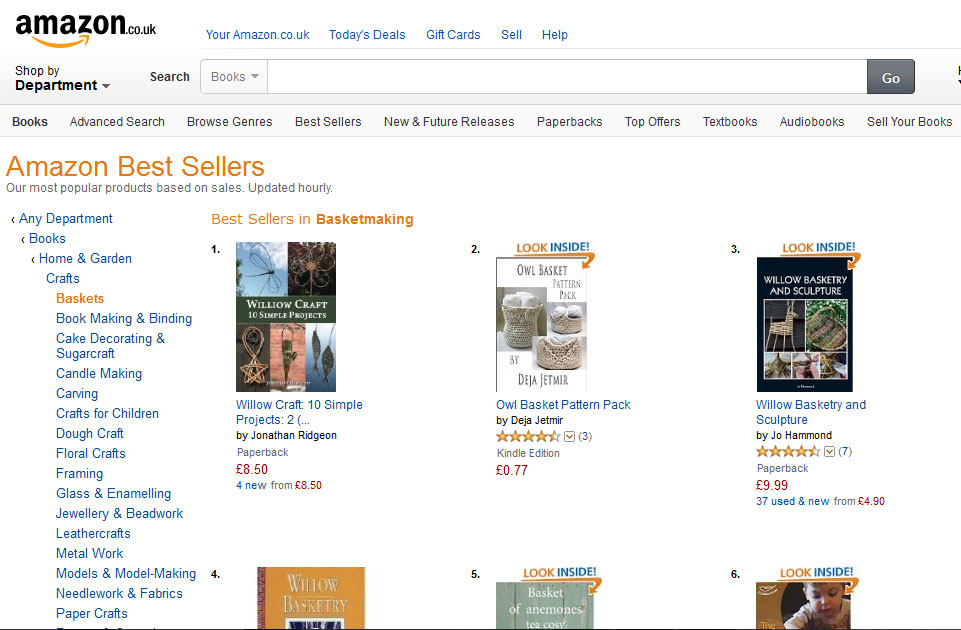
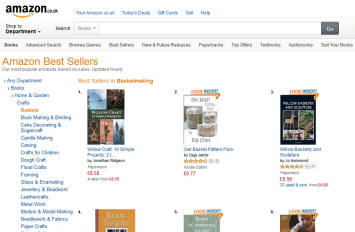
NEWS
UPDATE
Book reached #1
best seller in basket making category on amazon.co.uk!
 |
|
|
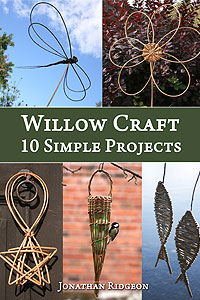 |
I am proud to announce that my book Willow
Craft 10 Simple Projects, (first published
as an eBook), is now published in physical form
and can be purchased as a paperback book from
online retailer Amazon. See the product page
here:
Alternatively, this book is still available
in eBook form and can be bought from my
eBook page HERE.
(Delivery to your email within 15 minutes)
Book description:
This eBook will show you how to make some of the most popular
and inspiring willow craft projects other than baskets.
There are items for both the home and garden, and all are
great fun to make. You do not need any previous experience,
the detailed instructions have been designed to guide you
every step of the way.
Packed with colour photographs
and diagrams showing clearly how to complete every stage. |
|
|
|
|
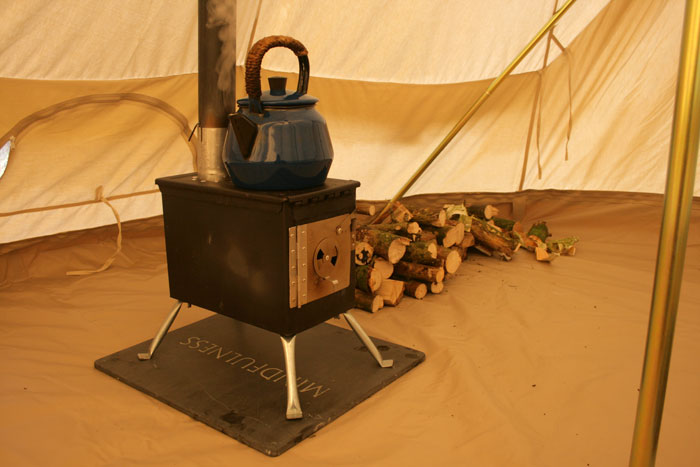
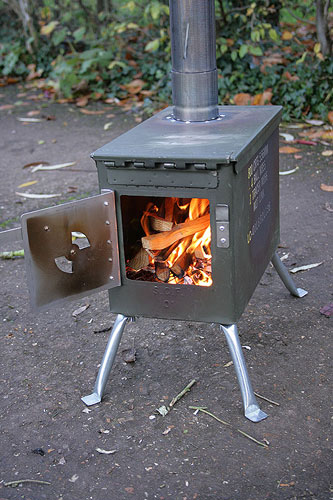
New How-To Article Added - Making an Ammo
Can Stove |
| |
|
|
|
I have made this portable stove as a source of heating for
inside my canvas bell tent, it should be ideal for winter
camping when temperatures drop below zero. Also, I just thought
it would be a fun thing to make... People have made such
stoves in many different ways. They are mostly
used in colder climates like Canada and
Scandinavia. The following article shows my own
design, bear in mind that this is the first
stove I have ever made, I am not an expert where
stove use and design is concerned so the design
may not necessarily be the best.
To see my full step by step instructions on
how I made this stove
click here |
|
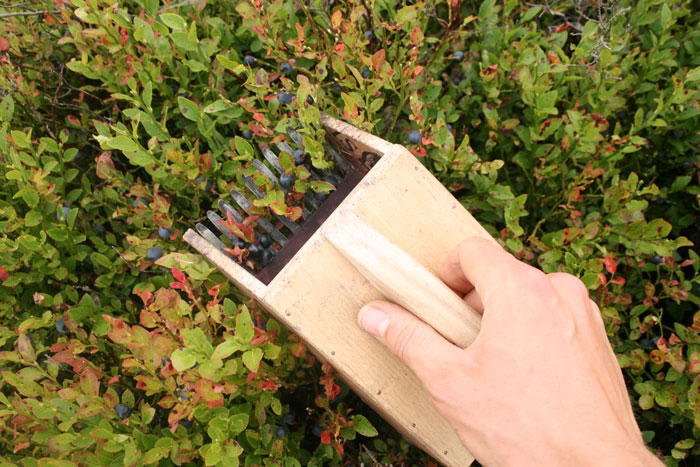
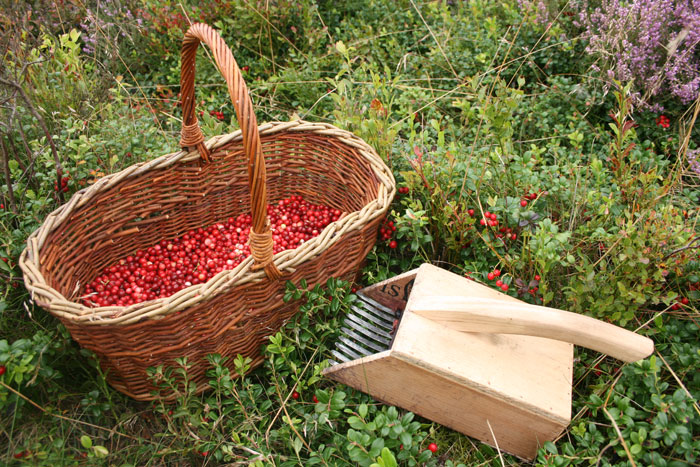
New Article Added - Making a Berry
Picker |
| |
 |
I have updated an old
article showing how to make another
design of berry picker; the 'berry
scoop'/ 'berry comb'.
They
are excellent for picking berries such
as Bilberries and Cowberries. Both
designs have multiple prongs like a
comb, the picker is used by pushing the
comb through the foliage of the berry
bushes, the fruit which is too large to
pass between the prongs gets plucked
free. Many berries can be picked at once
and the picker is frequently emptied
into your foraging basket. With a good
berry picker you can potentially pick
huge quantities in just 1 day! |
|
| |
 |
|
 |
|
| |
Cowberry Harvest -
Late summer at Cannock Chase park north
of Birmingham |
|
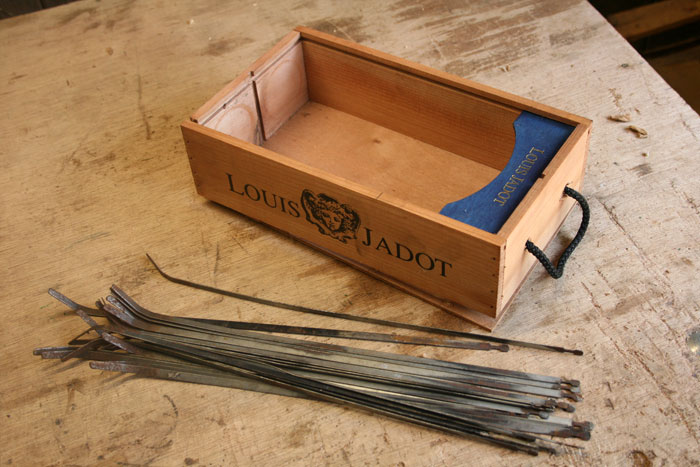
Materials used - small
wine crate and broken garden rake |
|
| |
|
|
|
|
|
For this
project I recycled some items I had lying about;
a mini wine crate and some tines from a broken
garden rake. You could of course use other
materials, some plywood off-cuts would be
perfect for the box, and for the prongs you'll
need to be a bit inventive, there are some
suggestions of other materials in the article.
To see my full step by step instructions
on how I made this berry picker
click
here |
| |
|
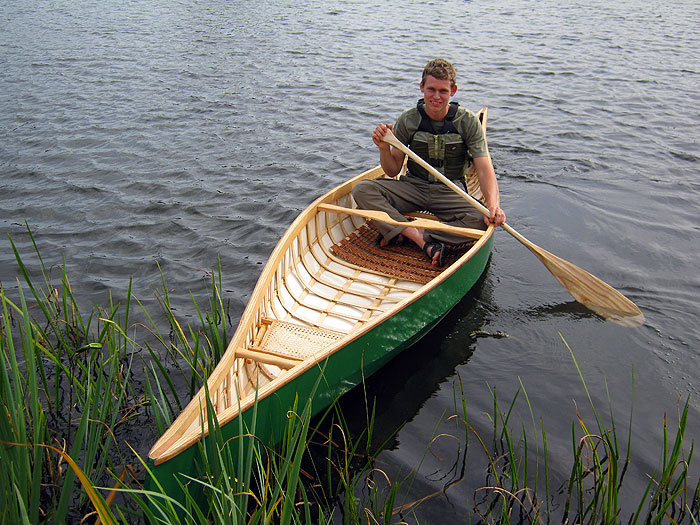
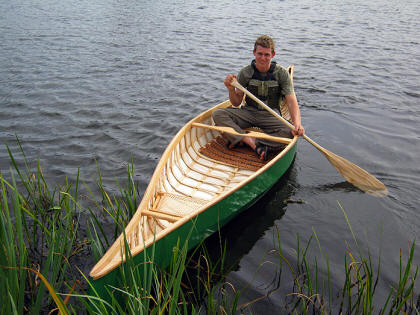
My New Skin
on Frame Canoe - Job Done! |
| The moment I had been waiting for
after months of work; I made the final touches to complete the
construction and took to the water.
I cant put into words how satisfying
it feels to step into and paddle a canoe I have made. All I can
say is that it gave me a very warm feeling of achievement.
Canoeing is the nearest thing to physical poetry that I know and
is good for the spirit...
You can view the
full 'build-along' pictorial article showing how the canoe was
made by clicking HERE
|
|
 |
|
|
|
 |
|
 |
| |
|
You can view the
full 'build-along' pictorial article showing how the canoe was
made by clicking HERE |
|
|
|
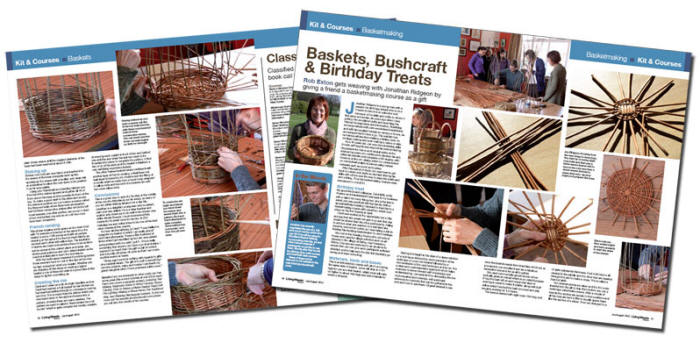
Jon's Bushcraft
Basketry Courses Feature in Living Woods
Magazine - July 2012 |
|
Rob Exton reviews my
Introduction
to Basketry Course in the Living Woods
Magazine
To view the article in full click
here
Rob Exton Concluded that...
"This
is a great way to spend a Sunday, in the
middle of the country (Meriden is not far
away), so many of you are within striking
distance for a day trip. Jonathan is a
delightful young man who is patient, calm
and very skilled. He is a clear teacher and
enabler who deserves to do well in his
chosen way of life. Mostly though, I must
recommend this course for its sheer value
for money. At £55 including tea and coffee
it has to be one of the best value courses
in the country."
Click the following link to
visit the Living Woods magazine website
www.living-woods.com
|
|
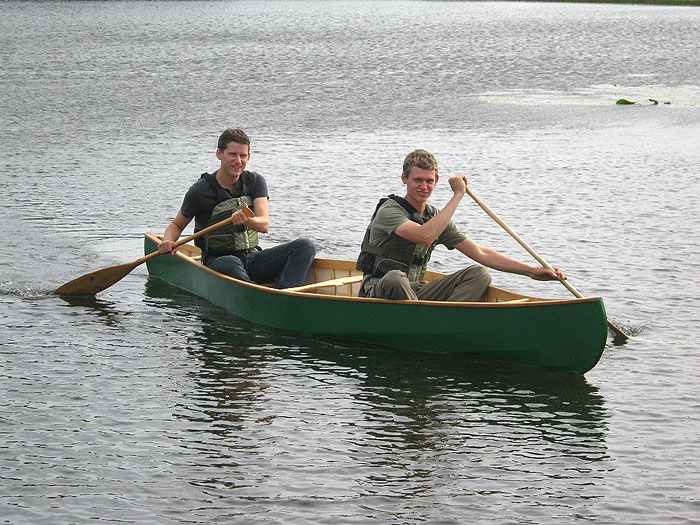
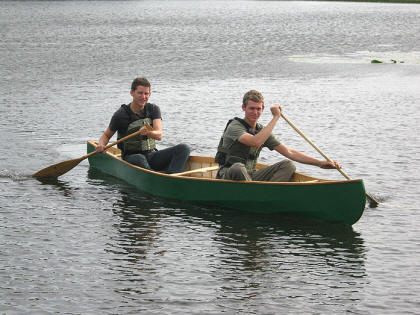
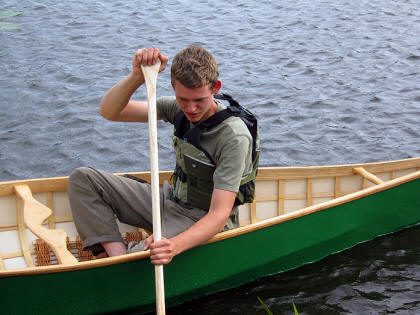
Ongoing project -
Canoe
build-along |
| My Third Skin on Frame Canadian Style Canoe...
The following story will be updated as and when I complete
new stages...
Click here to
see
the full story as it unfolds...
After all the fun and enjoyment I've had out of my last two
skin on frame canoes, I have decided to build another one, this
time it will be a two man canoe in the same Canadian style that
I like so much. There are no plans for the canoe I am building,
all I know is that I want it to be around 4.5 meters long and
about 90cm wide at the centre Most of the jobs will just be done
by eye.
This is not a canoe made from 100% wild materials like a
birch bark canoe, but a mix of traditional wood working skills,
some cotton canvas and even a few wood screws. The emphasis for
me is always on doing a proper job, speed is not the essence. I
am always reluctant to use power tools as I feel mistakes can be
made quickly with such hasty devices. Hand tools fit better with
my calm and patient nature anyway. |
| |
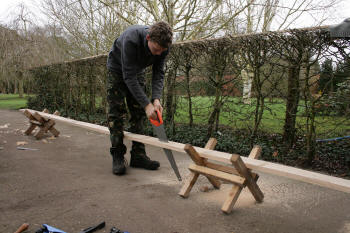 |
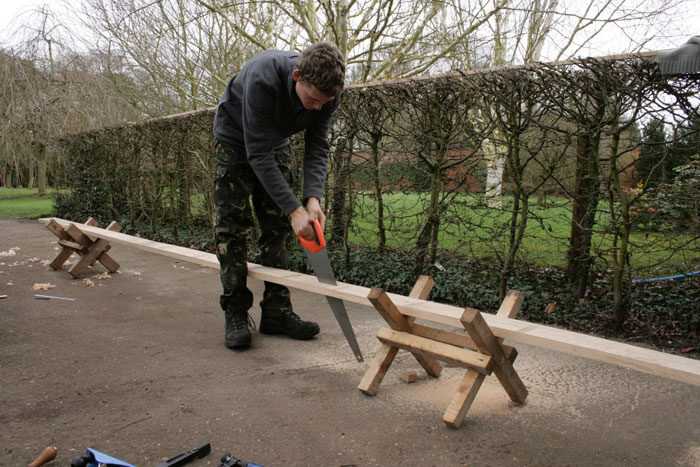
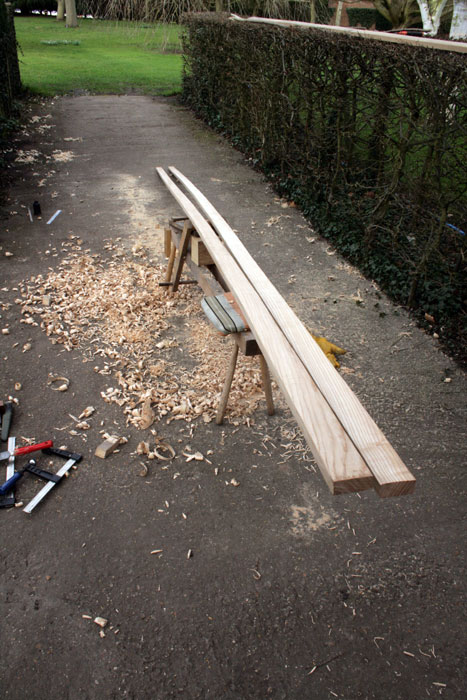
| To start I've purchased a plank of naturally air
dried Ash wood from the timber yard about 7" x 1" x 5m.
At first I wanted to use a long sapling from the woods
to fashion my Gunnels from but I was unable to locate
one straight and long enough for my needs. By purchasing
the plank I would also have enough wood for many other
parts too such as the long keel baton etc. The wood
didn't come cheap though... about £90 for this one
plank! The first job was to rip cut along the length
to cut off two laths suitable for Gunnels. This job
could be done with a circular saw but I am quite
stubborn and don't like to use power tools all that much
:-)
|
|
 |
| |
 |
|
 |
|
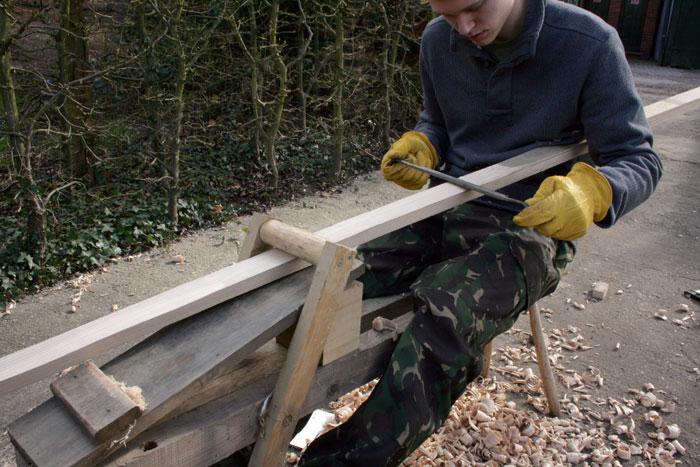
| |
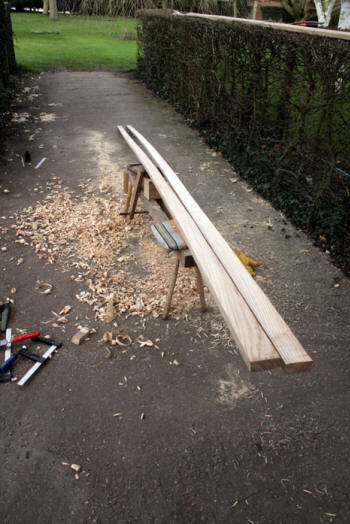
Using a Shave horse and Draw Kinfe I then worked
the two gunnels down to final dimensions which is about 20mm x
55mm. I then made a gradual taper towards the ends shaving it
down to about 3cm high with no change to the width.
|
|
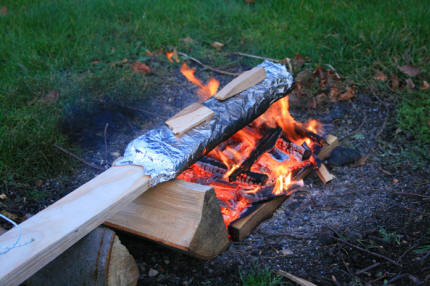
Now it was time to steam bent these tapered
ends upwards which will give my canoe some nice curves (known as
Indian ends). I am using quite a simple but effective method to
steam the wood. Firstly I wrap the wood in Hessian material,
then give it a good soaking and finally wrap it up in tin foil.
Then I cook the wood over the fire like a fish. The wood doesn't
burn if the material is wet enough.
|
|
| |
|
|
|
|
|
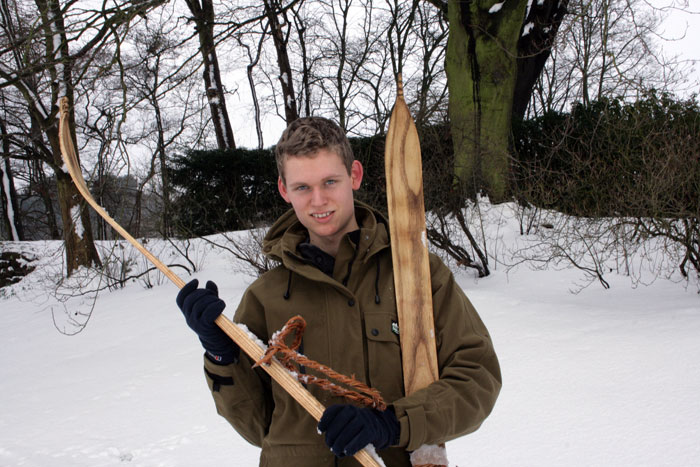
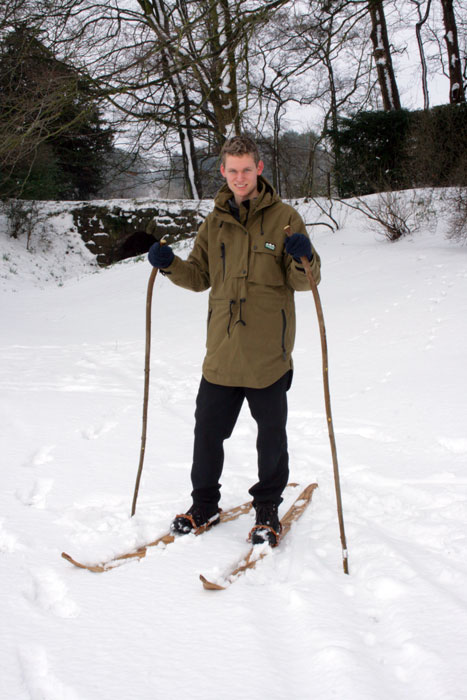
Post - 08/02/2012 -
Hand Made Skis |
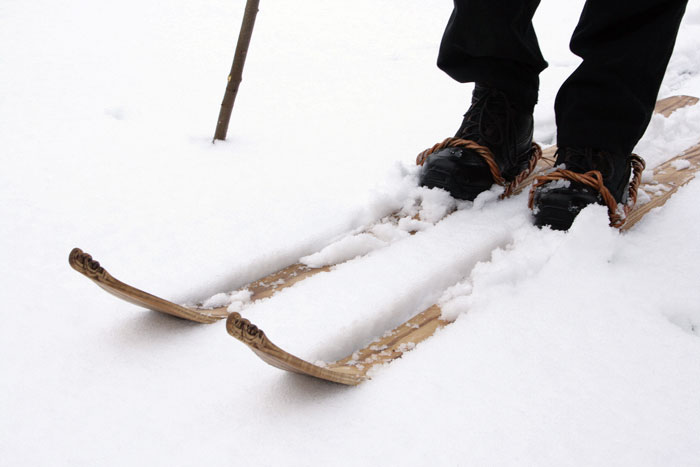
| I had never been skiing before
or even held a pair of skis, but making a pair
seemed like a fun idea. I was mainly inspired by
a video of native Reindeer herders in Sweden,
and also by my good Norwegian friend - Torjus
(his website:
http://livingprimitively.com/ )
 |
 |
|
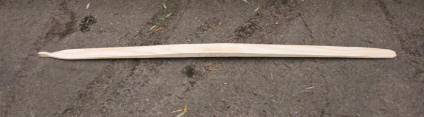 |
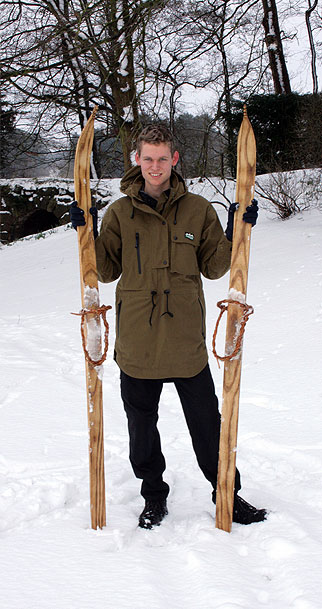
One of the first things I learnt about skis
is that they are not actually just flat pieces
of wood with a bend at the end; they also have
an overall bend meaning that the centre of the
ski will stand off the ground slightly when not
stood on (see picture on left). This bend serves
to spread the weight of the user more evenly
over thick snow, and instead of the centres of
the skis dipping down into deep snow the skis
just become flat. |
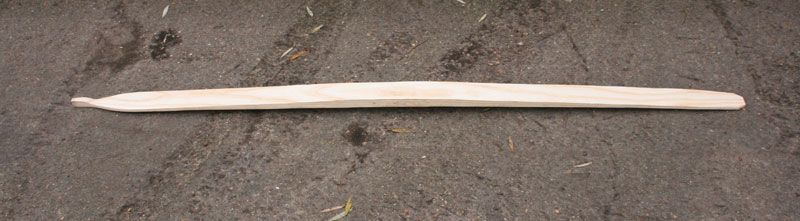
I used much the same tools as I would use to
make a bow - A draw knife and shave horse; a
hatchet, a large Farier's rasp and a cabinet
scraper.
The wood is Ash wood. I split two billets from a
large fresh log which some tree surgeons had
left on a fire heap! I worked the wood while it
was fresh as that makes the job a lot easier!
Luckily the billets had an overall natural curve
which I utilised. The only bends I needed to
make were those for the ends. |
 |
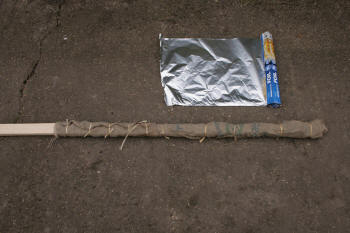
To steam bend the ends I wrapped the wood in
hessian fabric from an old sack, I then soaked
this with water and wrapped the the lot with
Turkey aluminium foil. I then supported this
over a nice hot fire for perhaps 45 minutes
(note how a log protects the unprotected wood
from the heat. The pieces of wood on top of the
foil are just holding a flap of foil down.) Its
just like cooking a Salmon in foil really,
hehe.
|
|
 |
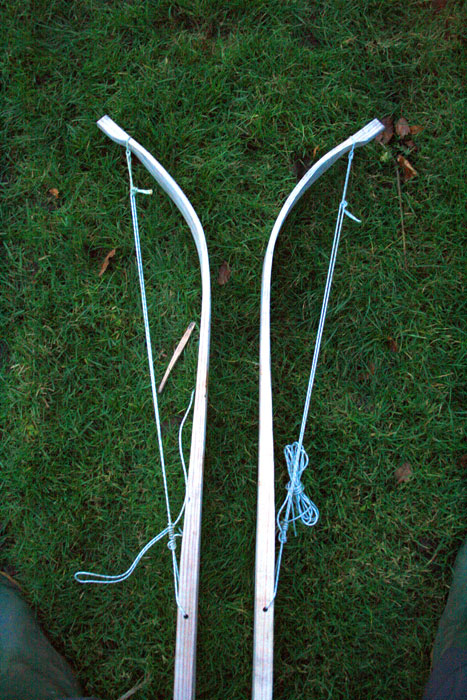
Before wrapping the ends with hessian and
foil, I had already rigged up some cord which
would enable me to swiftly make the bend and
hold it in shape; one loop tied to the top and
another long length secured at the centre of the
ski. When the wood had been steamed for long
enough (perhaps 45mins), I could then quickly unwrap the wood,
thread the long cord through the small loop at
the top and then pull down forcefully to bend
the wood and hold it in shape.
The rest of
the work to do included:
-Chiselling out a rectangular slot hole through
which I could secure the bindings
-Carving the decorative ends in a traditional
Swedish style
- Applying pure Pine tar with a brush (made by 'Bickmores' as
a horse hoof treatment, and purchased from the
'horse health' website)
-heating the tar and wood with a blow torch as
it is applied helps to make it go into the wood
better. Excess tar is rubbed off with a rag.
-Applying Bees wax to the undersides to make the
skis glide better (without the tar and wax; snow
would stick and clog the skis up.
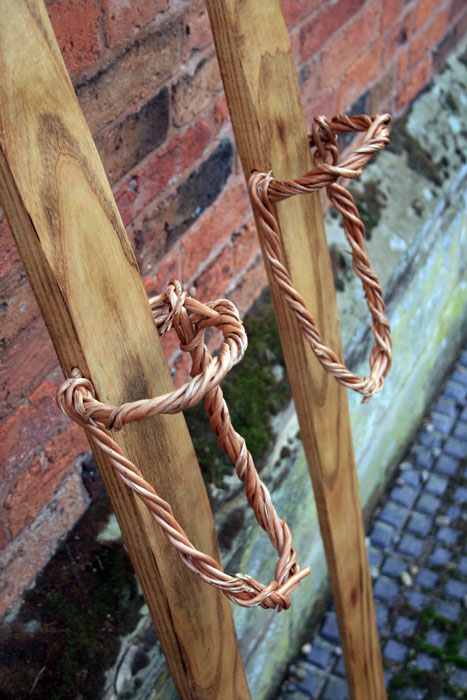
-The final job was to then weave the Willow to
make
the bindings, these will ensure my feet are
securely fastened to the
skis. The Willow is soaked and twisted like a
withy beforehand to make it more pliable.
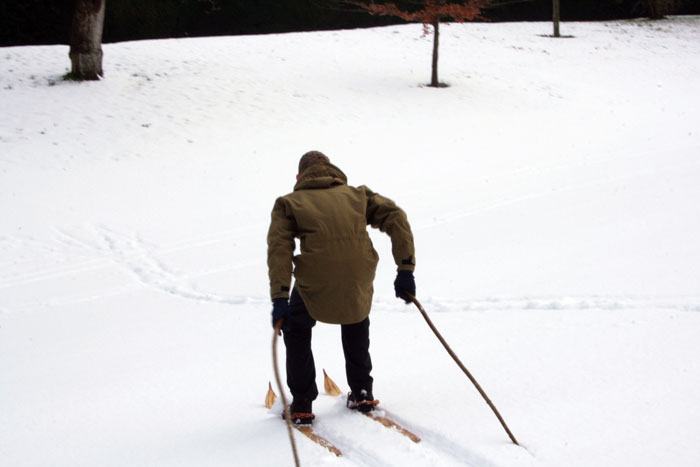
Then it was just a case of waiting for some
snow to have some real good fun!
100% satisfying!!
|
| |
|
|
|
|
|
|
Post - 21/09/2011 -
Birch bark containers |
|
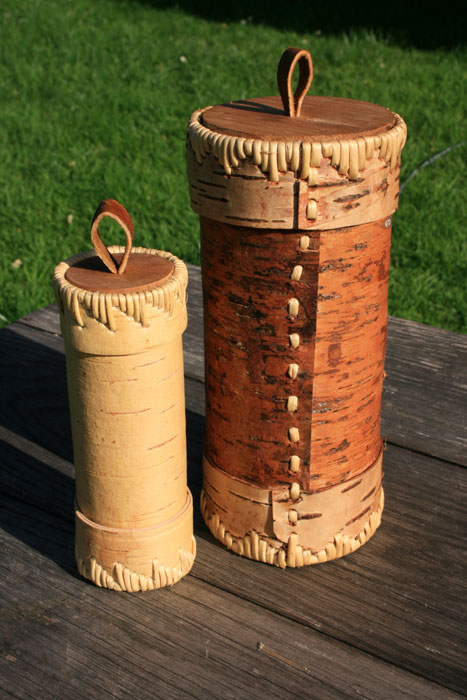
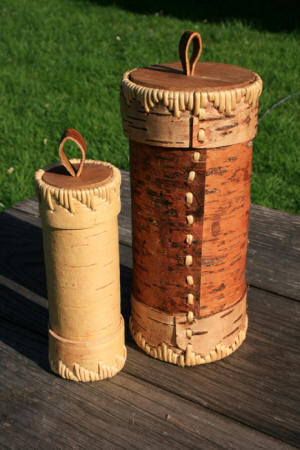
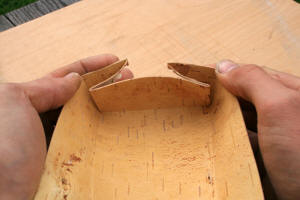
I recently made these two Birch bark pots,
they are stitched differently to the way I have previously made
containers; this is now my new favourite method. As well as
being very decorative, the 'stepped' stitching ensures that the
bark doesn't split along its grain, which would be likely if so
many stitching holes were made right next to each other along
the same line. Making stitching holes through two layers of bark
also helps the bark not to split.
The container on the right is made from the
bark of a dead tree. When stripping the bark from the logs the
wood inside had actually started to rot away but the skeleton of
bark was still good to use, that's because of all the natural
tar it contains. the smaller container is made from fresh bark I
managed to salvage from some logs left behind by tree surgeons.
This bark is such a nice material, its a shame so much of it
just ends up on peoples fire heap!
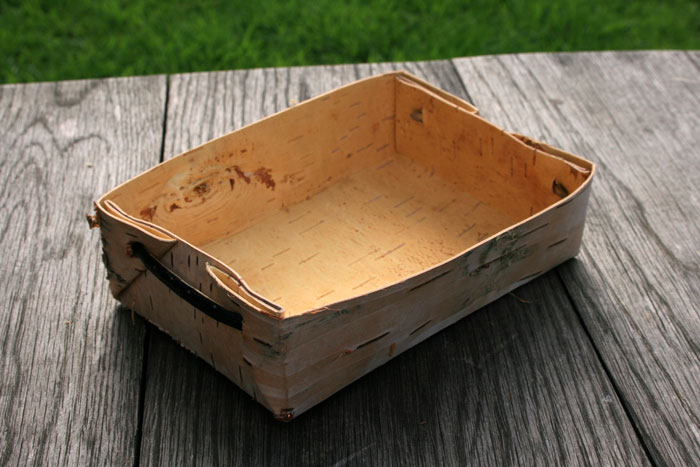
Some of the crafts I make are quite
intricate, so for a change I thought I'd show you how to make a
simple little bark box like this...
 |
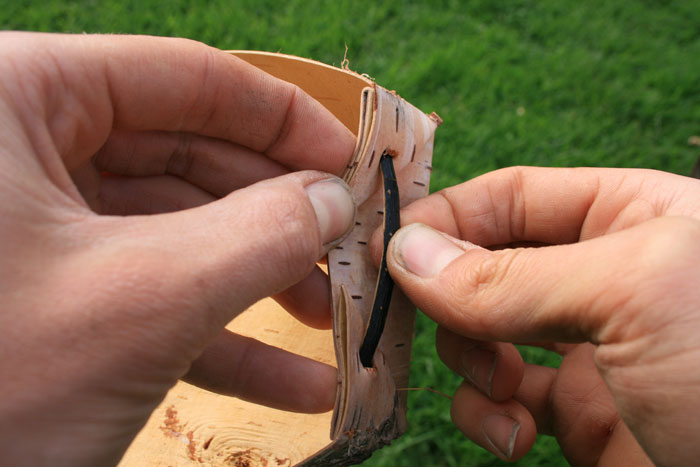
 |
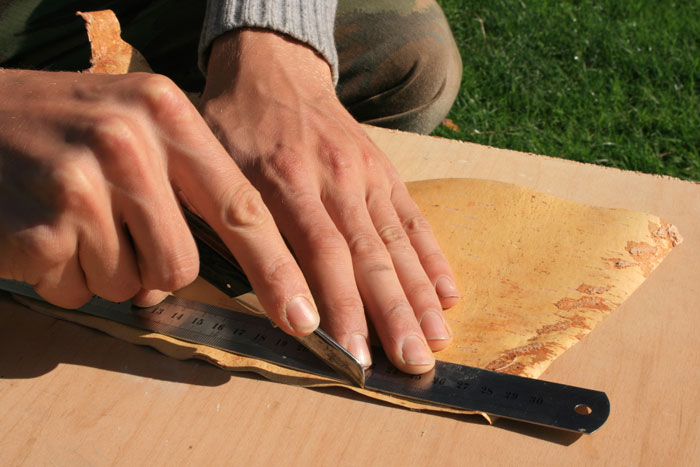
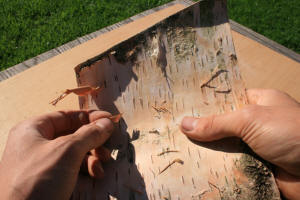
| Strip your bark from felled or naturally fallen
trees. The only tools you need to make this little box
are a pen knife, a ruler, and something to score lines
with. The folds are simply held together by two stick
pegs inserted through slots in the bark. |
|
| |
 |
 |
|
| |
Start by cleaning up the outside
of the bark. removing any loose material. Pulling your thumb
over the bark side-ways works well. |
Now cut the bark
into a neat rectangle. |
|
| |
 |
 |
|
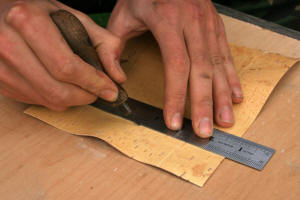
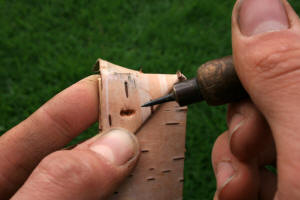
| |
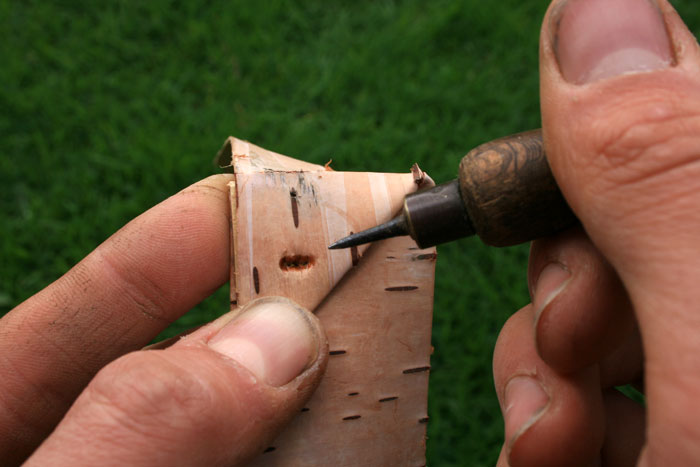
Carefully score the
folding lines onto the bark as represented by the diagram. I
used a bradawl for this job. |
|
| |
 |
 |
|
| |
Fold the corners up |
Make four small
slots ready to receive the pegs which hold the folds securely in
shape. |
|
| |
 |
 |
|
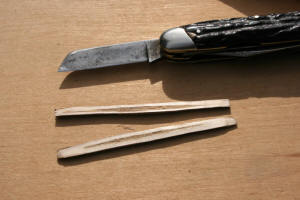
| |
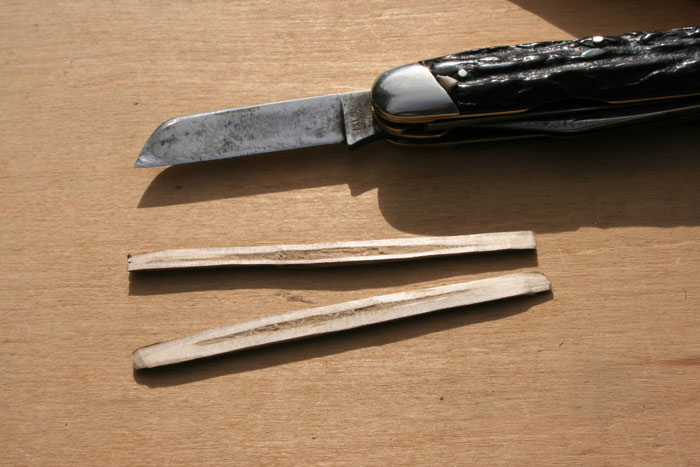
Cut two sticks to length and
shave them down thin. If they are a bit flexible that will help
with the fitting. |
Insert the pegs on
either side... job done! How simple and effective is that! |
|
|
Also see my tutorial on how to make other
simple birch bark containers/ pots..
click here
And my step by step guide to making a Birch bark basket
Here |
|
Post -
19/09/2011 -
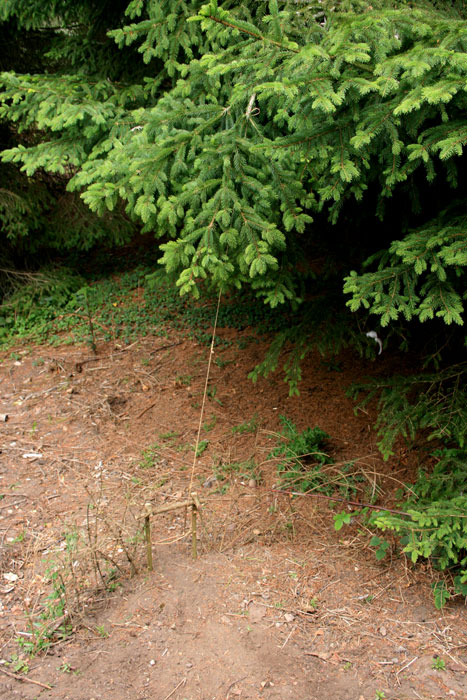
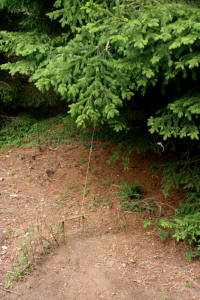
Primitive Trapping |
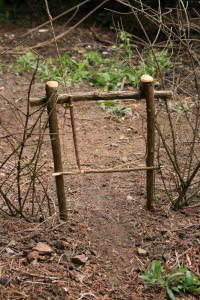
| Trapping is only something you'd do if you needed to feed
yourself, it should then be carried out with much care and
respect. However, it can be fun to learn how to lay traps with
no real intention of actually catching anything; that's what
I've been practicing today.... I find it fascinating how a few
carefully prepared sticks can be assembled with a snare to
create a very effective trap. The trap here on the right is a
type of Rabbit snare. Many types of trap utilize a toggle which
is held in place by another stick; when the stick is dislodged
the toggle is released and up goes the noose. A trap like this
can surprisingly be set to an extremely fine tolerance.
Of
course, tracking skills and good knowledge of your prey's
behaviours will also mean the the difference between success and
failure; or the difference between a humane and inhumane catch. |
Click images to enlarge |
 |
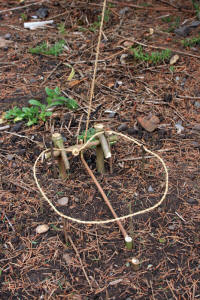
| In primitive situations when you are using a snare made from
natural fibres, the animal needs to be lifted off the ground to
prevent it from biting through the snare line (or its leg) and
escaping. This is done by attaching the snare to a springy
branch, when the animal sets off the trigger mechanism, the
noose tightens around its neck and the tensioned branch lifts
the animal upwards. This tension also prevents any chance of the
noose loosening. Placing sticks either side of the trap and
the animal trail guides the animal into the snare opening. There
are other things that need to be thought about too, such as
trying to make your trap as inconspicuous as possible; masking
your scent (usually by smoking your snare and parts over a
fire); and making as little disturbance to the animals trail so
that it will not become suspicious... animals are more clever
than you'd think!
|
 |
Another 'neck hold' trap. This is another
example of a toggle based snare with the main line under
tension. The central stick would be baited in the middle. She
snare is held up with tiny 'Y' shaped sticks. It should be easy
to see how this works. |
|
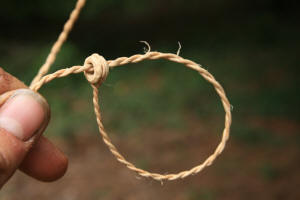
A simple 'Eye' made from a section of naturally hollow Elder
wood helps the snare to slip freely along. |
Please respect my wishes and only
use these traps in survival situations. Never leave a practice trap set!
|
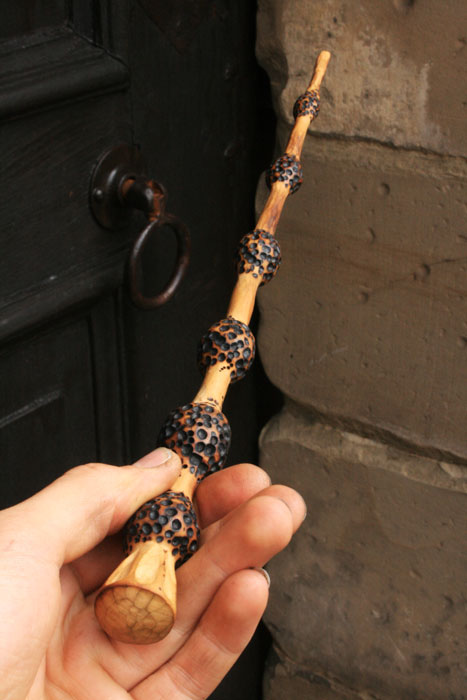
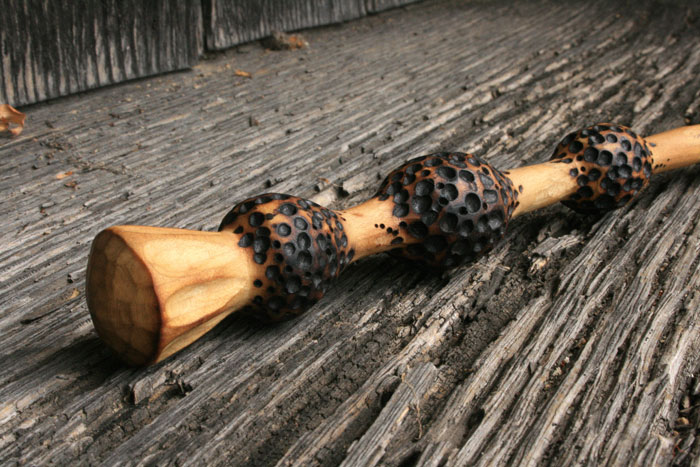
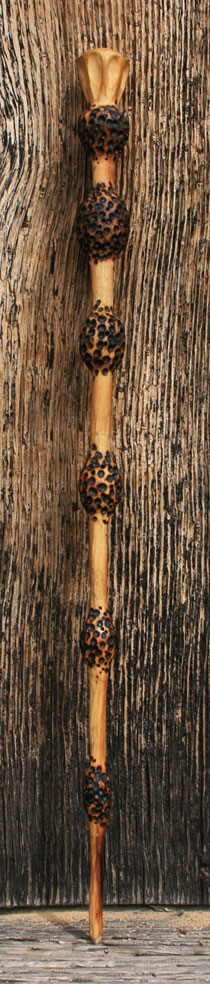
Post -
17/09/2011 -
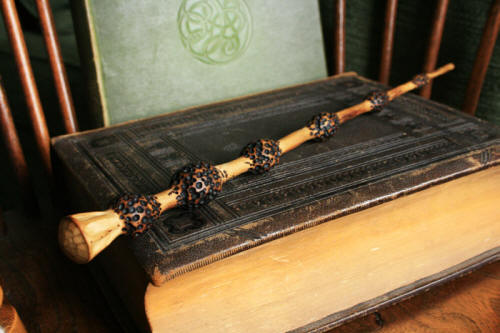
Harry Potter Elder Wand |
| I'm not actually a big Harry Potter fan but I
made this wand with the intent of selling it :-) I
thought it might be an interesting item to show and share. I
carved it from genuine Elder wood with just a normal Bushcraft
knife. The Elder wand is said to be the most powerful wand there
can be. You'll think I'm mad but the finished wand strangely did
feel quite powerful in the hand. I guess the power of intent is
quite strong and maybe wands could be used to direct your
intent. We've all heard about the power of the mind; people
using their mental power to stay strong and overcoming illness
is a good example. |
 |
|
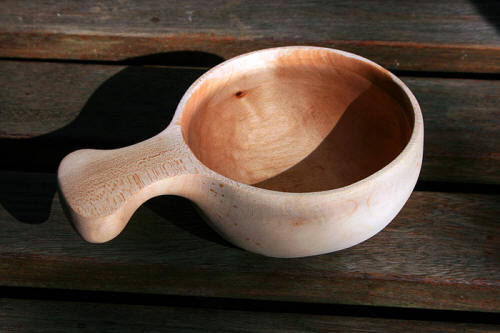
Post -
14/09/2011 - A
New Kuksa Cup Carved |
| I recently finished carving a new Kuksa cup from Sycamore
wood. This is now my number one drinking vessel. I use it all
day every day. Water tastes so much better these now...
Click here to see
my kuksa carving tutorial. |
 |
<<<previous posts
|