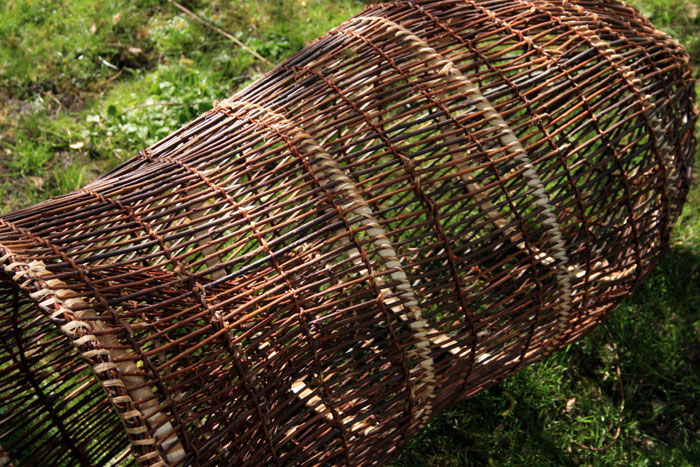
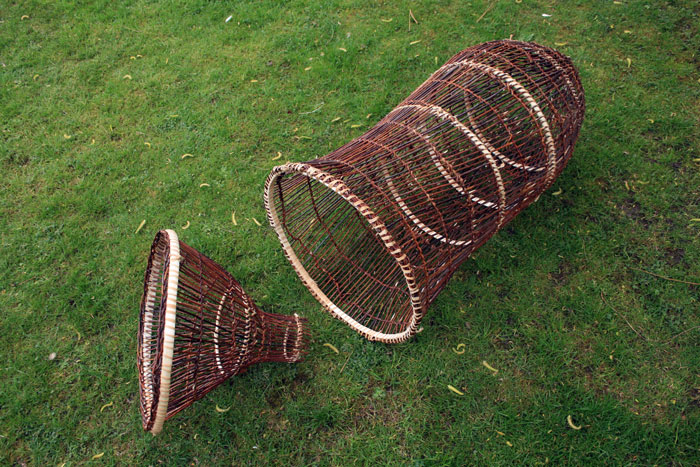
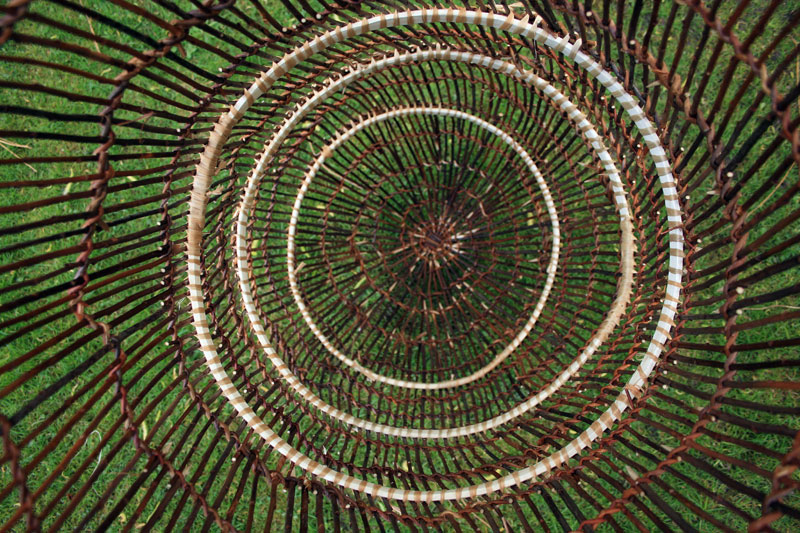
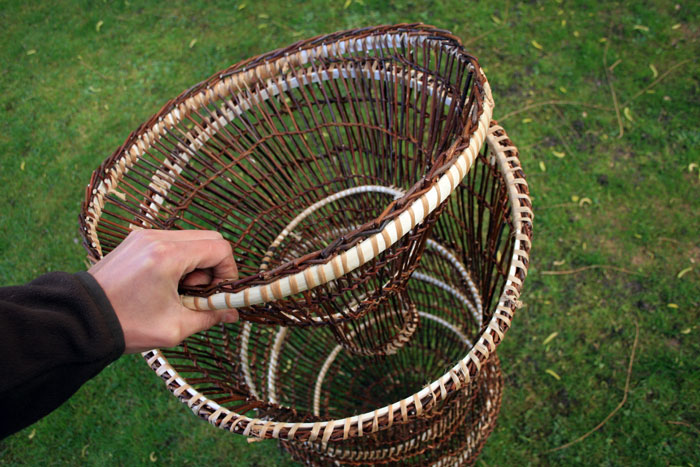
Wicker Fish Trap
I have crafted this fish trap from Willow growing in
the local fields. The construction is started like an
average basket with a spoke layout, although far more
spokes constantly need to be added in. A twine weave is
used throughout the construction. On its own the willow
structure would be quite flimsy so I have integrated
several wooden hoops on the inside to give it rigidity,
they are bound into place using Lime bark fibres.
I have been trying to use the trap in a lake, for bait
I suspend bread and sardines in the centre of the basket
structure. You can put the bait inside a sock to keep it
all together. So far I have only caught 3 small Rudd but
hoping for some bigger catches soon.
If you wish to have a go at basket making you can
follow my inspirational guide
here |
|
 |
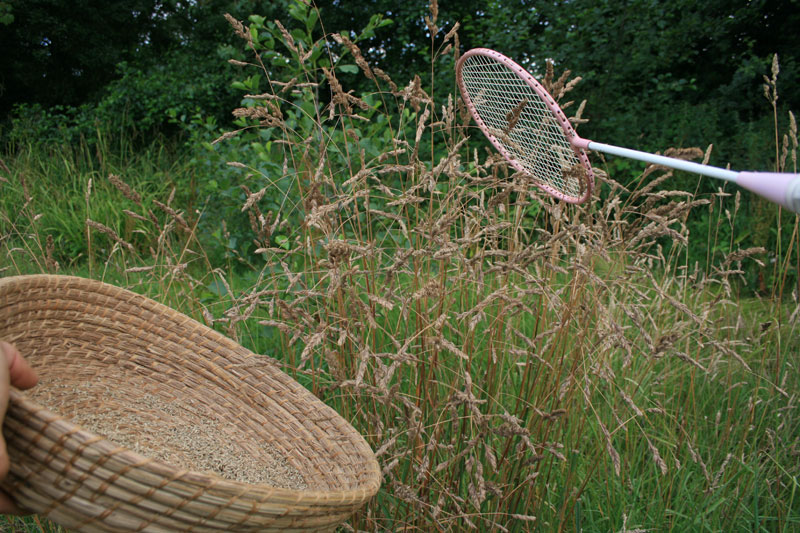
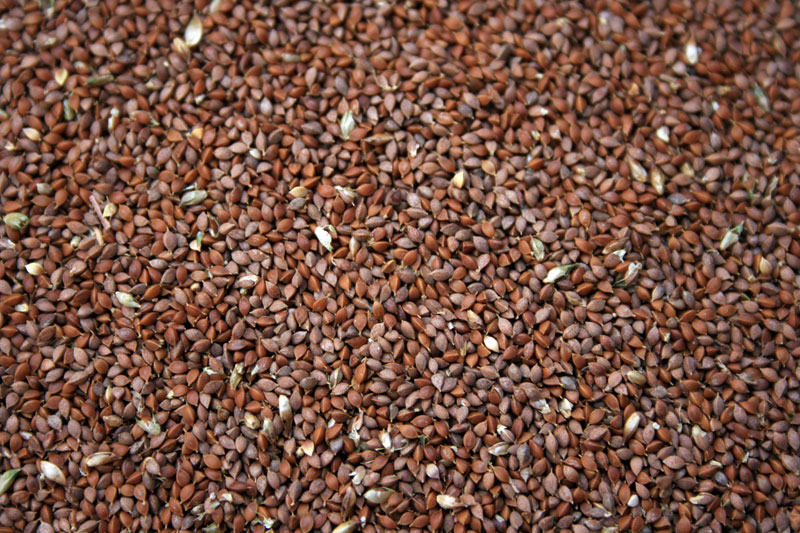
Seed Gathering
Most recently I have been collecting as many types
of edible seed as possible from the local fields and
woodland, then working out how to process them to use
as food. I started out with Collecting Soft Brome
Grass seed, then Yorkshire Fog grass seed, Cocks Foot
grass, Ribwort Plantain seeds and also Pendulous Sedge
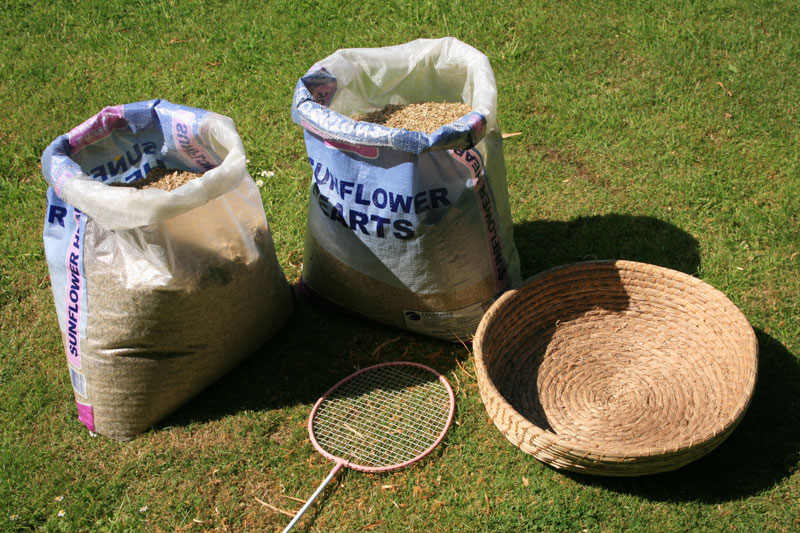
seed. As you can see below I have managed to collect
quite a large quantity of the Soft Brome Grass seed.
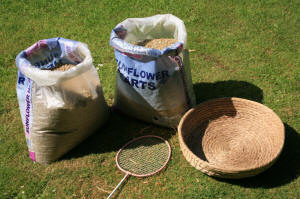
Using a coil basket made from sedges and badminton
racket I was able to collect 16kg in just 3 and a half
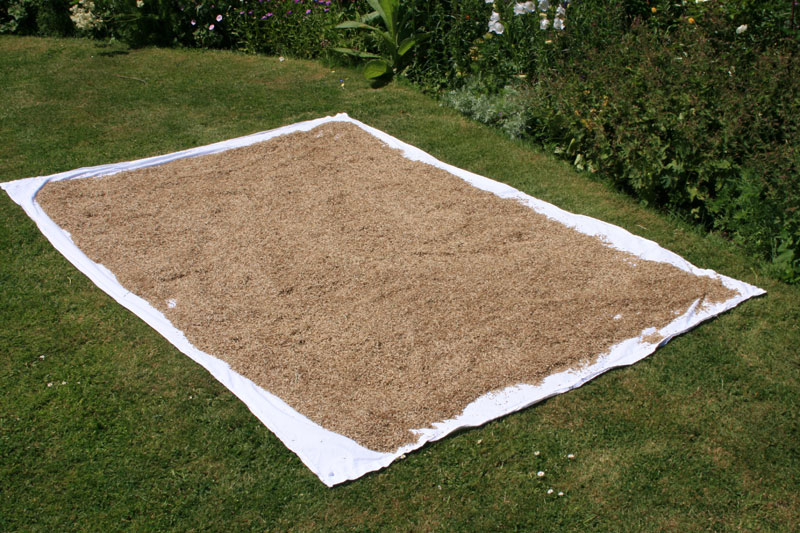
hours! Some of this seed was still a little green but
I dried it off in the sun on a large cotton sheet.
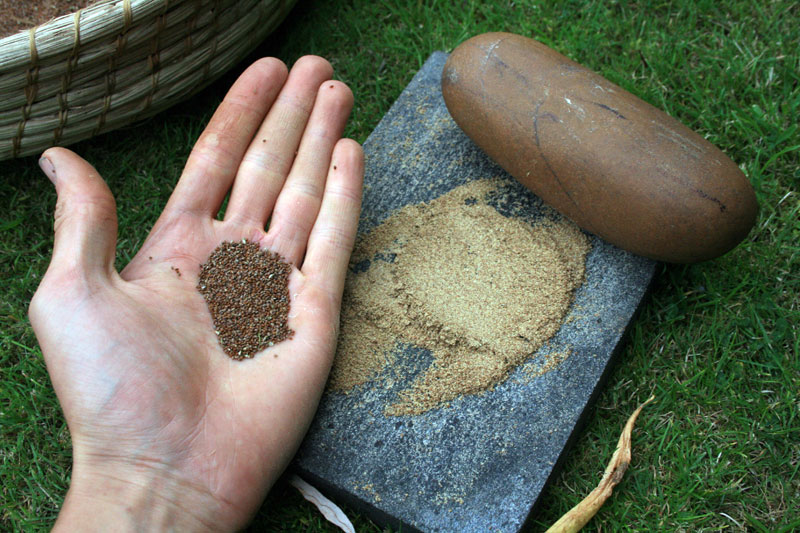
Some types of seed are harder to process than
others. With grass, each seed is encased in a husk
which needs removing before the seed can be eaten or
ground into flour. The brome seed first of all seemed
impossible to de-husk efficiently, with most seeds you
can parch them, rub them and then winnow the chaff
away but this did not work with the Brome. The
processes I worked out are far too in-depth to write
about here so I may be writing an article on the
subject soon.
I should mention that if you decide to collect
grass seed to use as a food, you must research Black
Ergot fungus first! This grows on some of the seed and
if eaten it can potentially be fatal. It is to be
taken seriously.
So far I can say that Pendulous sedge and Yorkshire
fog have been the most successful seed I have
gathered. Particularly the Yorkshire Fog seed which
tastes like sesame once parched. Fantastic! Pendulous
sedge doesn't suffer from the Ergot fungus so you'll
be safe if you stick to this seed for now.
| |
Sacks of Soft Brome seed and
gathering equipment |
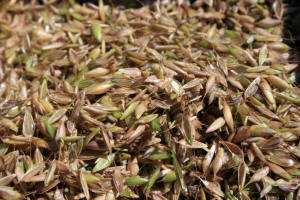
|
Soft Brome seed (some still a
little green) |
|
|
|
 |
 |
| |
Drying the seed on a sheet in the
sun |
|
Gathering method |
|
| |
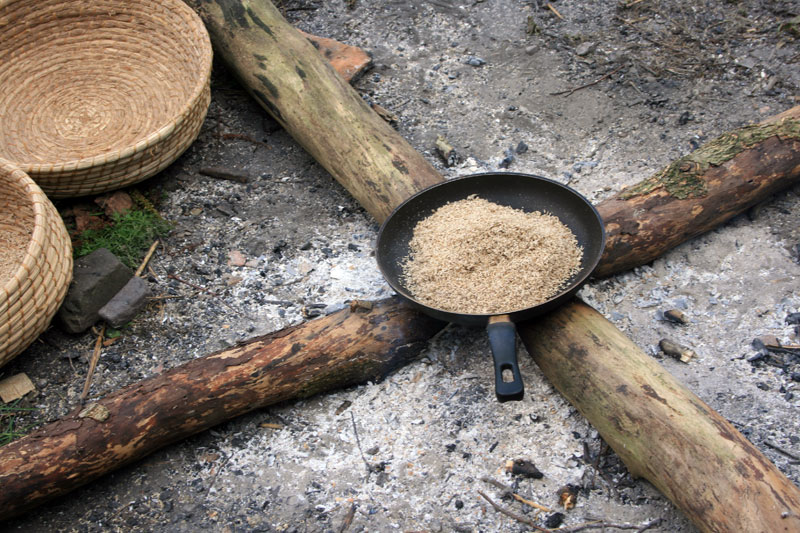
Parching Yorkshire Fog seed ready
for rubbing and winnowing |
|
Example of Pendulous Sedge seed
after parching, rubbing between hands and then
winnowing |
|
| |
|
Grinding seed into flour using a
Metate and Muller. Flour can now be used to make bush
biscuits or added into bread etc. |
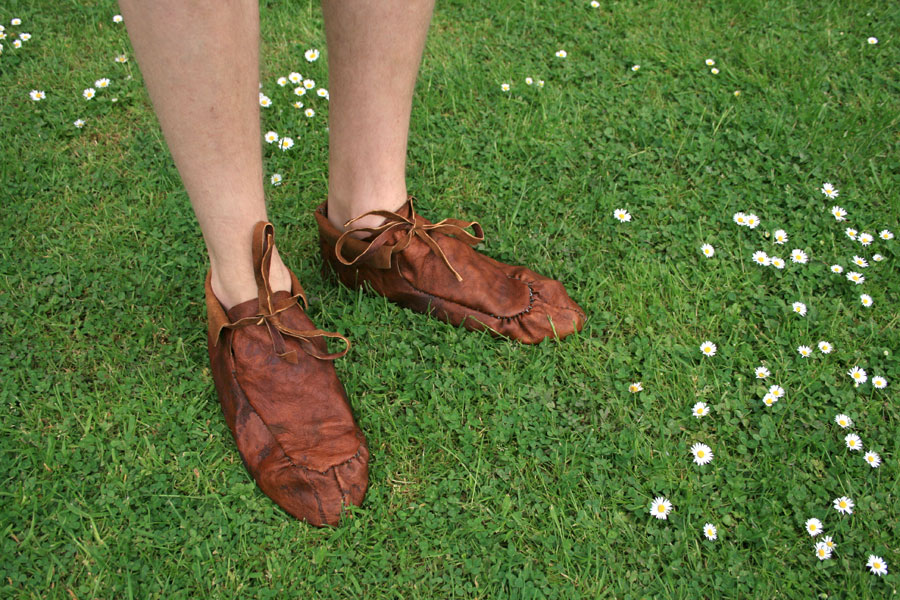
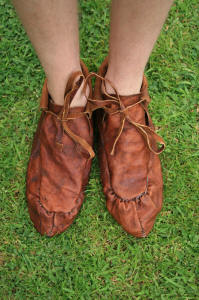
Muntjack Moccasins
I recently got hold of a couple of
fresh Muntjack skins. To make raw skin into a workable
leather takes considerable time and effort. Firstly I
decided to remove the fur from the skins using a wood
ash lye solution that I mixed myself, then I vegetable
tanned them using shredded Alder bark as the source of
tannin. I followed the great bark tanning guide here:
http://www.braintan.com/barktan/index.htm
After making the leather I cut the pattern out
according to an E-Book made by Torjus Gaaren at
www.livingprimitively.com
Unfortunately my moccasins do not reflect the quality
of his article, I could have done a much better job on
the stitching etc. Torjus from Norway makes far better
quality moccasins which he uses on a daily basis, his
E-Book is recommended. |
|
 |
 |
|
|
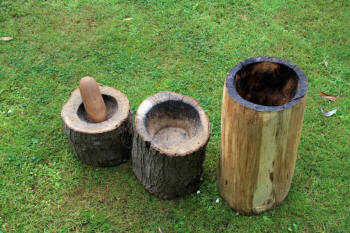
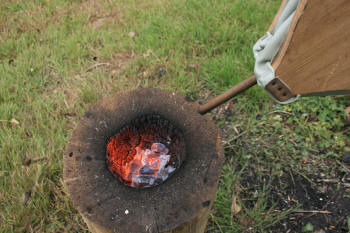
Mortar and Pestle
One way to grind up food, seeds and grain is to use
a mortar and pestle, I made these three over the past
few weeks from Oak logs. They are all made by burning
the bowl out with hot coals from the fire. Using a
hollow plant stem as a straw you can blow air directly
at the coals to promote the burning. For the large
Mortar I made a pair of bellows as progress was way
too slow with just a straw. After a while of burning
the charcoal is scraped out and the burning is started
again. This process is repeated until the mortar cup
is the desired depth. The largest is 9 inches deep. A
flat bottomed mortar helps to stop the seed jumping up
the sides of the mortar and escaping. |
|
 |
 |
|
|
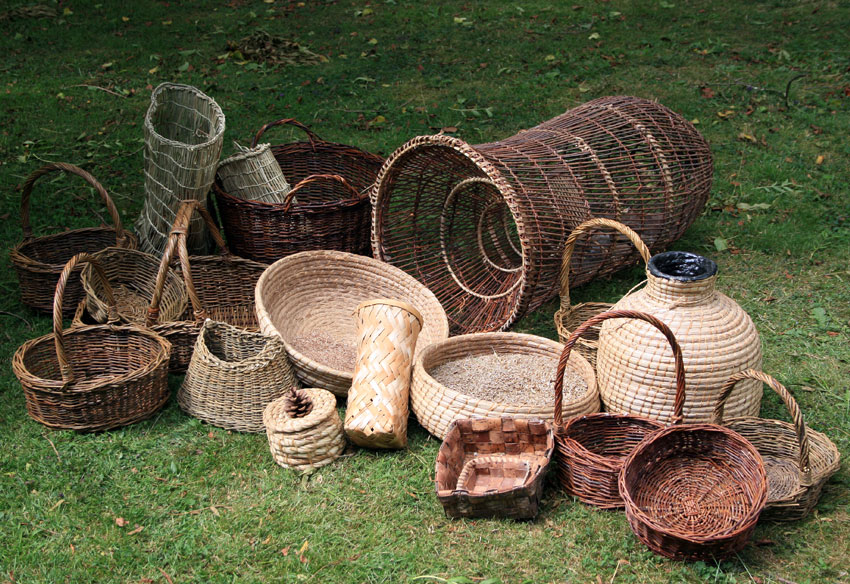
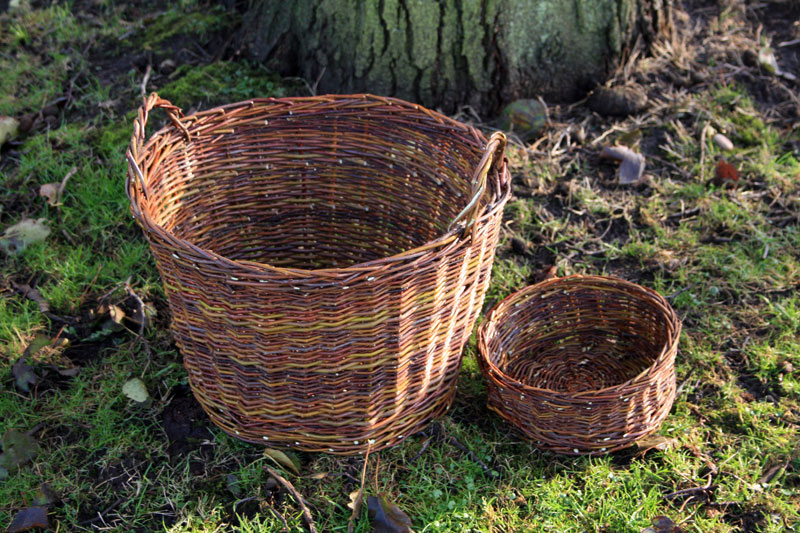
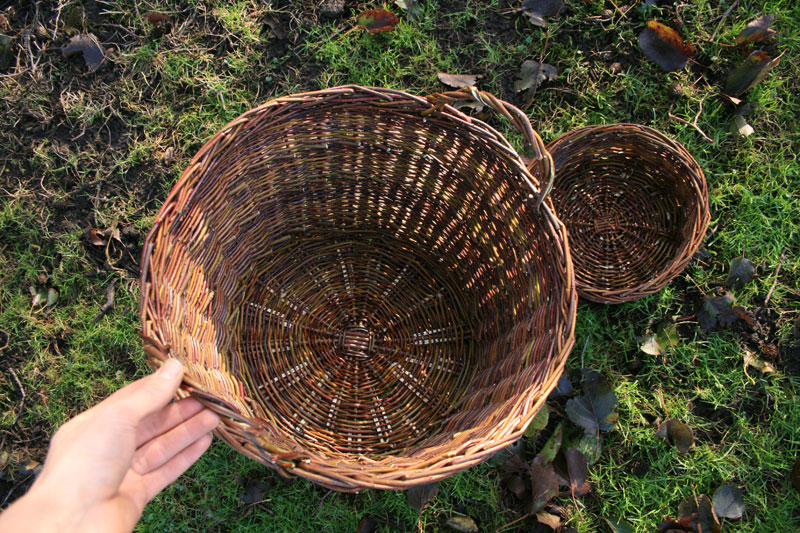
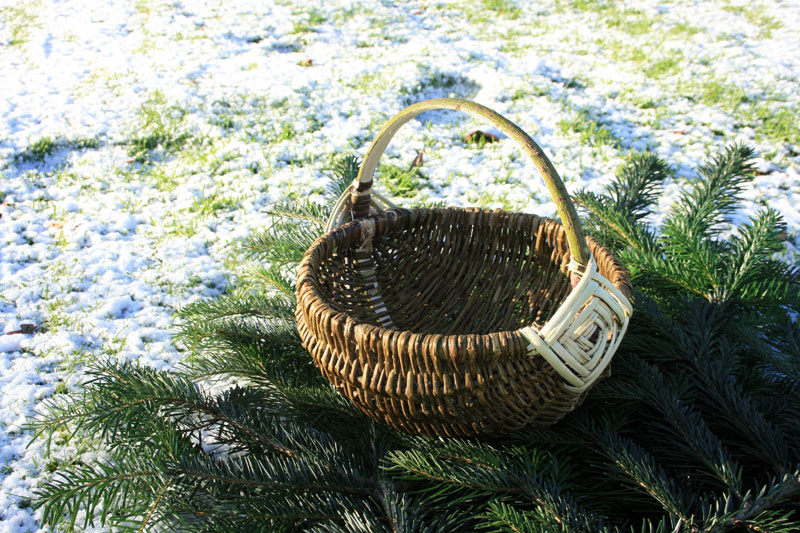
Basketry
As always I continue to make more baskets. this is a
display of some of my best basketry. |
|
 |
|
Some recent additions... If you wish to have a
go at making a basket you can follow my new basketry tutorial
here |
|

|
|
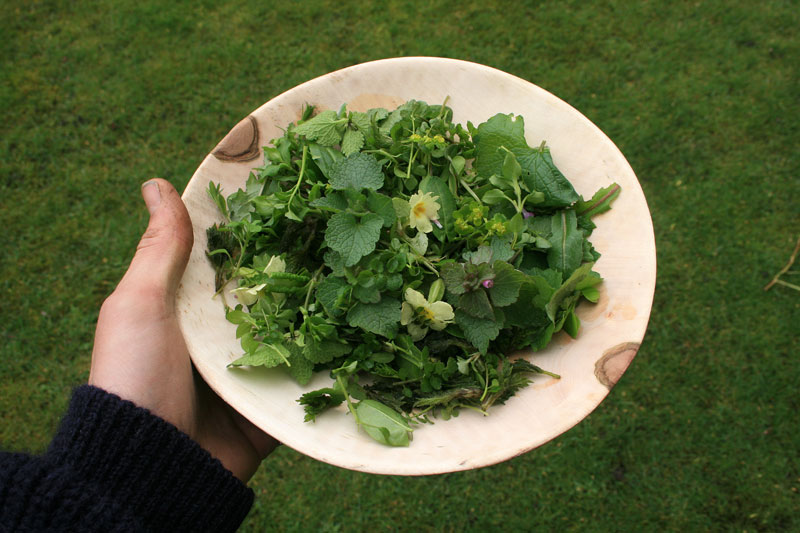
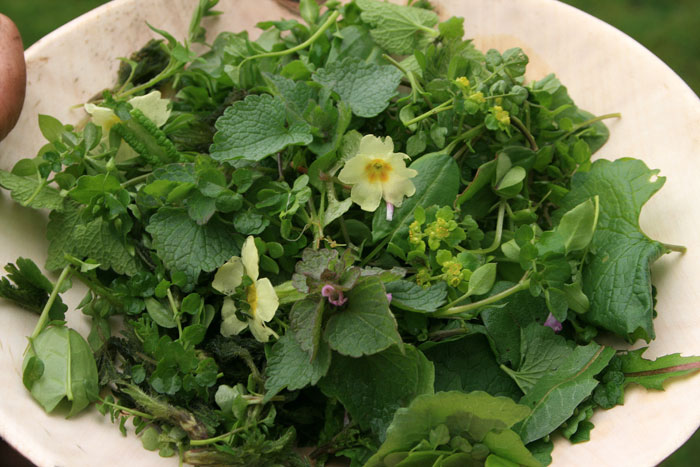
| Wild Salad
I made this salad up today
(30th March) from as many things as I could find. in total
there are 12 different plants used in the salad which are:
Red Dead Nettle
Cleavers (the tips)
Chickweed
Wood Bitter-cress
Nettle (tops)
Alternate leaved golden Saxifrage
Wood Sorrel (small quantity)
Ground ivy (very small quantity)
Common sorrel
Garlic Mustard
Primrose (flowers and very young leaves)
Dandelion leaves
Hopefully you can see what an abundance of salad there is
around even this early in the year... there were more
plants I could have used too. I ate the salad with an
omelette, a great combination!
Have fun and take care, make sure you know what you are
picking! If in any doubt; leave it out... and its good to
learn the other plants that could be mistaken for the
edible ones for example, Common Chickweed could be
confused with Scarlet Pimpernel to the untrained eye;
which is poisonous. Do your research properly and the
rewards will be amazing.
The 'Ray Mears Wild Food' book has been a real inspiration
to me... I have learnt a lot from the book that is not
included in the DVD. If you only have the DVD it might be
worth buying the book too.
(I take no
responsibility for people picking and eating incorrect
plants... do your own research and be thorough) |
|
|
 |
| latest basketry...
I
have learnt a new technique called 'French Randing'. I
used this type of weave to build up the main sides of the
basket. To do this, finish off the base and turn up the
stakes etc. Then basically add a weaver at the side of
each stake, you weave each weaver one at a time, working
your way around the basket in clockwise motion. Take one
of the weavers to start and take it in front of the stake
to the right, then behind the next stake and then out to
the front again. Then you take the next weaver from the
left and do the same; Always taking the next weaver from
the left. Things will look a bit complicated when you come
back around to the point where you started because the
first one you wove will be over the top of the two last
weavers... but its not as complicated as it looks, just
weave those ones from underneath as you did for all the
others. (this will all make sense if you actually try
it... you'll work it out) Continue to weave until you've
woven all the weavers out to the tips.
I understand that for a lot of people this will not
really make sense but for you basket loving folk out there
hopefully it is of some interest and help for those just
getting started with basketry.
This basket at the bottom is called a 'Melon basket'
If you wish to get into basketry I strongly suggest you
buy some books.
|
|
|
|
|
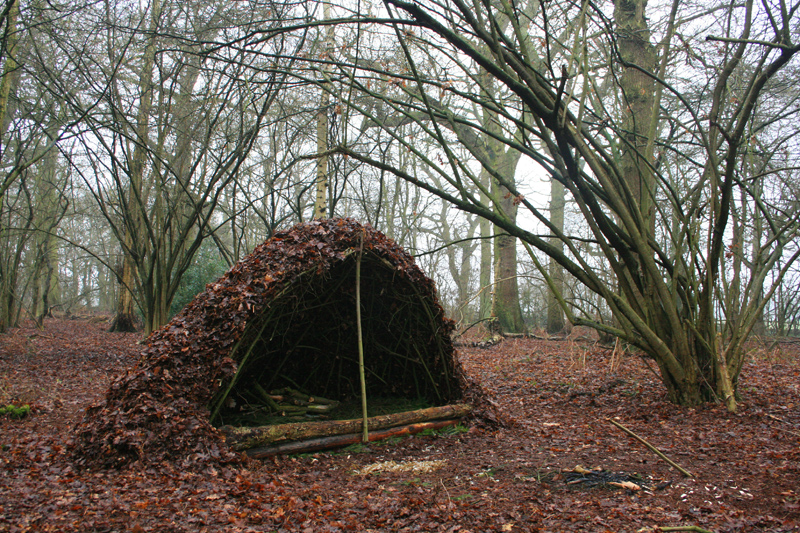
| Shelter building
I
built this small shelter recently. In this part of the
woods there is a lot of old Hazel trees. In my opinion
hazel has to be one of the best building materials for the
Bushcrafter. Nearly the whole structure of this shelter is
made from Hazel. Living hazel is used to start with to
make the main framework, then dead wood can be woven into
the structure to create a 'mesh' of sticks and twigs which
will hold the covering of leaves. A covering as thick as
from my fist to my elbow seems to be weather proof. To
cover the top layers of the shelter I take only the top
layer of leaf litter from the ground as this sheds the
rain better than the lower leaf mould which would act as a
sponge.
Before building a shelter look above the site into the
canopy, check for dead branches that could fall onto you
and the shelter, even small dead wood can cause harm. Also
when locating a shelter think about what resources are
about... is there going to be enough leaf litter in this
area to cover the shelter? is there enough fire wood
nearby? do you need water during your stay at your
shelter? Will your shelter be in the way of other human
activity? |
|
|
|
|
|
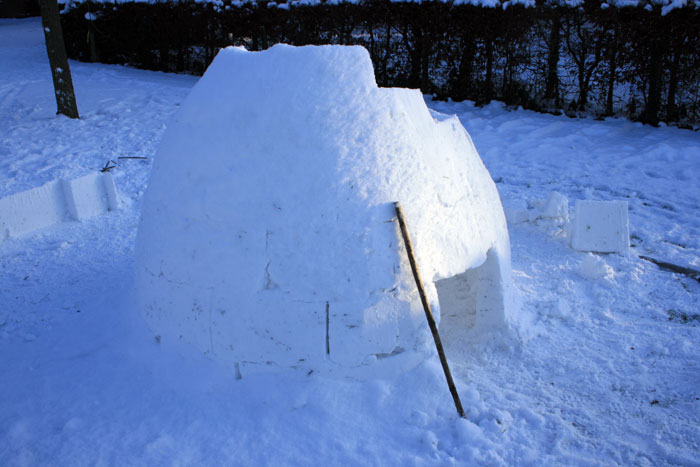
This was one of my winter projects. There was only about 4
or 5 inches of snow on the ground but I piled it up and then
compacted it with a shovel, then let the snow settle and
re-freeze for about 30mins or so. I could then cut blocks from
this pile of snow with a hand saw.
For more pictures see this forum thread:
here
|
|
  |
|
|
|
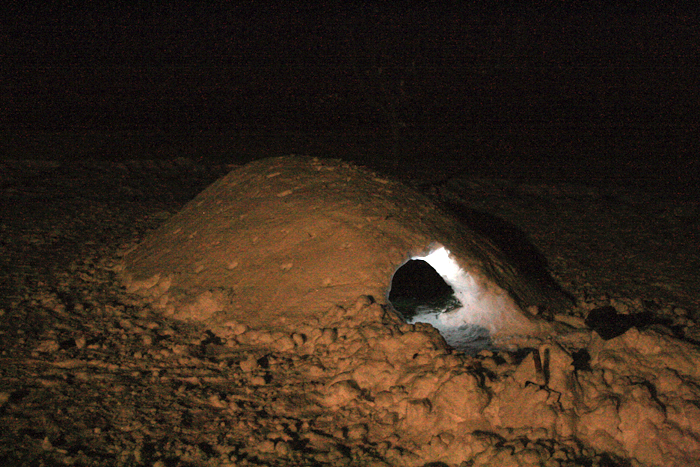
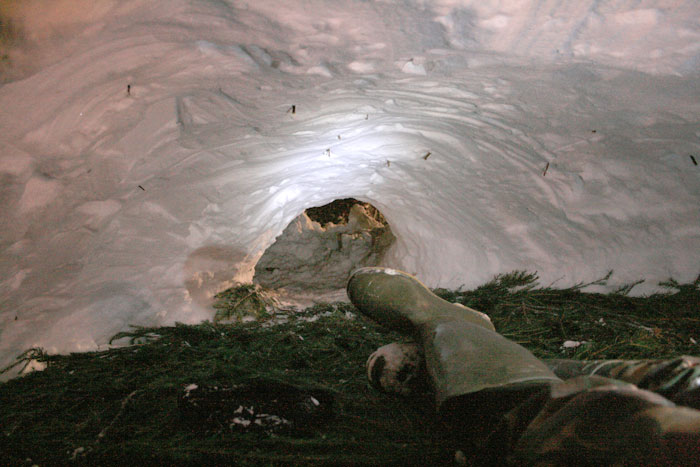
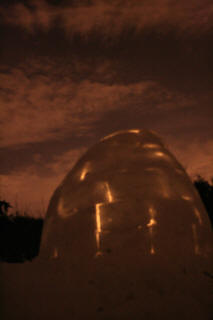
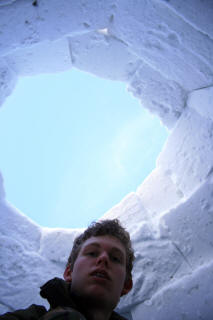
Quinze Snow Shelter
I made this
'Quinze' snow during the winter, I never thought it would turn
out this good. Surprising what you can do in Britain...
To make the shelter I just kept on piling up the snow into a
big domed mound. I didn't have a snow shovel so I had to use a
kids sled to shift the snow. Once the mound was big enough and
shaped correctly I let the snow rest and freeze for probably
about an hour. Then I cut lots of sticks to about 30cm long
and stuck them into the outside at 90 degrees to the surface.
Then when you dig out the inside you know when to stop
removing snow when your shovel hits the tips of the sticks;
this way you get a wall of even thickness and there is no
danger of creating any thin areas that could make the
structure unstable. There is room enough for 2 people to sleep
inside this one. It took a long time to shift the snow to make
the mound because we only have about 4 inches of snow here. If
you were ever going to make one just be careful the walls
don't collapse in onto you, it could be dangerous... Read up
on the proper way to construct these shelters first, I haven't
covered everything in this description... Its not rocket
science though. an air hole should be made and a burning
candle offers light, some heat and a warning if carbon
monoxide is building up.
A good layer of spruce boughs on the floor inside provide
excellent insulation from the cold.
|
|
|
|
<<Previous Page
Next Page>>
Home |
|
|