|
My 1st Canadian Skin On Frame Canoe |
| I am no boat
boat builder but with some research and advice from friends I decided that
I would give it a go. This was my first canoe and I learnt an incredible
lot throughout the project! This article will take you through how I made
the canoe but that doesn't mean that the methods shown are correct,
it's just what I thought might be right. However the canoe does work
really well and I am extremely pleased with it.
Obviously it would be impossible write about
everything that I did along the way because that would be a hell of a
lot of writing, but I'll show you the basic concept.
The boat building methods you use will vary
according to to materials you have chosen or the purpose of the canoe etc.
|
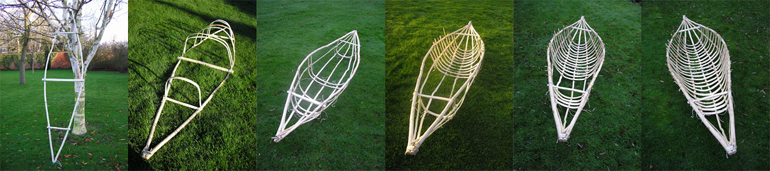
| First of all I went to a
Hazel coppice where there was plenty of raw material. You will notice that
nearly the whole canoe is made from Hazel wood. It was a case of using
materials which were available to me which had some good properties which
I could take advantage of. (Hazel is not a commonly used material for boat
building.) The first two pieces of wood I had
to collect were for the Gunnels (The gunnels are the parts which go
down either side of the canoe.)
I then had to get another three pieces of wood to
make the Thwarts (The Thwarts are the horizontal parts which help
the canoe to keep its shape. The longer the canoe the more Thwarts you
should have. Small canoes like the one I made can have as many as five
Thwarts.
I worked out what width and length I wanted the
canoe to be and then cut the parts to size and tied them together. The
Thwarts in this photo are only temporary.
I decided that my canoe was to be 3m long and I
can't remember the width. However you will have to work out your own width
size according to your preferences. |
 |
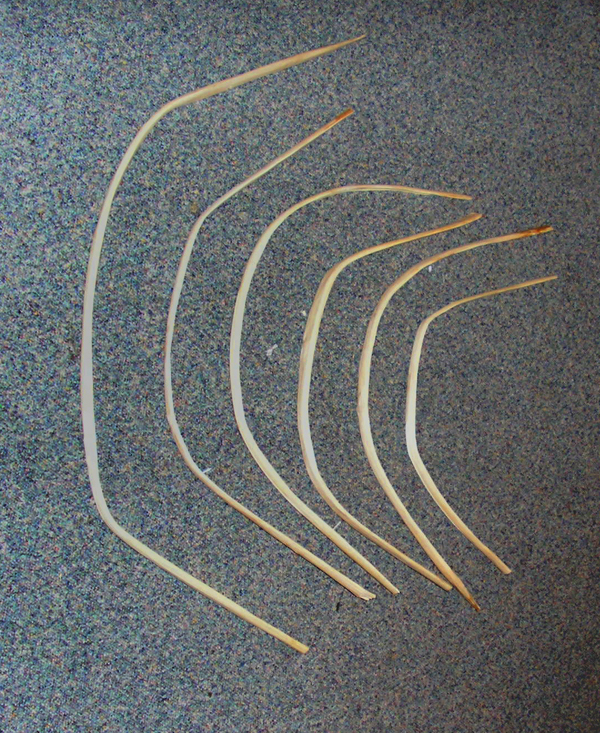
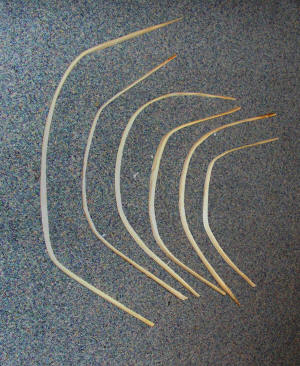
| The next job was to start
to making the Ribs. For these I also used Hazel. Using an axe and a knife
I made each Rib from a staff of green fresh Hazel. No two ribs are the
same and this is a lengthy job which took me weeks of spare time. Don't
rush!
I carved flat ribs but you could use 1/2" thick
willow shoots and just strip the bark.
I intended for the ribs to be only 2" apart
|
 |
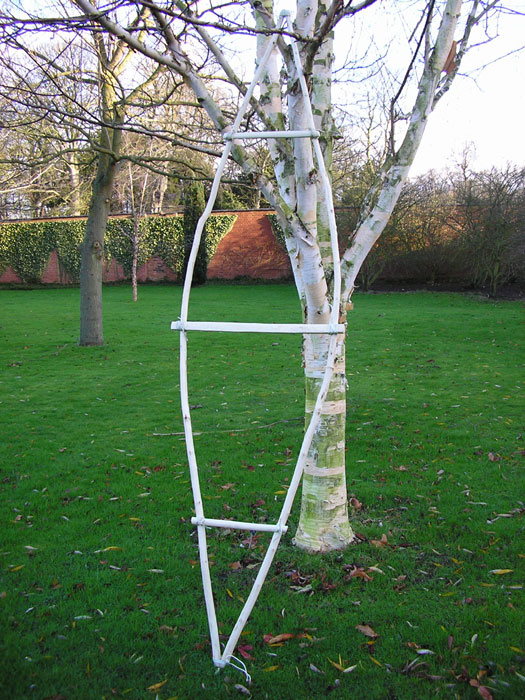
| I used green wood to carve
the ribs for a purpose. When the sap is still present the wood was supple
and allowed me to bend them into shape. When I was satisfied with the
shape of each rib I tied the ends together until they were dry. When the
sap has evaporated and the wood is seasoned the wood will keep its new
shape without the aid of the string. For me,
the Hazel wood seasoned overnight on top of my hot radiator without
splitting! This sped up the process a little.
Another way you could bend the ribs would be with
steam or by ladling boiling water over them. (different wood types will
need to be dealt with in different ways.)
Another thing to know is that the flatter the ribs
are on the bottom the more stable your finished canoe will be. (You can't
roll a cube easily but you can a ball if you get what I mean.) |
 |
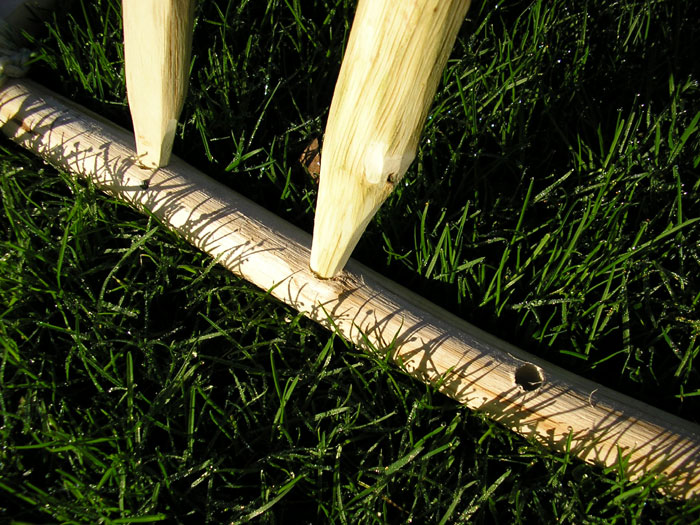
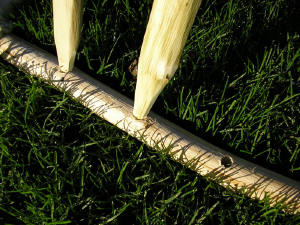
| The ribs are tapered at
the ends and snugly fitted into 3/8" wholes which I drilled into the
Gunnels. I know drilling isn't strictly bushcraft but I'm sure there are
more primitive ways to do this. (By the way I did use a Bracer! No power
tools!) |
 |
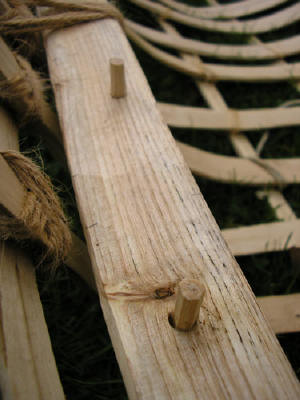
| I found that every so
often a rib would keep popping out of its whole so I secured them with
string. Hopefully from the picture you can tell what I have done.
obviously do this before attaching the canvas. |
 |
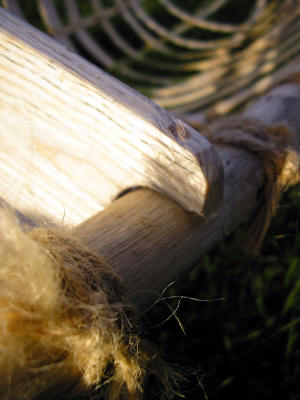
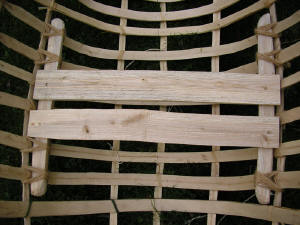
| Before too many ribs were
fitted I replaced those temporary Thwarts with better ones carved from
Ash. I strongly advise to get them right at the start and not bother with
temporary Thwarts! Things can get a little tricky when fitting the new
ones! The picture on the right shows how the
thwart is connected to the Gunnel. |
 |
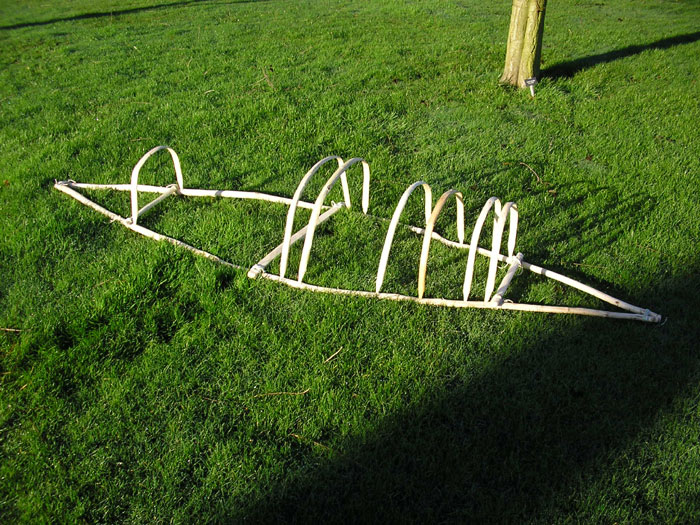
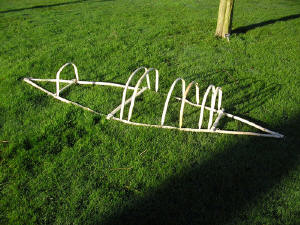
| To hold all the ribs in
their correct places I added longitudinals which stretch the full length
of the boat. Each rib is tied to each longitudinal. I had 5 knots to tie
for each rib! So if you have about 30 ribs to secure that will be 150
knots! make sure each one is tight! You don't want to be doing it all
again! |
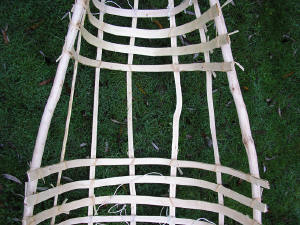 |
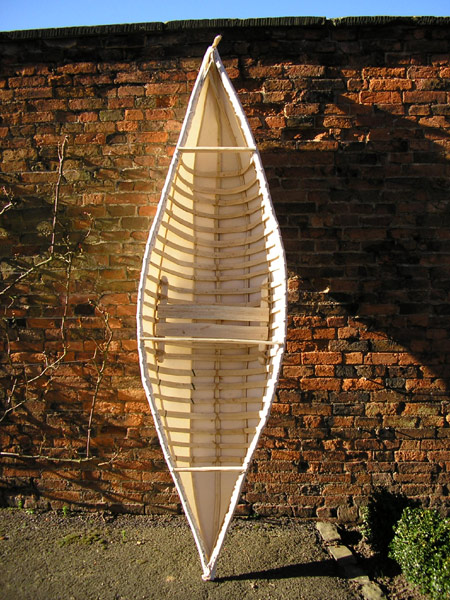
| Slowly your
canoe will begin to take shape! It's a great feeling of achievement when
your boat has all its ribs fitted! You will be enthused about progressing
with the manufacture of your canoe! |
 |
| Next I made a simple seat.
The front edge of the seat should be at the centre so that when you sit on
it your weight will be slightly to the back of the canoe. The middle
Thwart can act as a handy back rest. You don't want to be sitting bolt
upright though. You can see how the seat is
constructed from the picture. The seat supports are attached to two of the
longitudinals and the longitusinals are held in place by the ribs, but at
the same time the longitudinals are holding the ribs in place. Everything
is holding everything in place.
If you are wondering where the central Thwart is in
the picture, I had to take it out for some reason but it is fitted again
not long after. It isn't a good idea taking thwarts out though! Not at
this stage! |
 |
| I made the seat removable so
that you could kneel in the bottom if you wish. The first few times I used
the canoe on didn't use the seat. I felt I had more balance this way.
Using the seat soon became easy though.
Another important thing is to make sure there is nothing in the boat which
could catch onto your clothing. If you fall out you don't want to be
tangled up with your canoe underwater. |
 |
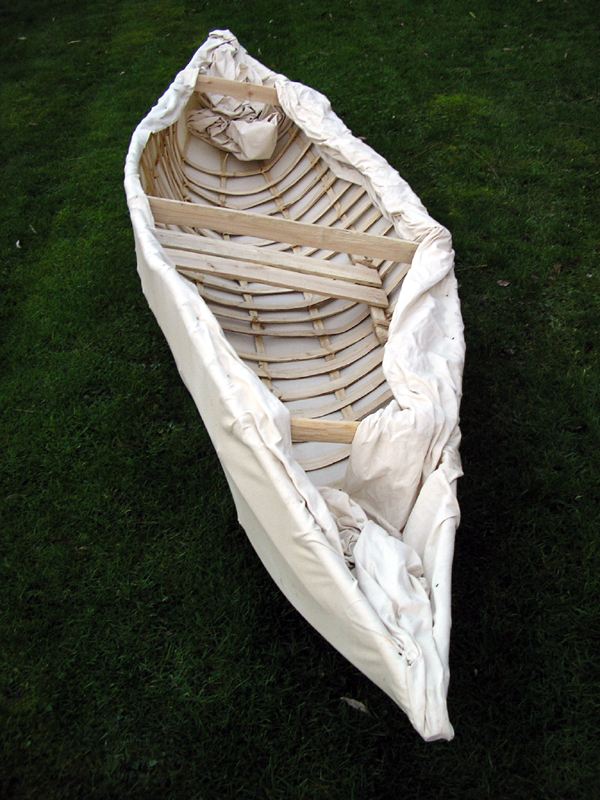
| When the main structure of
your canoe is finished to a good standard it is time to fit the canvas!
This is the exciting bit! I purchased my
canvas from :
http://www.whaleys-bradford.ltd.uk/products.cfm?catID=3#446
I chose the 9.5oz Cotton canvas. Make sure you
choose a piece that is wide enough and give yourself plenty of extra to
give you something to pull on. 9.5oz canvas will enable you to stretch it
and will fit to the shape of your boat a treat.
You will also need tome small tack nails. I used 1/4
Blue tacks from Focus |
 |
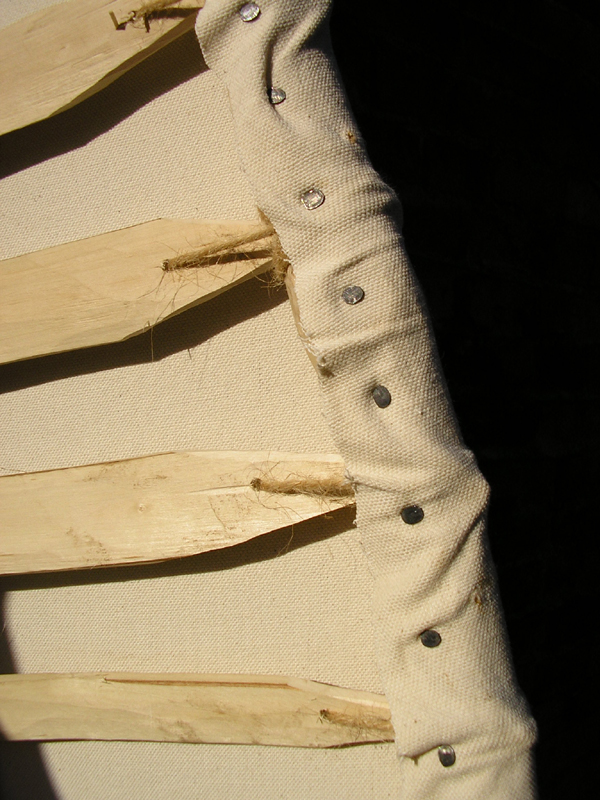
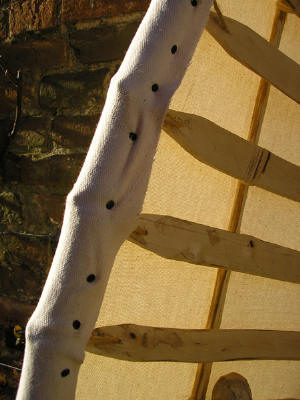
| You need to get this canvas
stretched over your canoe as tight as possible! No slack! Some people use
ratchets and its always a good idea to have someone to help at this stage.
However I did it without ratchets or help and I managed to get it pretty
tight!
Someone once said to me that if your hands aren't
bleeding by the end its not tight enough! My hands were bleeding so I left
it at that.
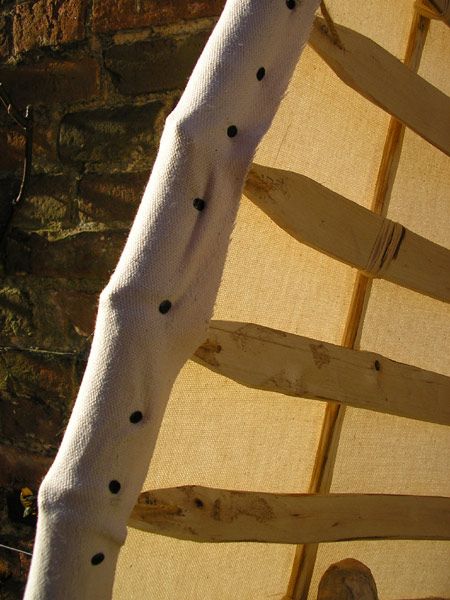
The way I did it was to put a couple of nails in one
side and then pull it up real tight the other side with all your strength!
Bang the nails in on the inside of the boat into the Gunnels. Basically
just go for it and use a bit of common sense. You should be methodical
too.
Because I was doing all this by myself it was very
tricky! I had to hold the canvas tightly in place whilst holding a nail in
place and then in the other hand hold a hammer! I don't know how I did it
to be honest! |
 |
| When the canvas is as tight
as you can get all over you can cut off the excess from around the top
edge. Spray the canvas over with water to
tighten it all up then leave to dry.
If you have got this far then you need a real pat on
the back! Email me and show me what you have done! I would love to see! |
 |
| Now for a spot of painting.
The paint will make your canvas watertight. use cheap paint that you use
for painting door frames, skirting boards... etc. |
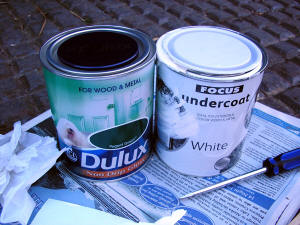 |
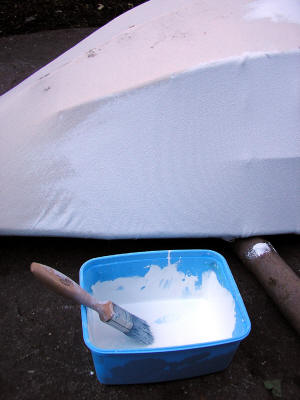
| I gave my canoe 2 coats of
under coat and 2 coats of over coat. You just need enough paint to fill
the weave of the canvas. After each coat had dried I rubbed it over very
lightly with very fine sand paper just to take the roughness off it.
When a coat of paint is nearly dry if you rib it
over with your hand the paint will fill the weave better and it will be
smoother.
Paint like this may sometimes take 24 hours to dry.
Don't get impatient! It will all be worth it!
Whilst the paint is drying you can be making your
paddle. |
 |
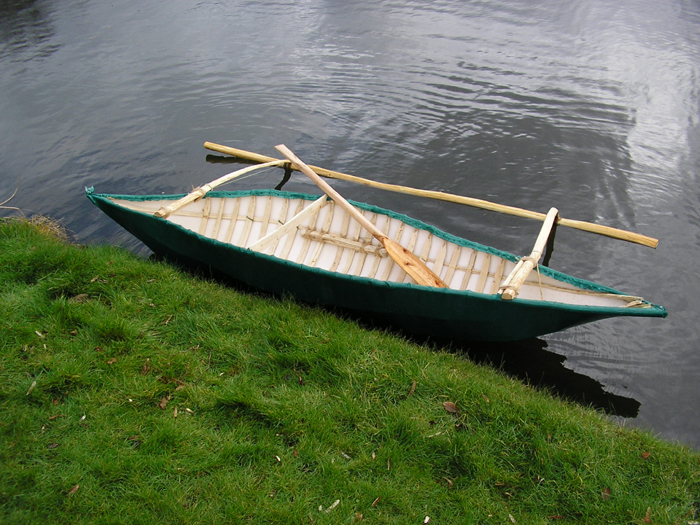
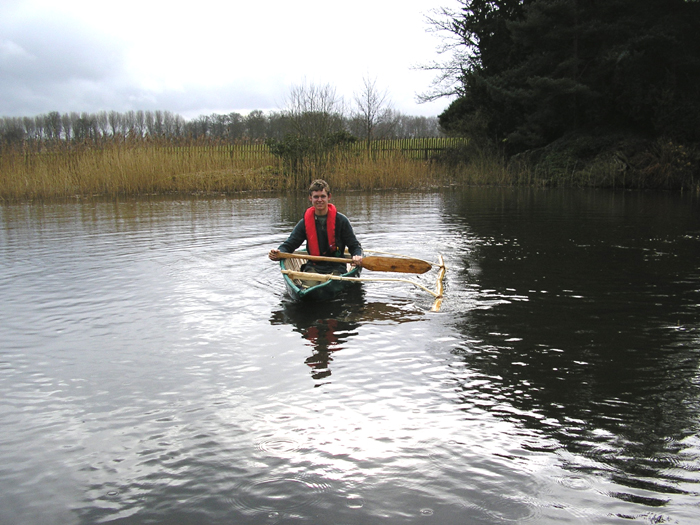
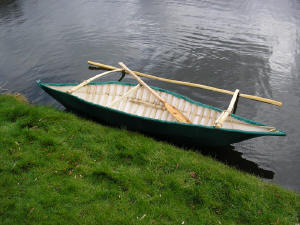
| Put your life jacket on and
take her for a test paddle! I funny thing
about my canoe was that it was the first canoe I had ever been in and it
was one I had made! A great feeling indeed!
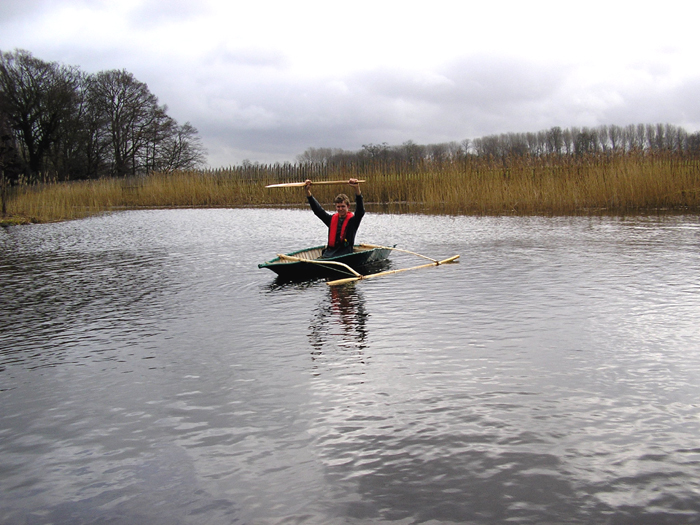
Being as it was my first time in a canoe I decided
to make an outrigger for a bit of stability. The canoe is also very rocky!
With the outrigger though it is a joy to paddle!
Don't sit in your canoe on land because you will
risk putting too much strain on its framework! |
 |
|
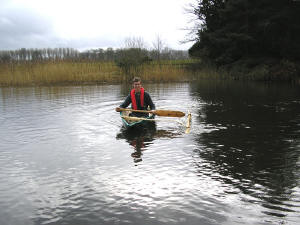 |
| MISSION ACCOMPLISHED! |
 |
| For more
information and great advice visit the this thread on the Bushcraft UK
forums!
http://www.bushcraftuk.com/forum/showthread.php?t=17469
|