 |
| Home | How-to Articles | Jon's eBooks & Books | Blog | Gallery | About Jon | Contact | Links |
|
||||||||||||||||
|
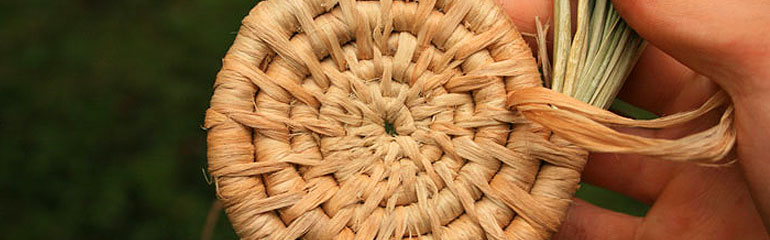
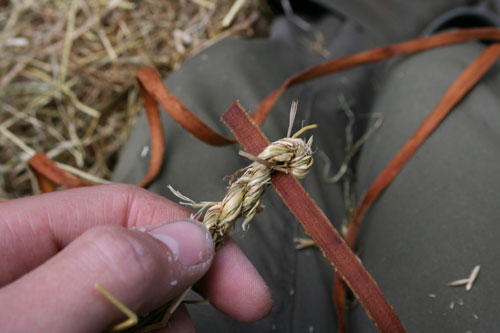
To start the basket take a small handful of hay and make the end into a piece of cord so that you have an eye through which you can thread your binding material (Elm bark in this case)
|
 |
|||||||||||||||
|
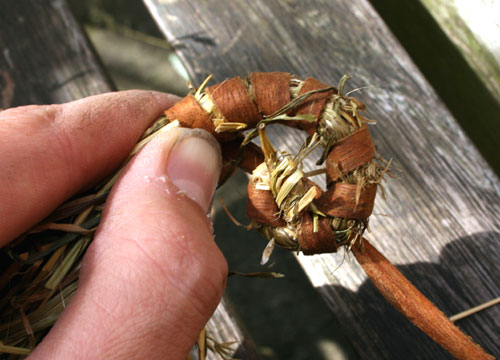
Begin to wrap the strip of bark around the core of hay for a few centimetres. Gradually encourage this sausage of material to begin to spiral around.
|
 |
|||||||||||||||
|
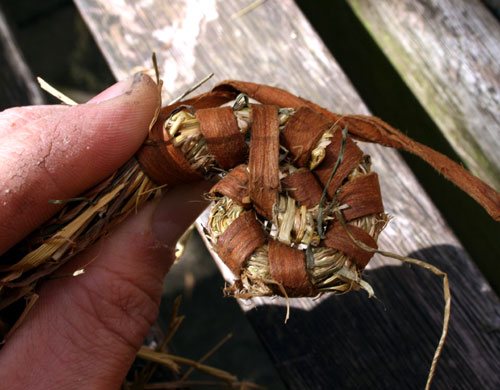
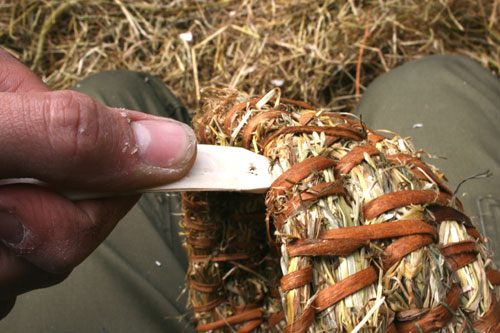
From now on every couple of wraps you make with your binding material, take the end and thread it under and around the previous layer of the coil. If you have trouble threading between the layers you can use an awl to separate the fibres. With a fairly tough binding material like this Elm bark you can point the end with your knife to make it easier to thread between the layers. For a softer binding material such as string I like to whittle a large wooden needle and use this for threading. |
 |
|||||||||||||||
|
You will need to keep adding hay into your fibre core to keep it an even thickness. The thickness of the coil is up to you.
|
 |
|||||||||||||||
 |
||||||||||||||||
| When your bark strip is about to run out you can weave/ thread the end down between the coils to lock it in place. You can introduce new binding material by doing the same but outwards towards the edge. |
 |
|||||||||||||||
 |
||||||||||||||||
 |
||||||||||||||||
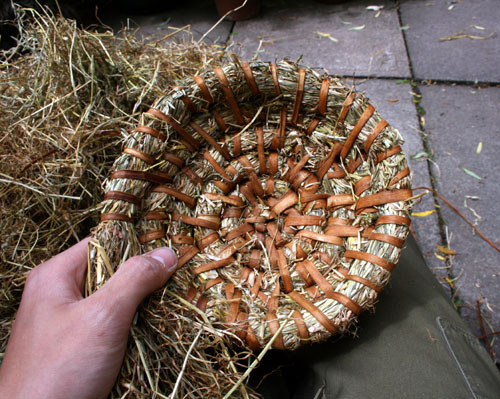
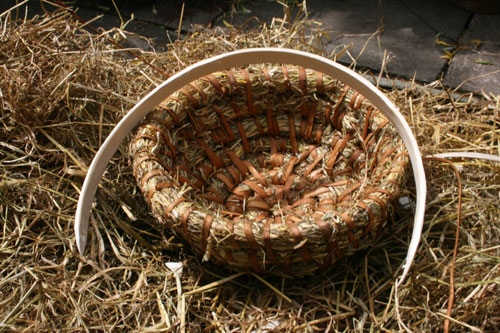
It won’t be long before your basket has grown to a usable size. You can make a basket as big or small as you like with walls as steep or gradual as necessary depending on your needs. |
 |
|||||||||||||||
|
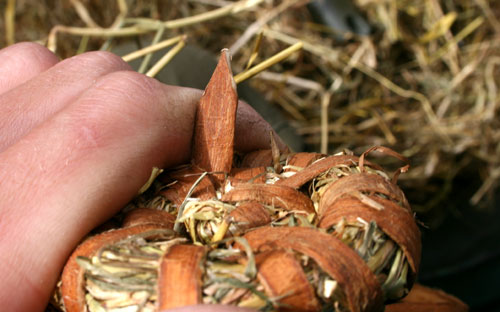
When you are happy with the size of your basket stop adding in as much hay and eventually stop altogether so that core of fibres tapers off.
|
 |
|||||||||||||||
| You can make handles from various materials. A wooden handle is rigid and strong which maybe suitable for your needs. The design or use of a basket may mean that a handle is not required. |
 |
|||||||||||||||
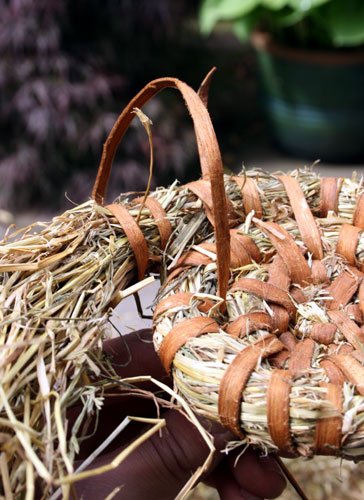
| For my basket I made this simple wooden handle from some Willow. I have made a couple of wholes about 2 centimetres up from the ends which I carved into points |
 |
|||||||||||||||
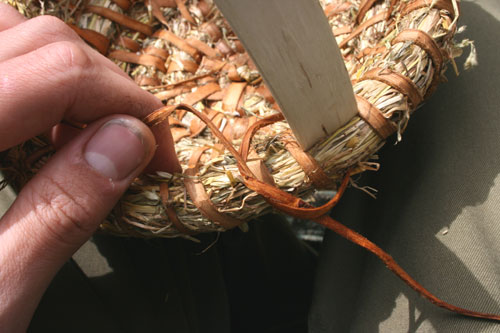
| Push the ends of the handle into the warp making sure that the handle is central and straight. Now you will need to fix the handle in place, this is where the wholes come in handy. |
 |
|||||||||||||||
|
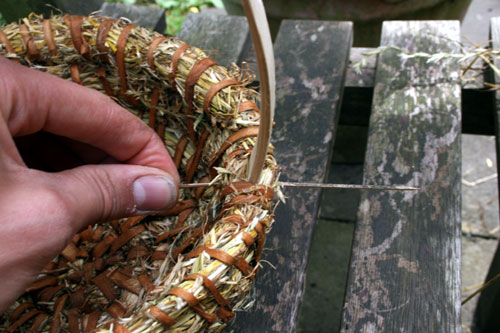
Push a thin stick or awl through the warp fibers and whole, and then out the other side to separate the fibers. Now pass string through this passage and tie the handle in place.
|
 |
|||||||||||||||
 |
||||||||||||||||
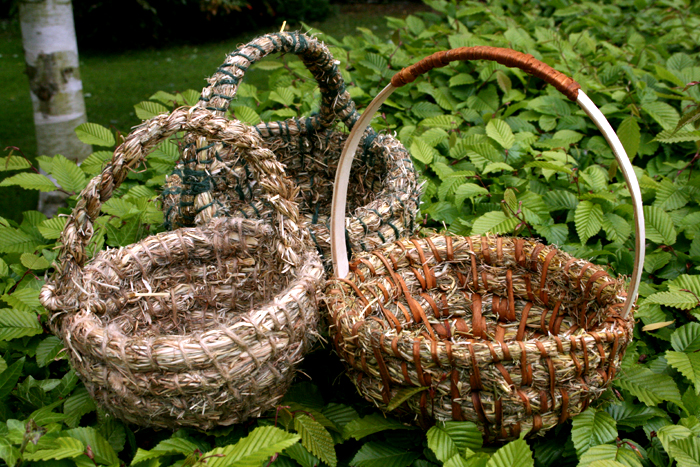
| I decided to bind the top of the handle with bark to complete the basket. |
 |
|||||||||||||||
|
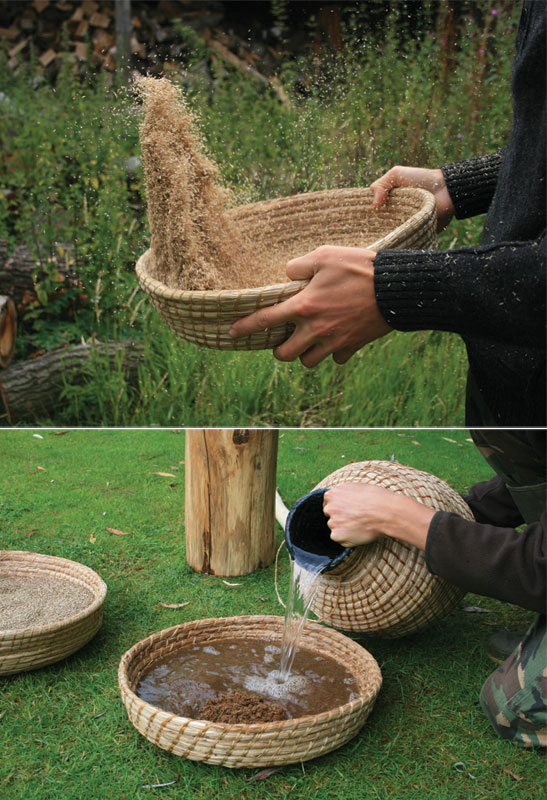
The two baskets shown here on the left were made with hay and modern string. They have rope handles which were made from hay too.
|
 |
|||||||||||||||
| These baskets are made from Sedges and is bound with inner lime bark fibres. |
 |
|||||||||||||||
| This one uses a pine cone as a handle on the lid.
|
 |
|||||||||||||||