| |
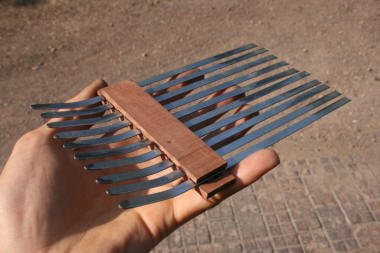
For this project I
recycled some items I had lying about: a mini wine crate and
some tines from a broken garden rake. I realise it is unlikely
that you will have the same materials, so you'll need to be a
bit inventive too. Plywood off-cuts
or thin sawn timber are perfect for making the
box. The comb can be made from flat rods (like my garden rake
tines), or round, like knitting needles or carpentry nails.
Either way, they should be pretty stiff. Metal is good if you
have it, but I don't see why wood or bone couldn't be used. If
experimenting with an all-wood version, I would imagine that yew
or holly might work well as they are very strong.
The
construction of your picker will depend on the materials you
have, but here is how I put mine together... |
 |
|
| |
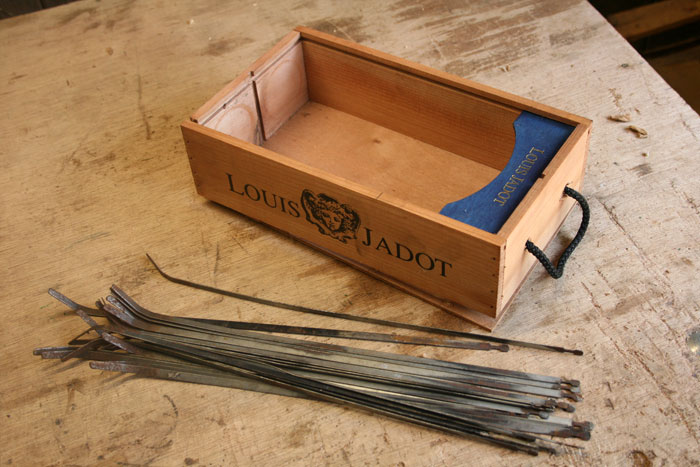
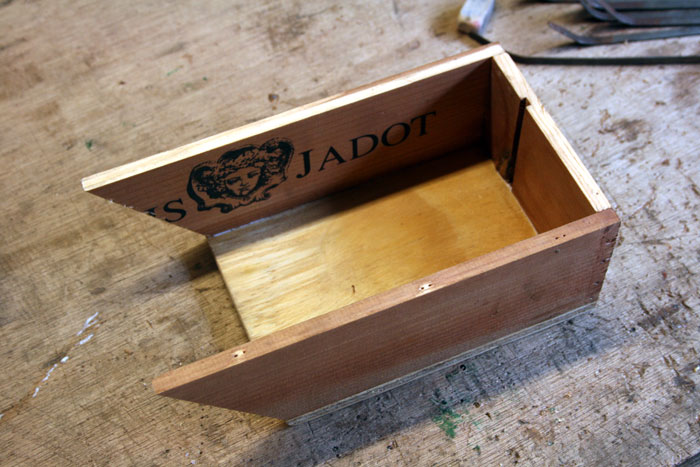
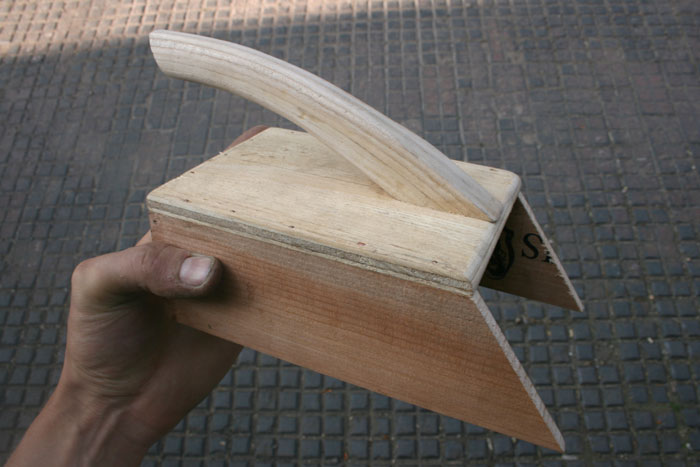
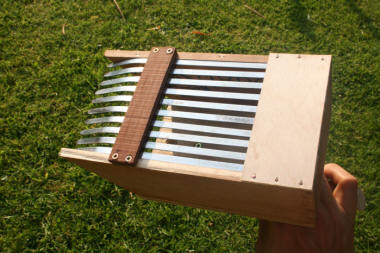
Firstly, I
disassembled the wine crate, then cut the pieces to more
suitable dimensions to suit my design. Notice the angled front
too. For reassembling I used both nails and wood glue.
Note: it is wise to
carefully plan the internal width of the picker according to how
many prongs you'll have and their spacing (specific prong
spacing is mentioned further on...) |
 |
|
| |
I fitted the handle next
(an off-cut from another project) because it needed to be
screwed in place from the inside, this wouldn't have been doable
when the comb is fitted. Many other handle designs are
possible... |
 |
|
| |
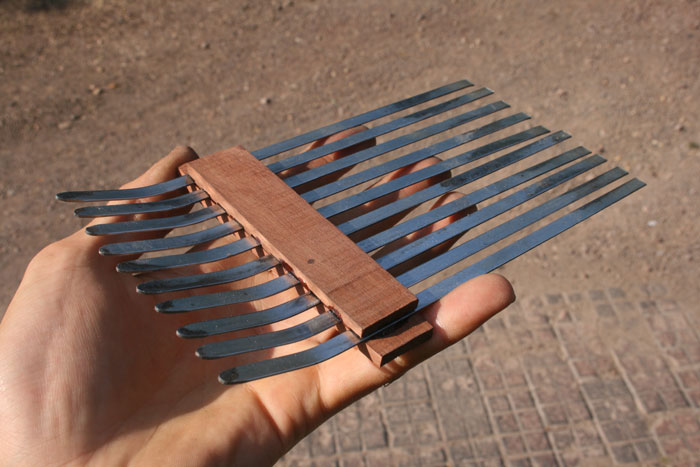
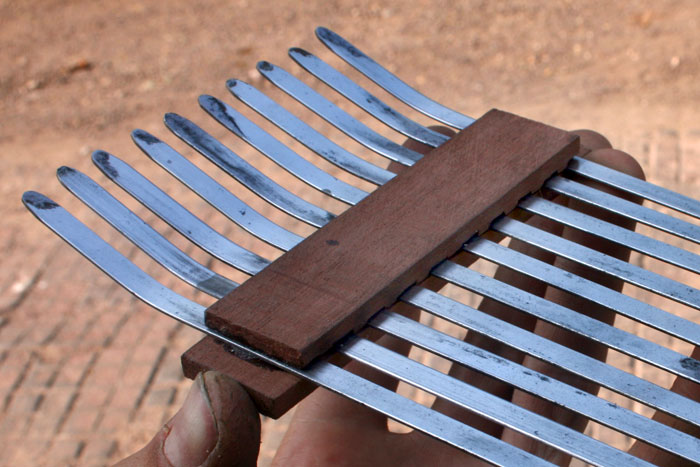
Next, I needed to make
the comb. I had never physically inspected another berry picker
of this kind before, so I had to make my best guess for the
spacing between the prongs. I decided to go for approximately
6mm, thankfully this turned out to work well. I have since
measured the spacing of the prongs on commercial pickers and
found that they are spaced about the same.
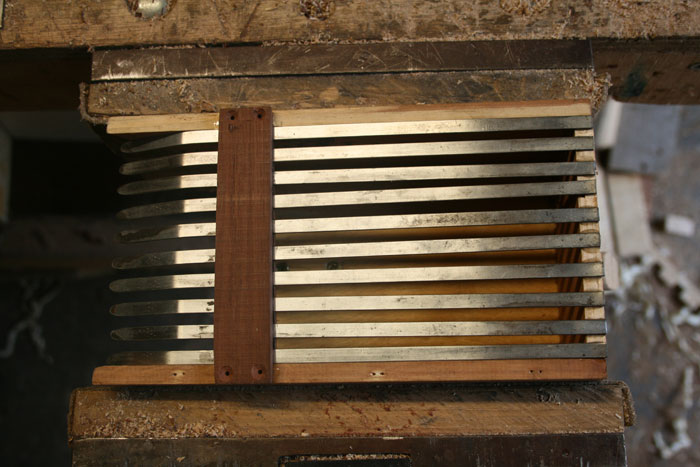
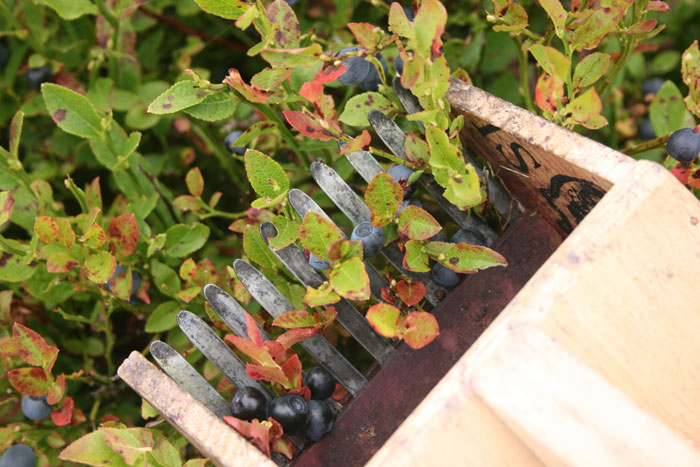
Note: in this design, the
metal prongs extend all the way to the back of the picker,
providing the full bottom surface. This is not strictly
necessary, a sheet of wood could have been used behind the comb.
Having the prongs go all the way to the back does however allow
a few of the caught-up leaves and other debris to fall through.
It is also a strong design.
The next few pictures show
how I assembled and fitted this comb. |
 |
|
| |
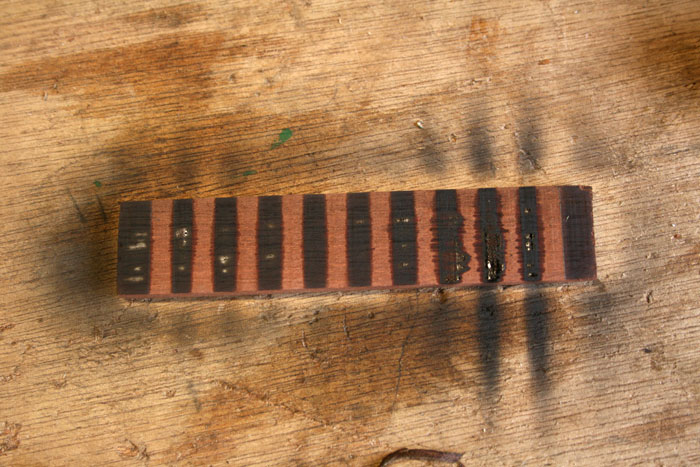
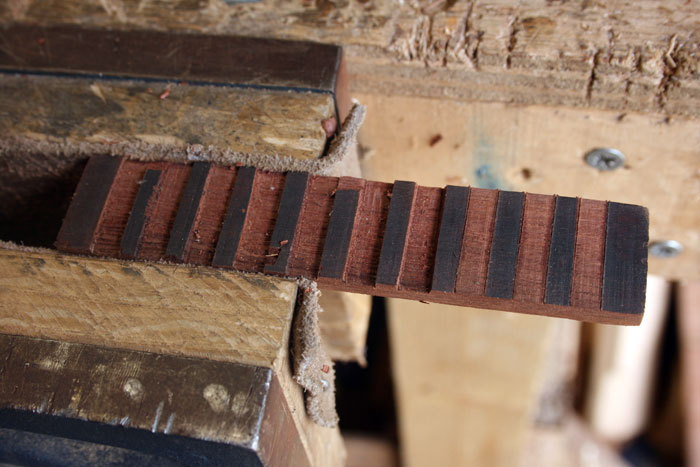
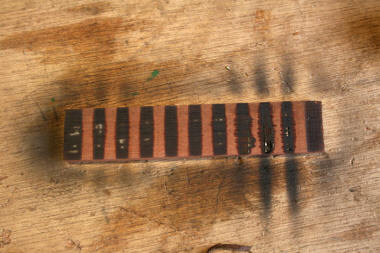
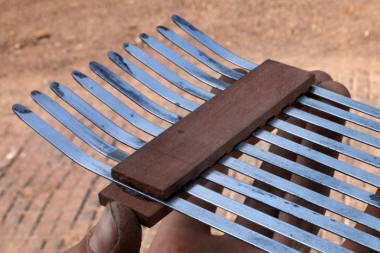
I secured the
prongs in place at the correct spacing between two slats of
hardwood. I used something which looks like teak or mahogany,
but oak, ash or beech would have worked fine. To ensure the
prongs would be held permanently at an exact spacing I decided
to recess each prong into a groove made in one of the slats. You'll see what I mean in the following
pictures...
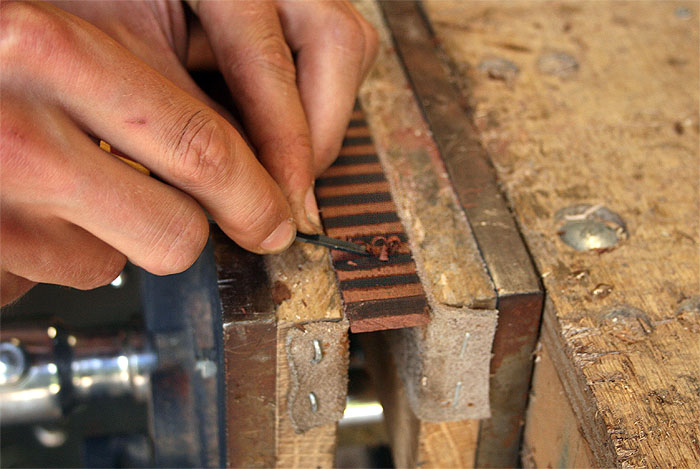
I laid out the prongs on
top of one of the slats at EXACTLY the right spacing, then
took a can of spray paint and sprayed over the prongs and wood. |
 |
|
| |
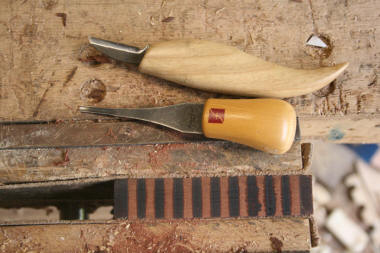
I could then easily see
where to carve the recesses |
 |
|
| |
For this job I used a
sharp knife and a palm chisel. A Stanley knife and a standard
narrow woodworking chisel would work fine too. |
 |
|
| |
I first made vertical cuts
to establish the sides of the recesses, using a ruler to guide
the knife. |
 |
|
| |
Then I chiselled out the
interior of each recess. More vertical cuts needed to be made
every so often in order to get down to depth. |
 |
|
| |
You can see here some of the recesses
chiselled out to depth. |
 |
|
| |
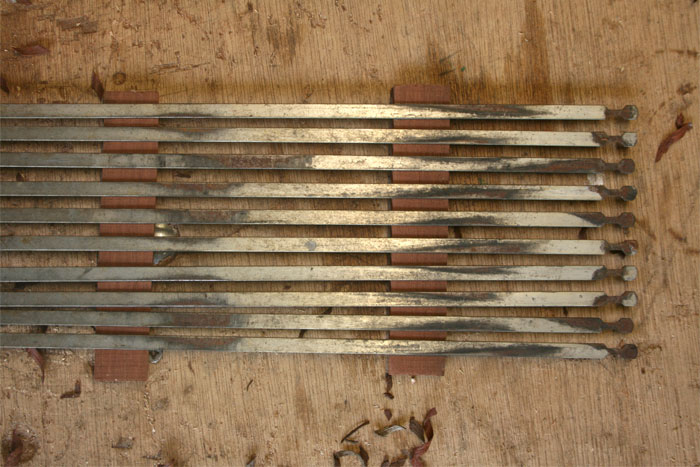
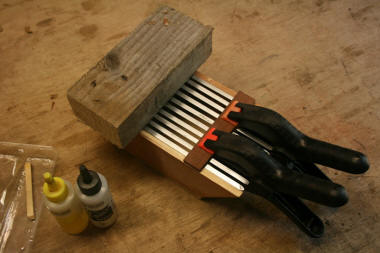
Before fitting the
prongs, they needed to be cut to length with a hacksaw and cleaned up with some
fine sand paper.
They were then sandwiched
in place between the two slats of wood, using 24 hour epoxy glue
for a reliable fix. To ensure everything was aligned perfectly,
the assembly was placed in its final position until the glue had
set. |
 |
|
| |
A close up picture
showing how the prongs are sandwiched between the two wooden
slats. |
 |
|
| |
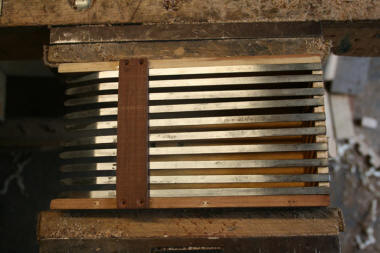
All that remained was to
fix the comb permanently in place. I used four small screws to
secure the bottom wooden slat to the box, and more epoxy at the
back end of each prong. |
 |
|
| |
I also added a rectangle
of thin plywood at the back for extra security. |
 |
|
| |
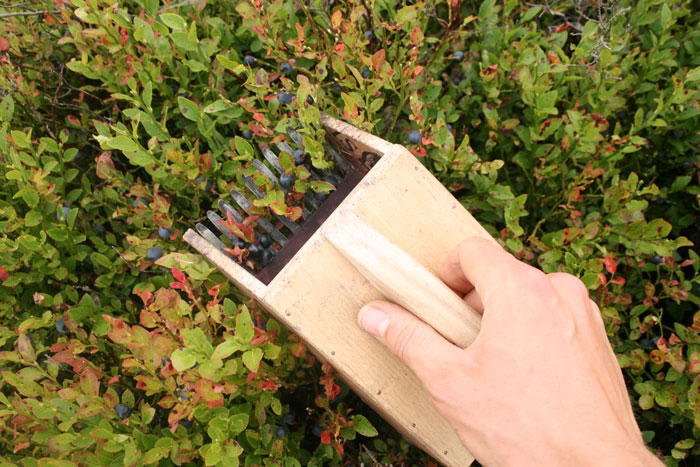
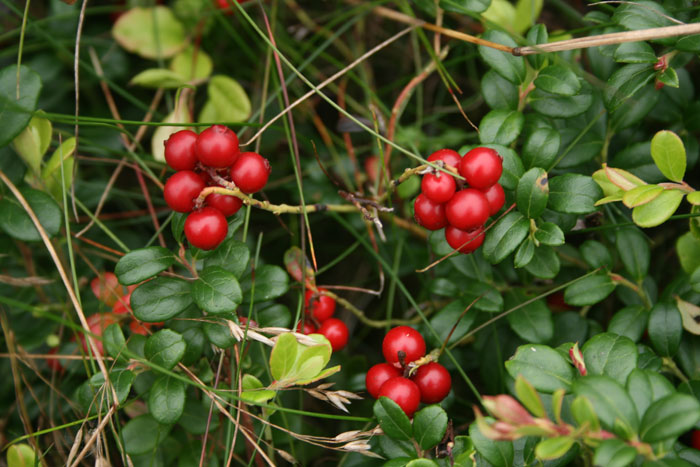
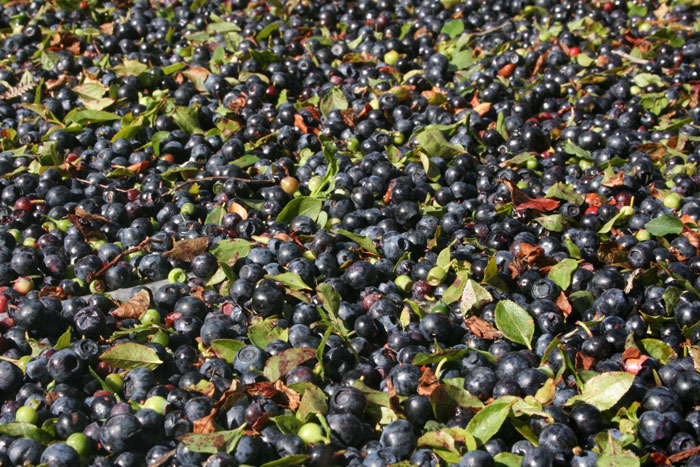
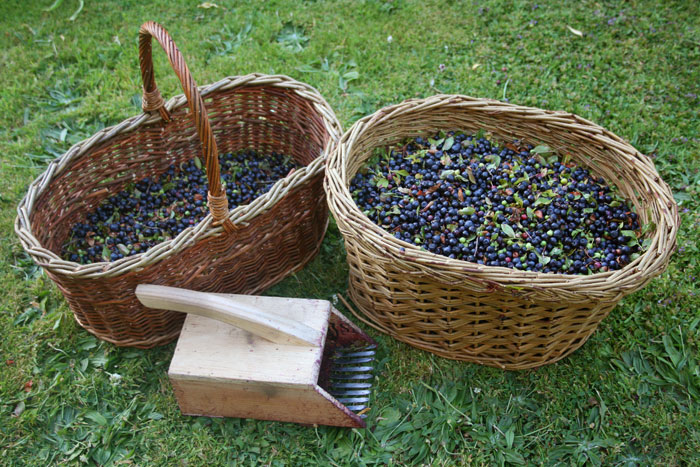
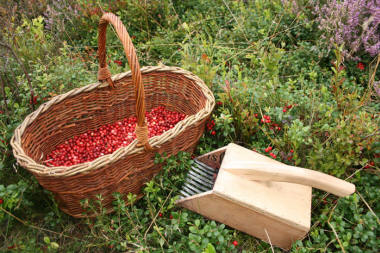
Harvest time! Cowberries
galore. |
 |
|
| |