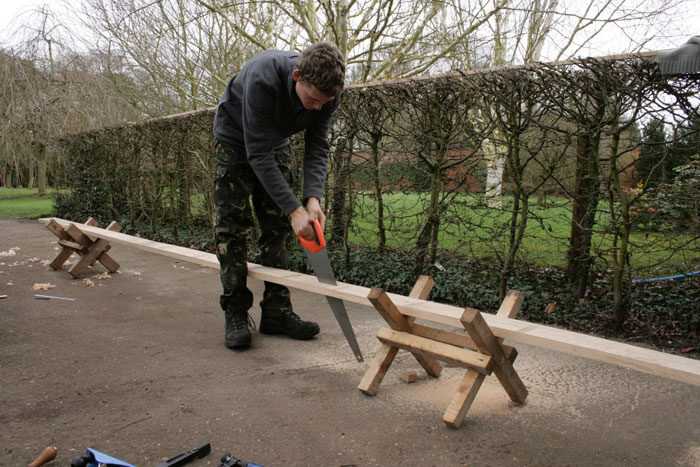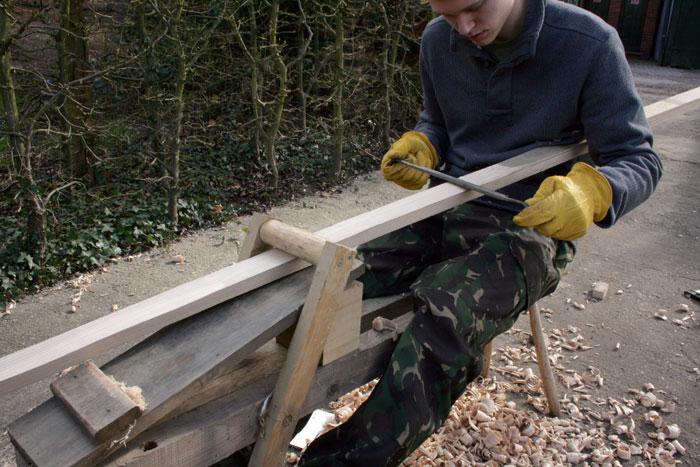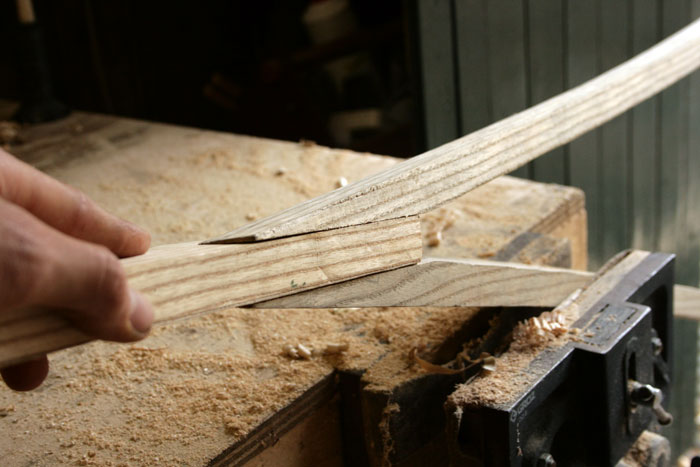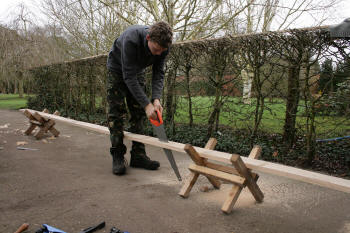
Cutting Gunnels from Ash wood plank by hand. A good Sharp
saw Is a necessity if you don't want to use a circular
saw... |
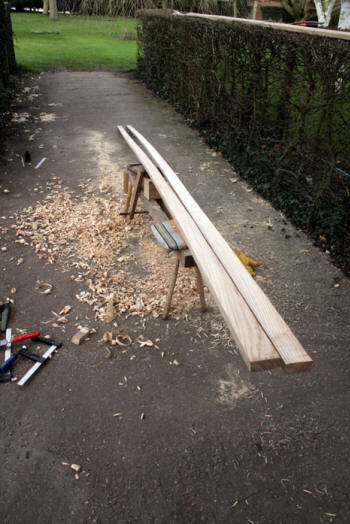 |

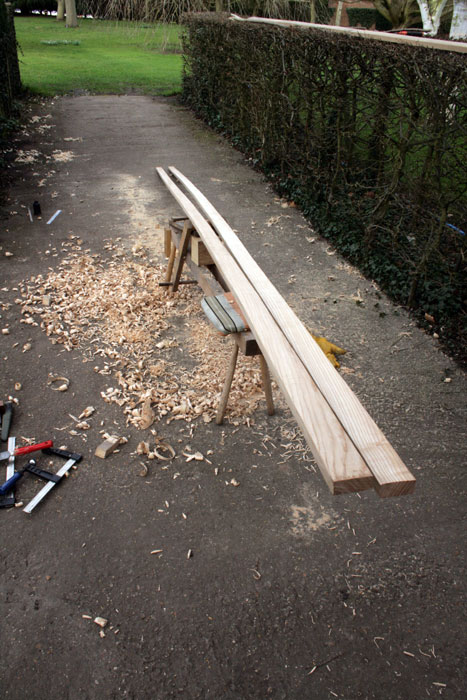
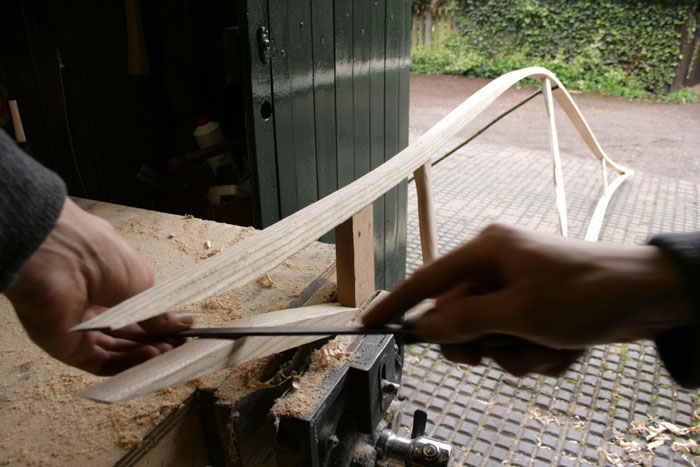
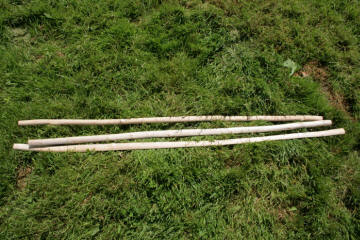
Shaving down to final dimensions using draw knife and shave
horse (20mm x 55mm with gradual taper towards ends - down to
3cm high with no change to width. |
| |
|
 |
 |
|
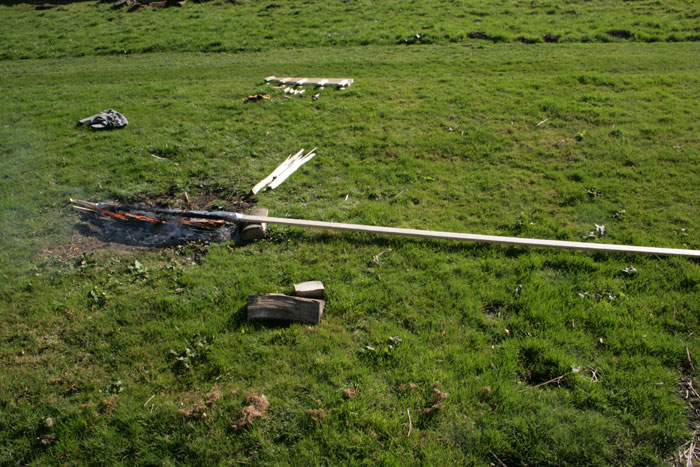
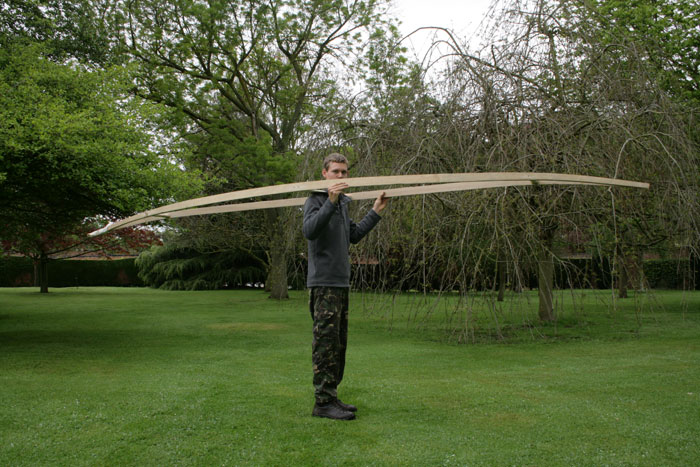
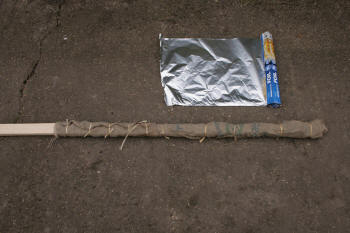
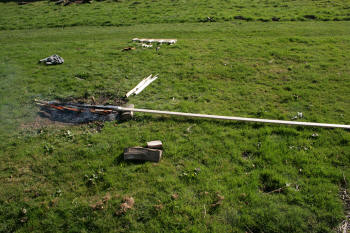
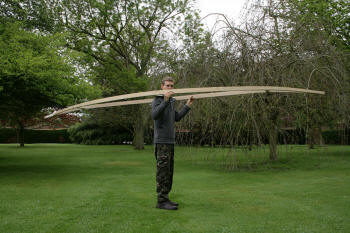
Steam bending
Indian ends on gunnels. Simply wrapped wood in wet hessian
sacking and
aluminium foil then propped over fire. Steamed for 1.5
hours. |
| |
|
 |
 |
|
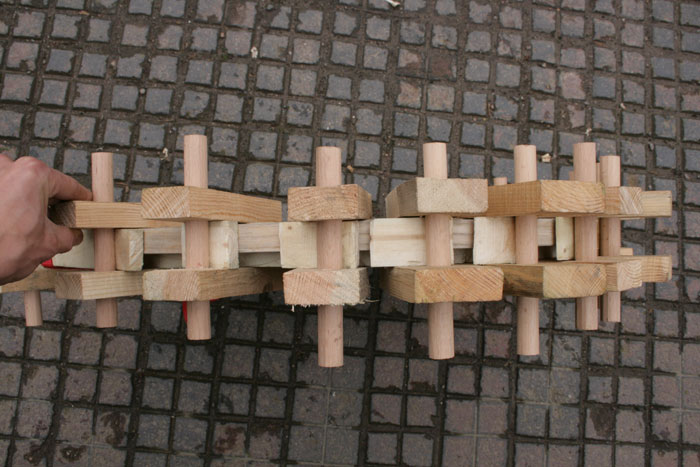
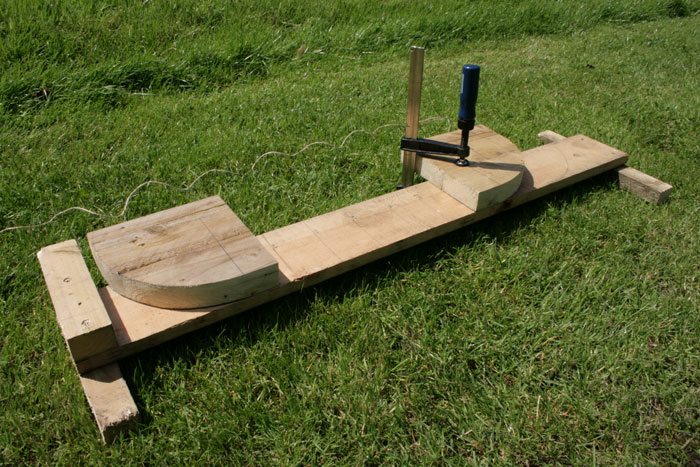
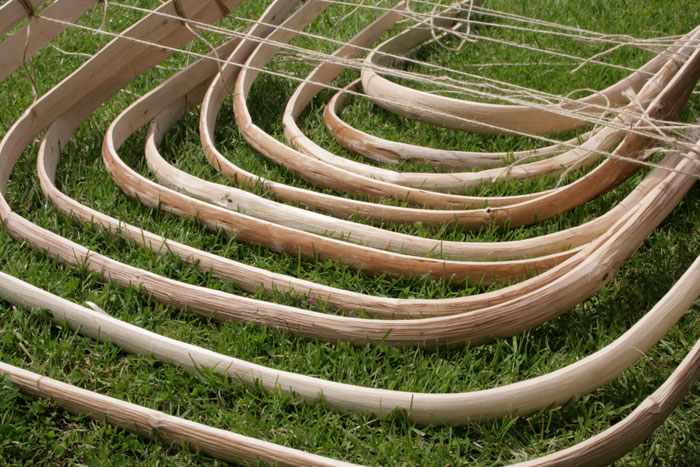
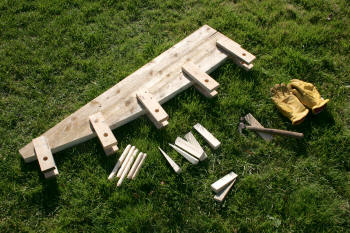
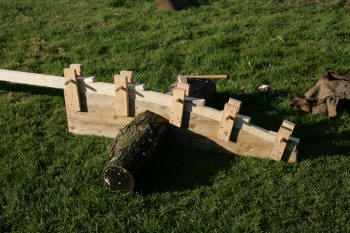
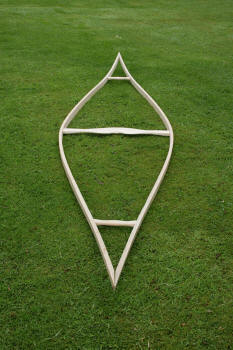
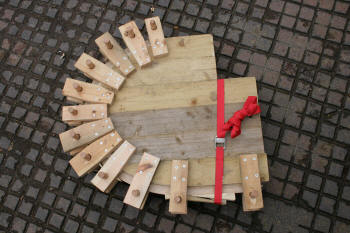
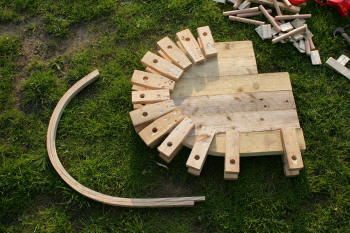
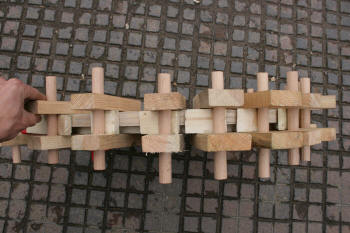
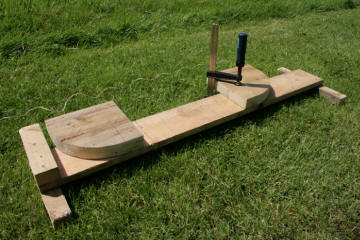
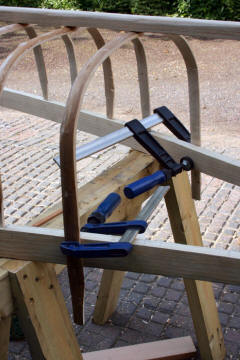
Form made from
scrap wood - dowel and wedge system. Form needs to be more
extreme in shape as wood will relax a little. Leave wood in form for
several days for wood to dry and take new shape. |
| |
|
 |
 |
|
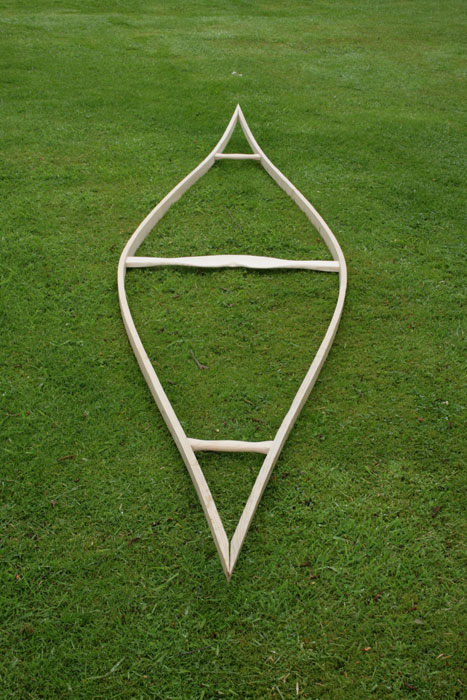
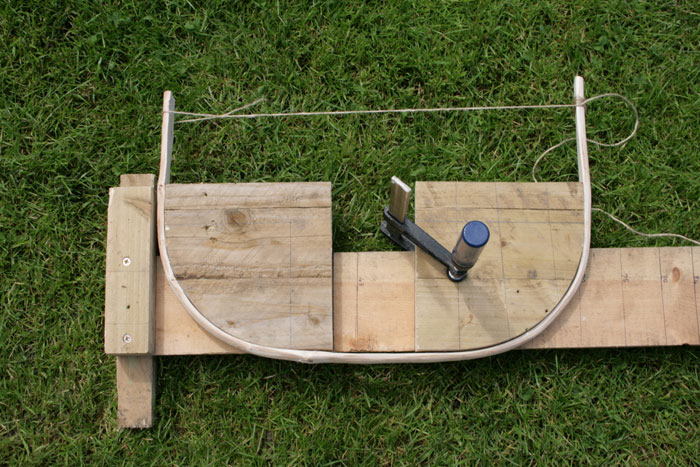
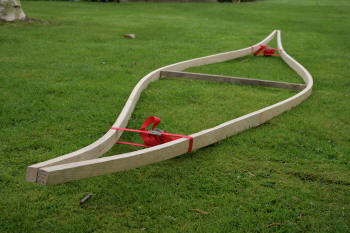
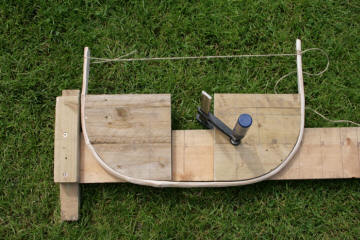
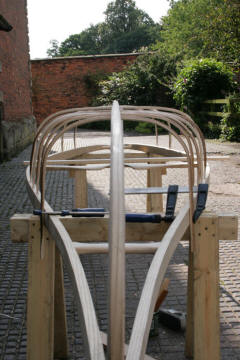
Temporarily
checking shape with straps and scrap wood. |
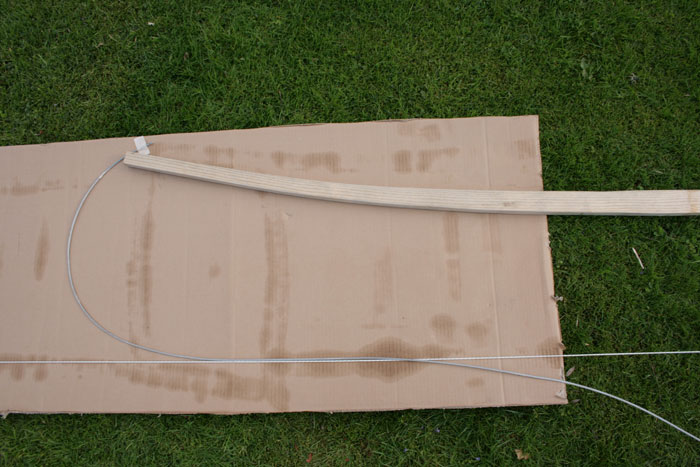
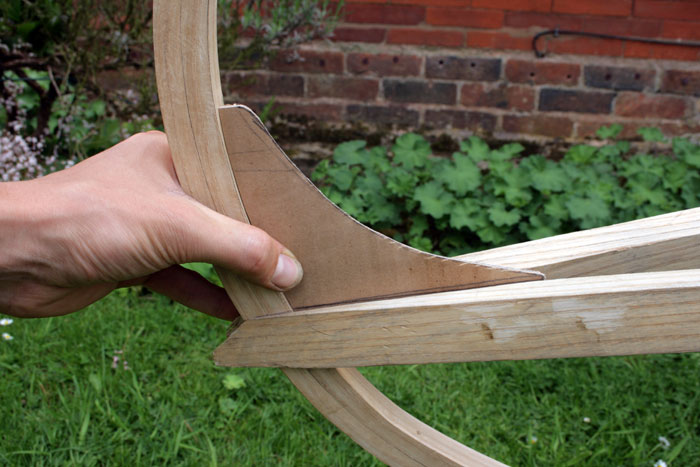
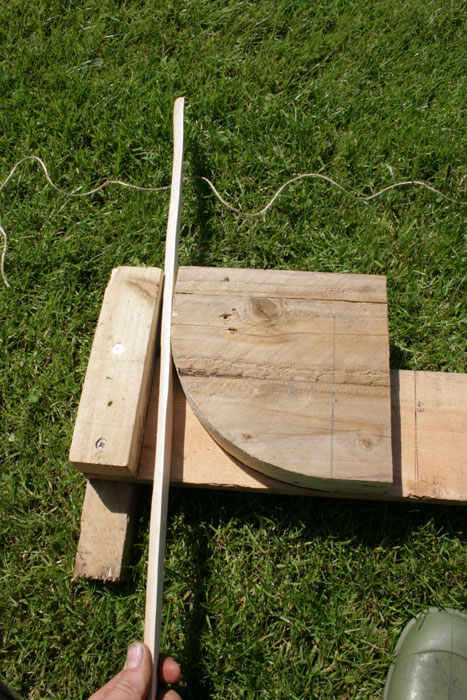
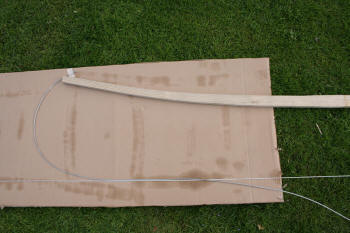
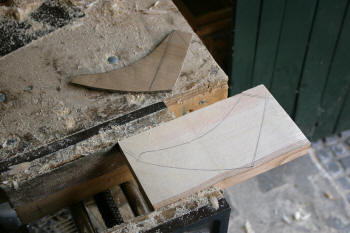
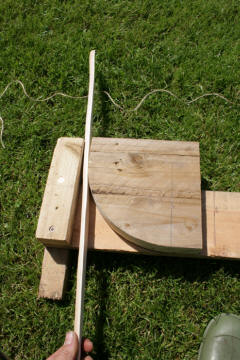
Envisaging stem
shape with cable on cardboard - Marked around cable with
marker pen and used as template for making steam bending jig later. |
| |
|
 |
 |
|
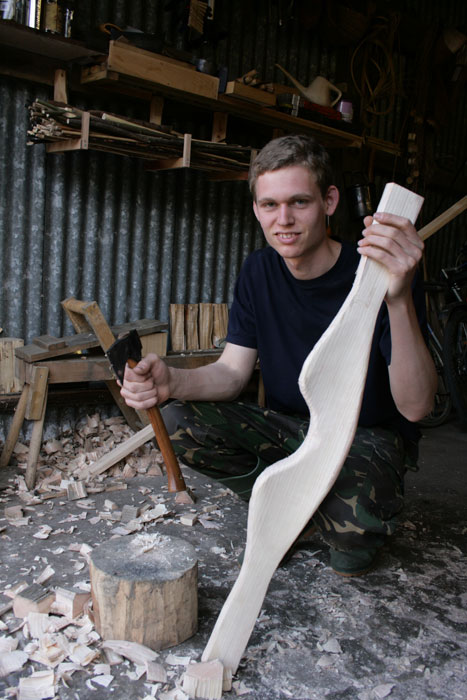
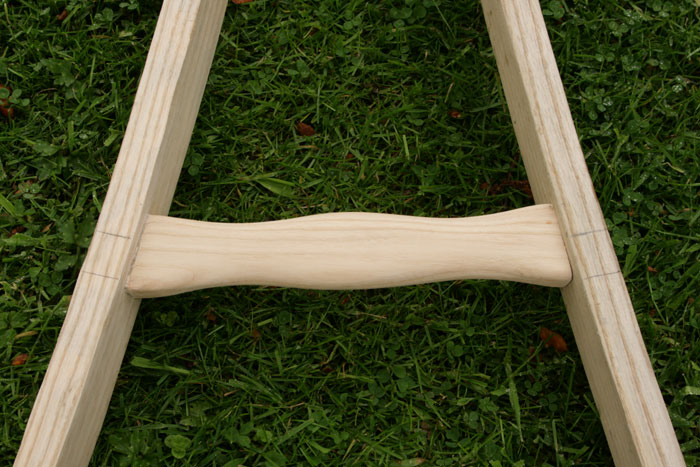
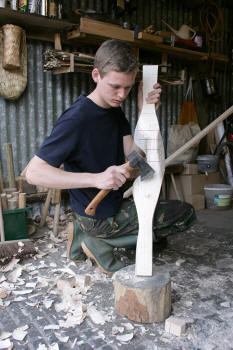
Carving Yoke from Ash wood - The yoke is a piece of wood
shaped for carrying the canoe on the shoulders (like a water carrying
yoke) - To be fitted at at centre of canoe as the main Thwart. |
| |
|
|
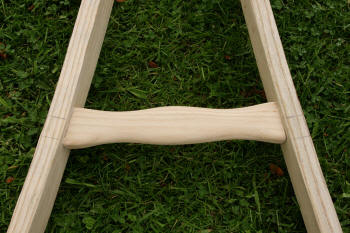
Smaller Thwarts carved and fitted along with Yoke - wood
screws used |
 |
 |

|
| |
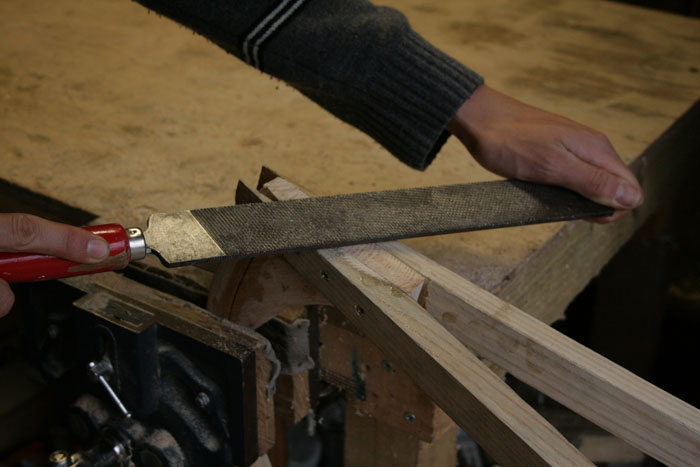
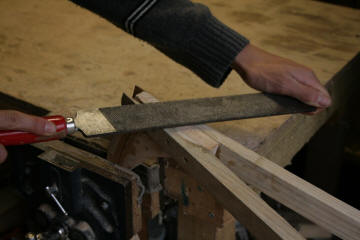
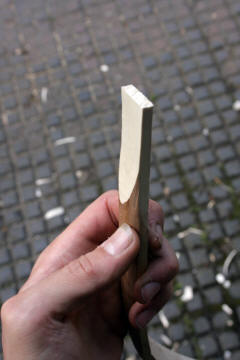
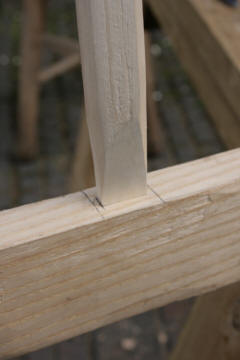
Shaping ends of
gunnels with rasp to receive curved Stem pieces later... |
| |
|
 |
 |
|
Checking fit
with wood of same thickness |
Stem pieces bent
in the same way as gunnels over fire with tin foil method.
Stems made from lamination of two pieces - one thick piece
would be liable to breakage when bending. |
| |
|
 |
 |
 |
 |
|
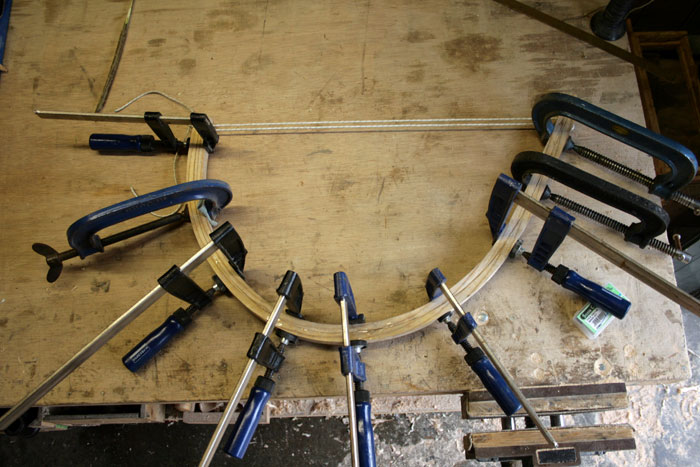
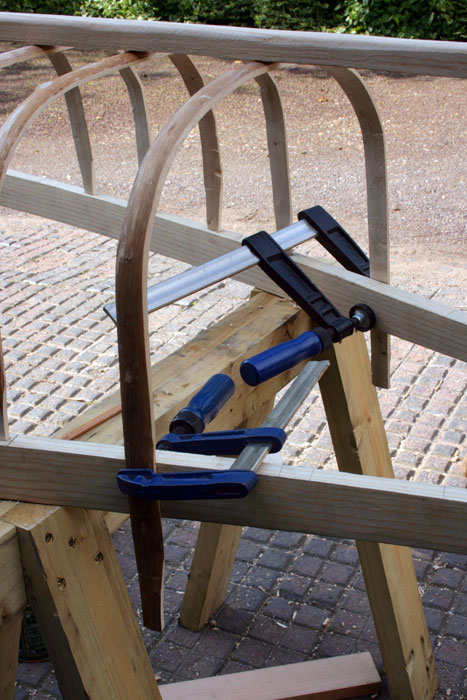
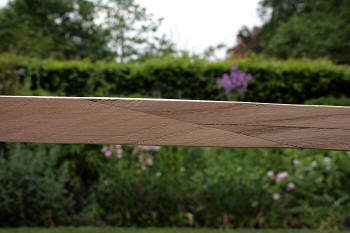
Gluing two
laminations of wood together for each stem piece with epoxy.
Clamp to ensure good bond. |
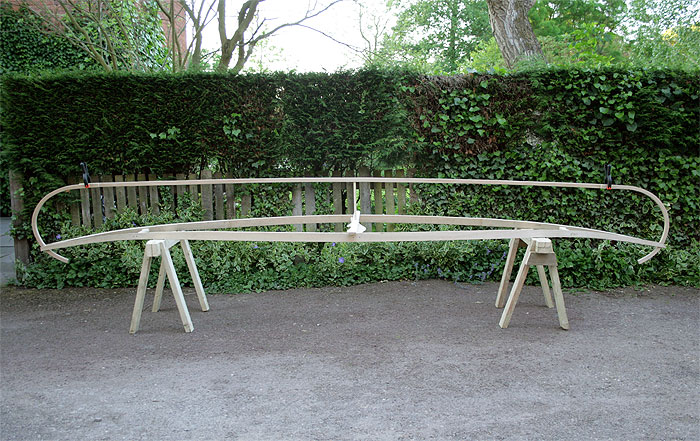
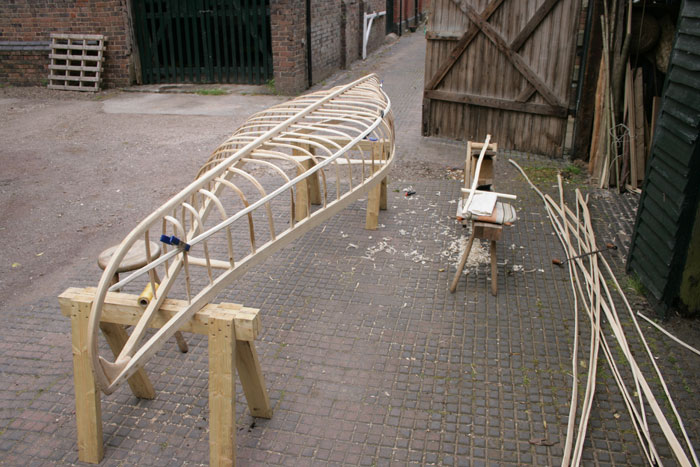
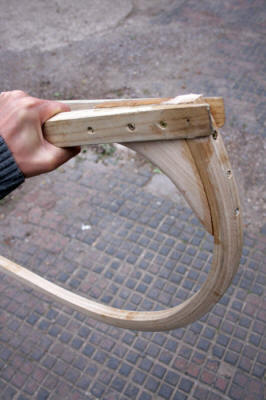
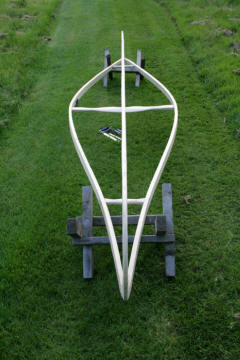
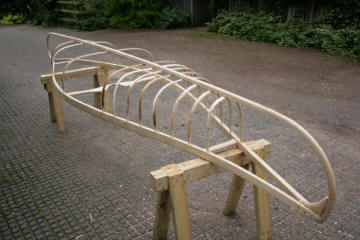
Keel baton cut
from Ash plank (20mm x 25mm
thick) and clamped temporarily along with Stem pieces to the
Gunnels to judge next stage. |
| |
|
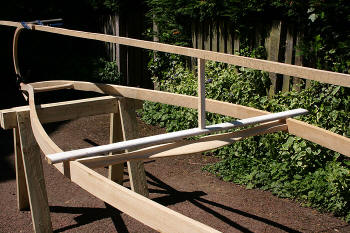
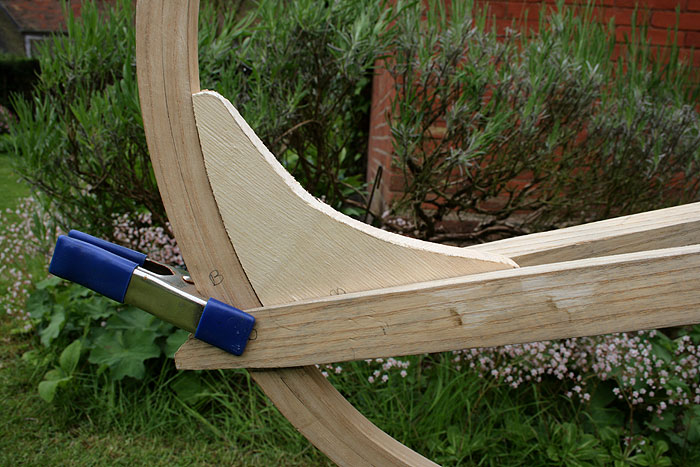
'T' shaped spacer at centre used for temporarily holding
keel baton at desired depth. |
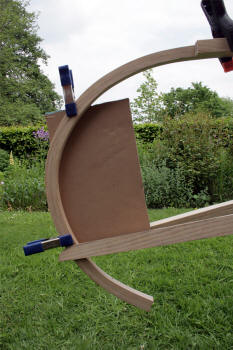
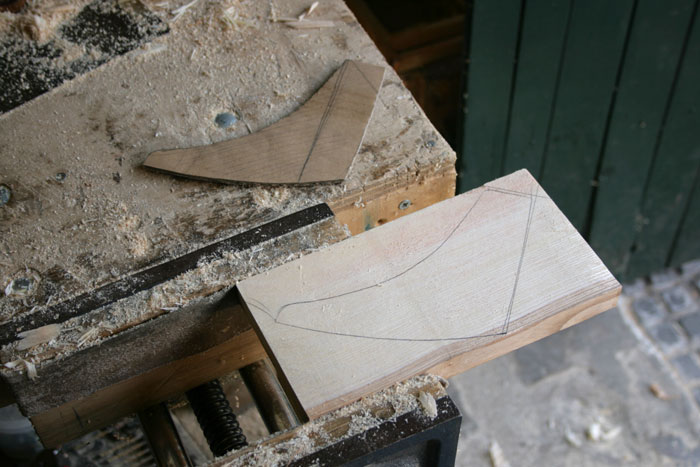
Making a cardboard template for a bracket
which will connect Stem pieces and gunnels together. |
| |
|
 |
 |
 |
 |
| |
Stem and keel baton spliced together - glued and
screwed. |
|
|
|
|
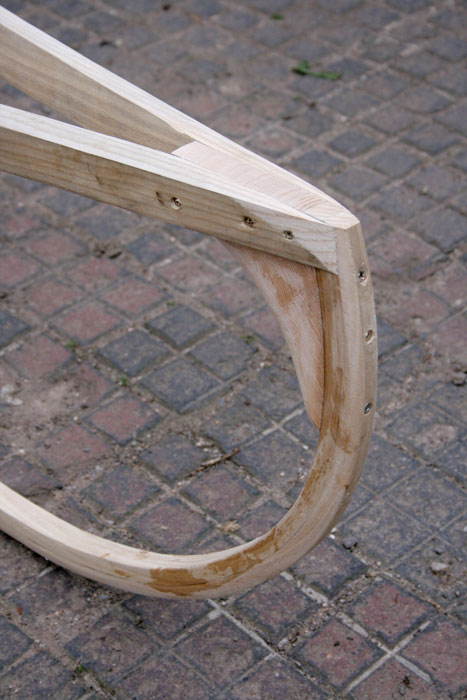
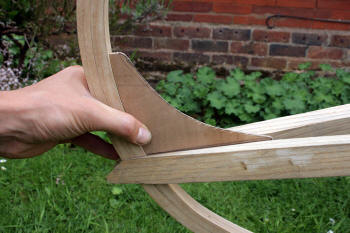
Bracket shaped and smoothed, then pieces permanently glued
and screwed together. |
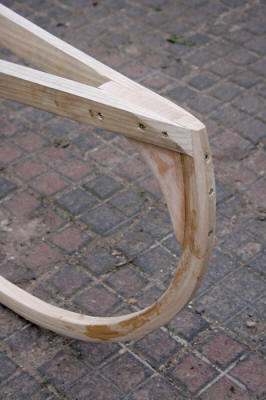
Further smoothing and shaping.
|
| |
Rasping wood joints flush, further
smoothing with cabinet scraper and sand paper. |
 |
|
|
 |
 |
|
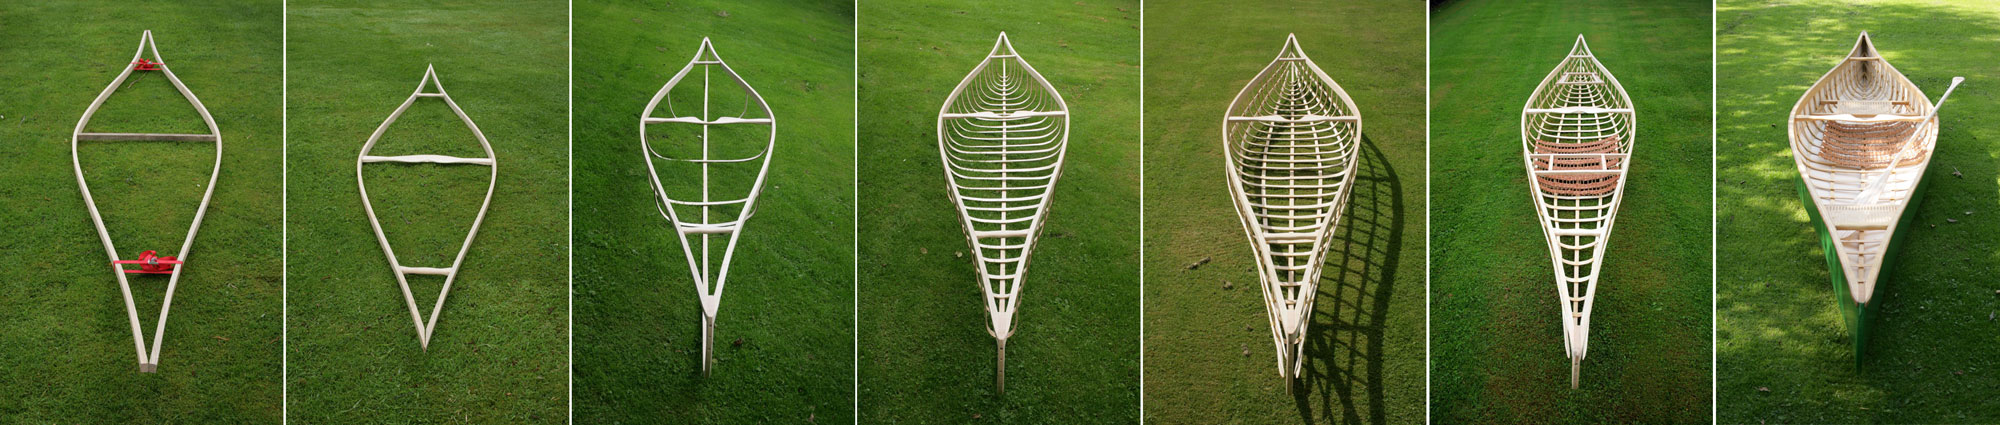
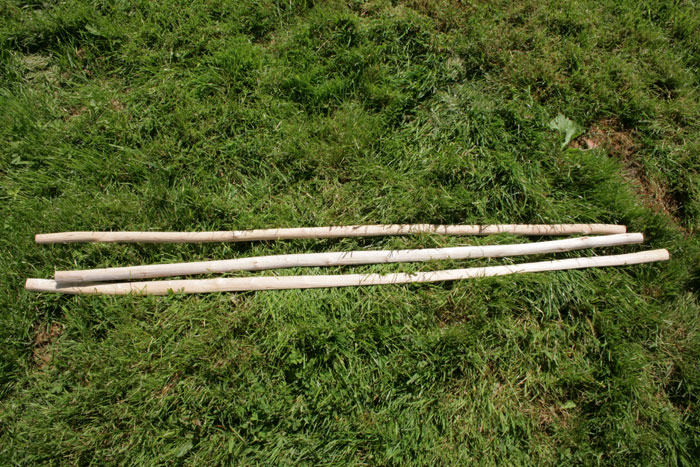
Time to make and steam bend the ribs to shape...
Ribs carved from green Hazel wood (fresh green wood bends a
lot better than dried) |
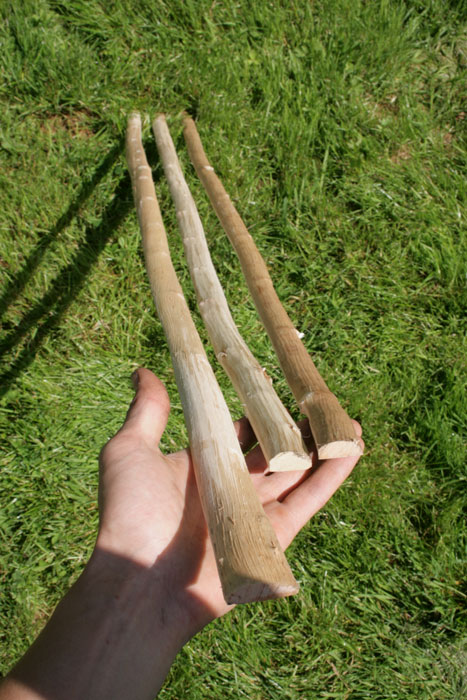
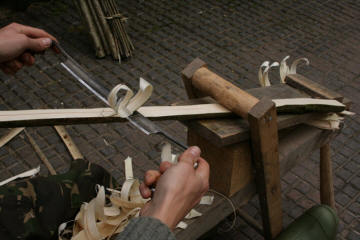
Carving flat ribs from straight shoots of
Hazel wood. One piece of wood can be split into two;
producing two rib blanks - These are then carved to correct
thickness using a draw knife and shave horse. |
| |
|
 |

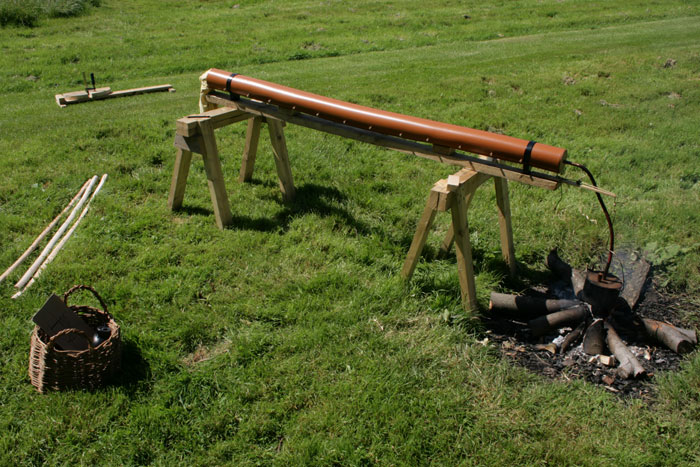
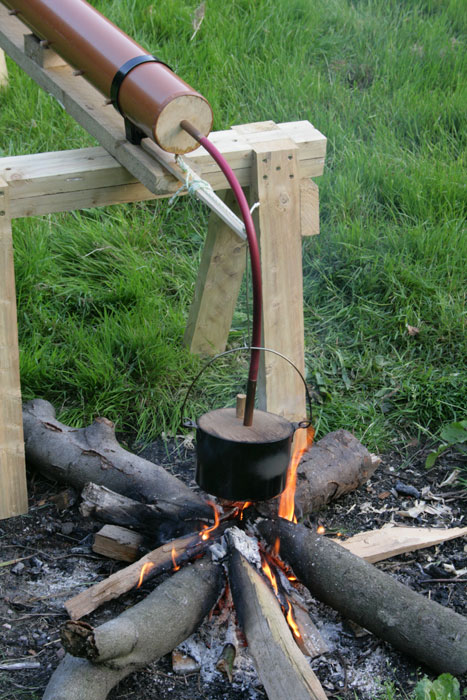
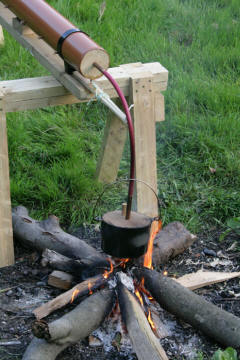
To steam bend the ribs I made this steamer from a drainage
pipe and a metal pot suspended over a fire. (Not that eco
friendly but neither is a marine plywood steam box...) |
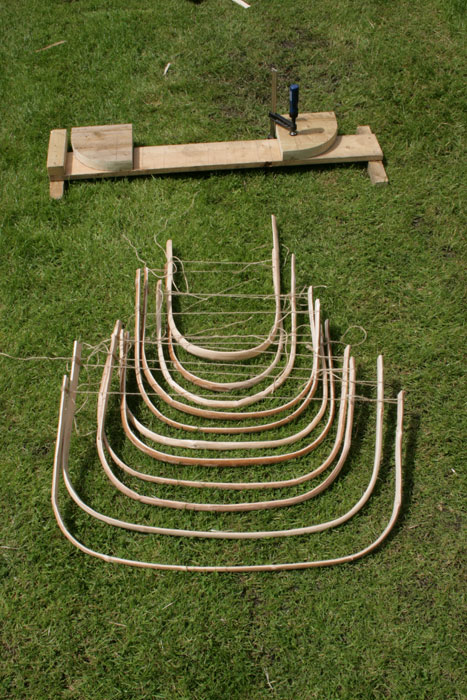
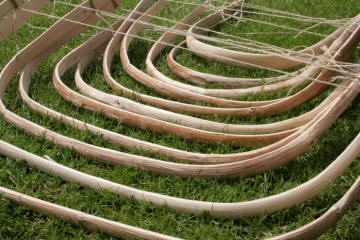
| Some of the ribs ready for
steaming to shape |
|
| |
|
|
 |
 |
|
pipe and pot Linked together with a
section of washing machine hose and two sections of copper
pipe as connectors. The hose is just the right diameter to
fit snugly inside the copper pipe sections. |
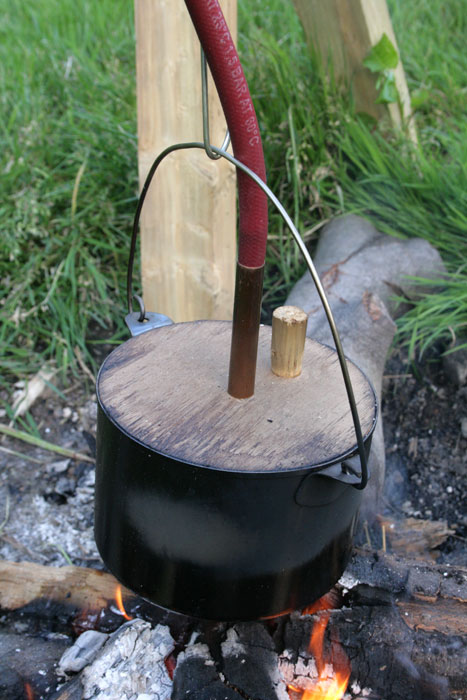
The metal pot is a cheap 'paint kettle'
from the DIY store. I capped off the top of the kettle and
the end of the drainage pipe with disks of plywood ensuring
a good tight fit. The two copper pipe sections are fitted
through these caps. In use - Pour in a few inches of water
and watch it doesn't boil dry... |
| |
|
 |
 |
|
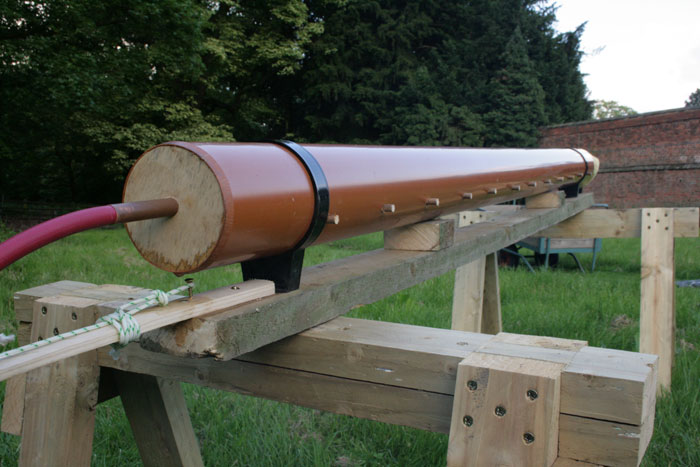
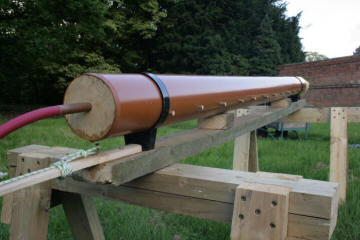
It's important to fit dowel pegs through
holes along the length of the pipe creating a shelf for wood
to sit on in the top half of the pipe. As steam rises; the
top half of the pipe is naturally the hottest. Also, the
rear end of steamer is propped up higher allowing good steam
flow throughout .
A small drip hole (2mm) is drilled on the
underside of the lower end. This allows condensation to
escape and not build up. . |
The steamer is loaded from the rear end.
The pipe is plugged with a rag at this end. (If the whole
steamer was sealed up 100% it would explode due to a
pressure build up.)
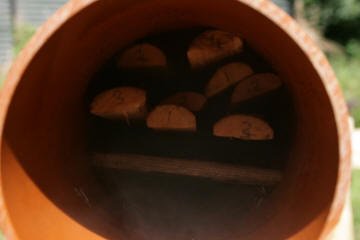
I number the ribs on the ends so I know
which are the longest pieces without pulling them all out to
check. They are then steamed for 20 mins before bending. |
| |
|
 |
 |
|
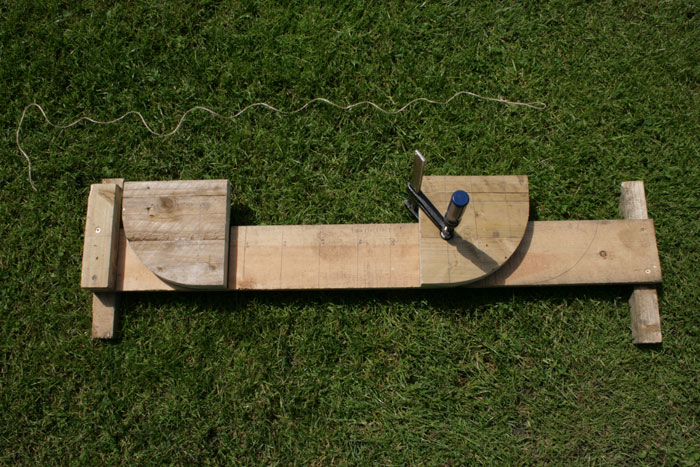
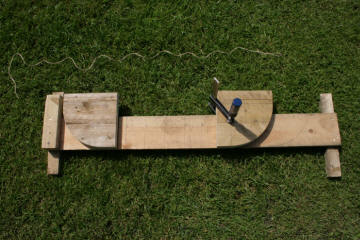
I made this variable jig to bend the ribs
with. I measured the width between the gunnels at all the
points where the ribs were to be fixed, then set the jig up
to make ribs specifically sized for each point. The bend on
some smaller ribs is too tight and needs to be bent by hand
and eye. |
left hand side if fixed and right hand
side is moved accordingly then firmly clamped in place. |
| |
|
|
 |
Rib tied to keep its shape then removed from the jig ready
for the next one. Ribs need to be bent quickly before they
cool down too much.
Ribs need to be carved to a very even
thickness otherwise they deform or the wood folds at weak
points. |
|
Rib straight out of the steamer - placed
in slot to hold this end in place then bent around curved
sections |
|
| |
|
|
 |
Ribs are left to dry for a few days in the sun |
| |
|
|
 |
 |
|
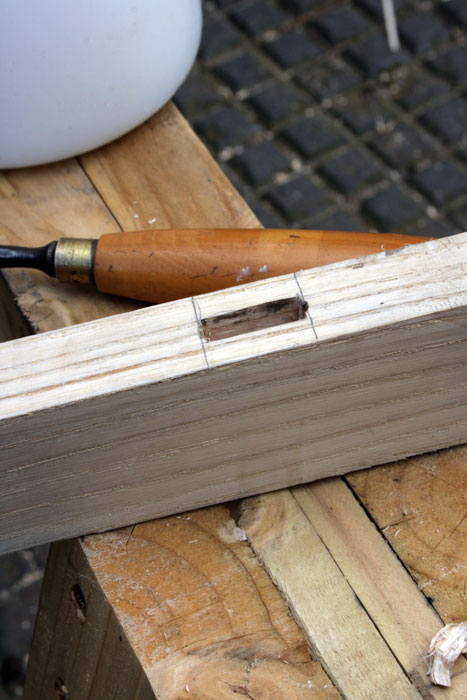
To fit the ribs I decided I was going to
chisel out mortise slots in the gunnels for the rib ends to
slot into (like a mortise and tennon joint) Fitting each rib
starts by clamping it exactly in position (This can take a
few moments to get just right. Sight up from the ends of the
canoe to check the rib is level and just touching the keel
baton)
The rib is then marked on both sides where
the rib meets the gunnels. The rib is unclamped and an extra
line drawn 15mm beyond this. These small sections will be
the parts that slot into the mortise holes. |
| |
|
|
 |
 |
|
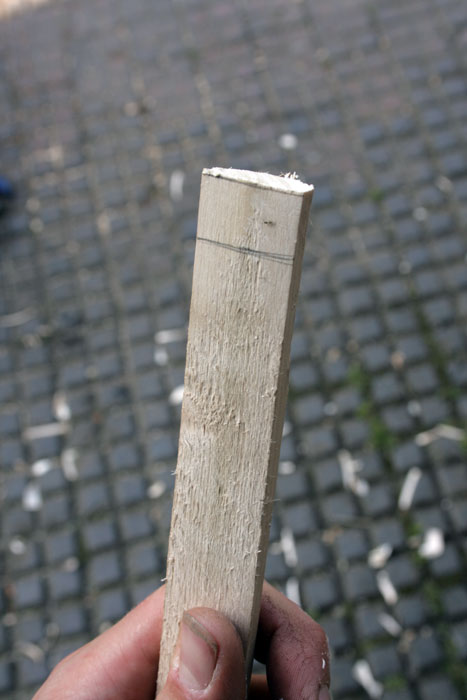
Excess wood is trimmed away at the line
|
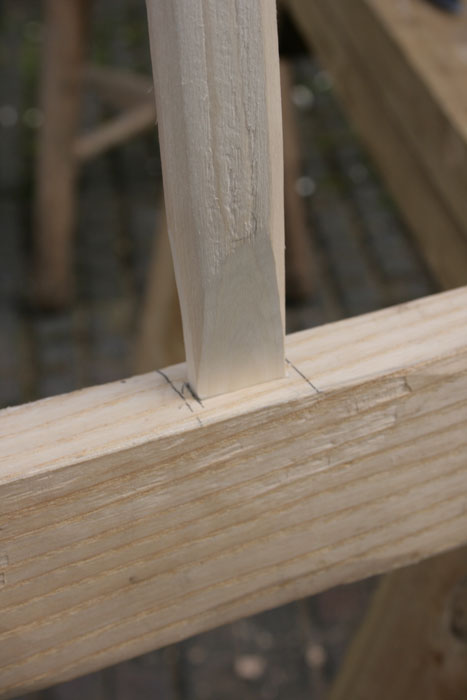
I Then carved the ends of each rib with a
knife nice and square like a tennon joint.
|
| |
|
|

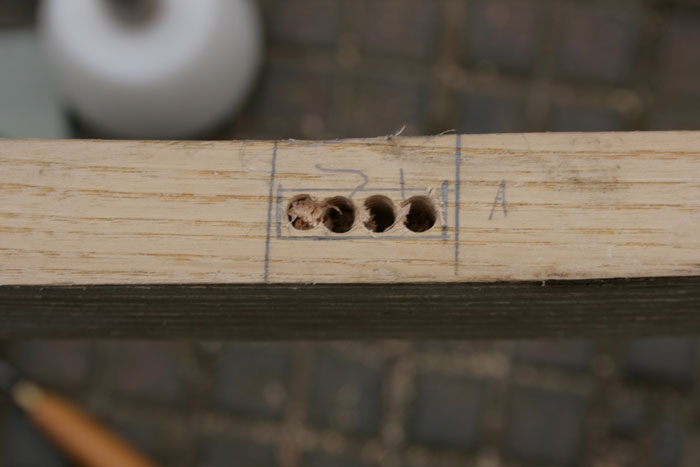
The dimensions from the tennon joints are
then marked out in place on the gunnels. The centre is
drilled out; making the chiselling easier.
|
 |
| |
A piece of tape around the drill piece
acts as a depth gauge so I know when I've reached 15mm deep.
|
|
 |
 |
|
After further work with hammer and
chisel... |
One end of a rib snugly fitted into its
slot.... |
| |
|
 |
 |
 |
 |
| |
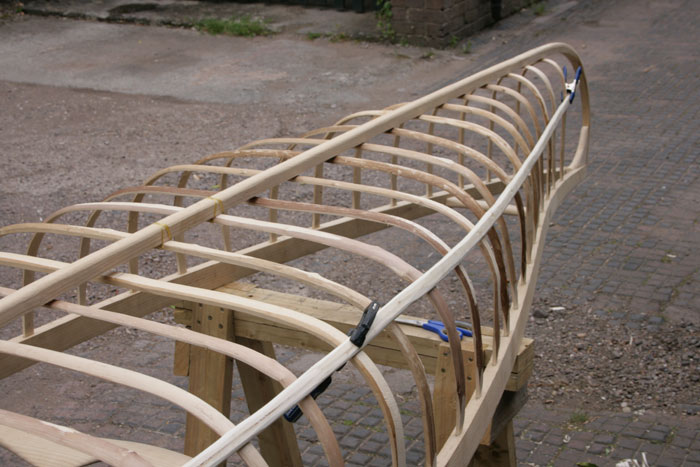
Some ribs were bowing upwards too much and
needed pulling down flatter with some cord. After a while
they take their new shape and the cord is removed. |
 |
 |
 |
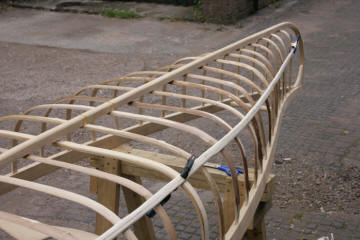 |
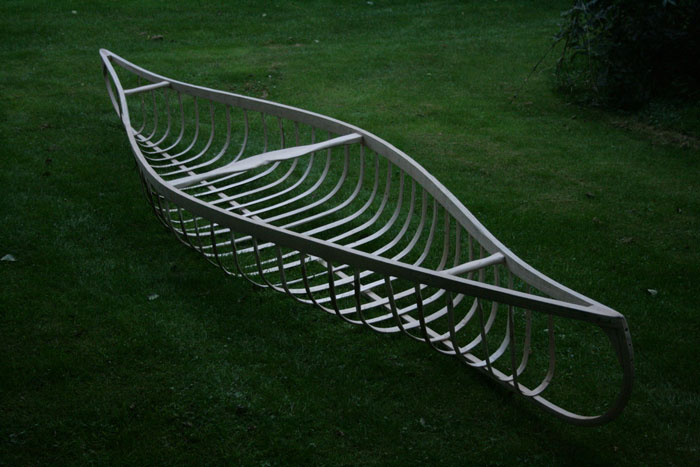
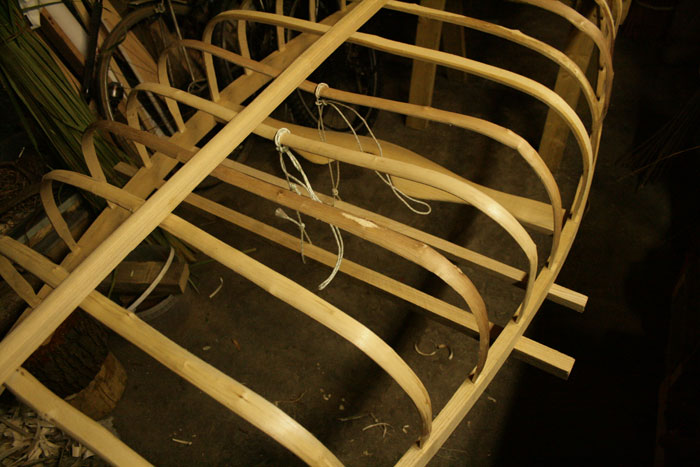
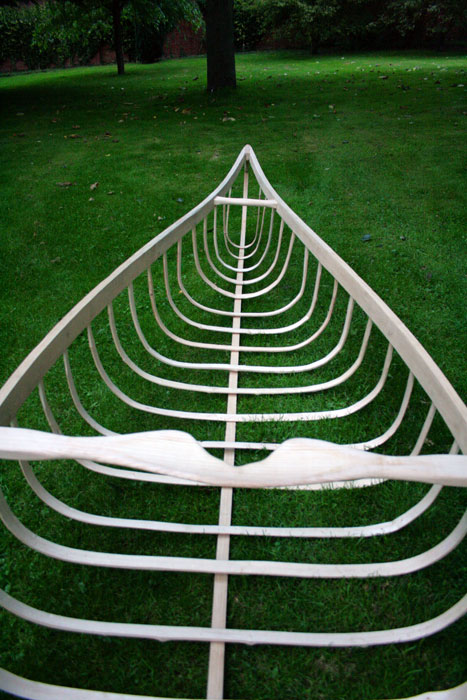
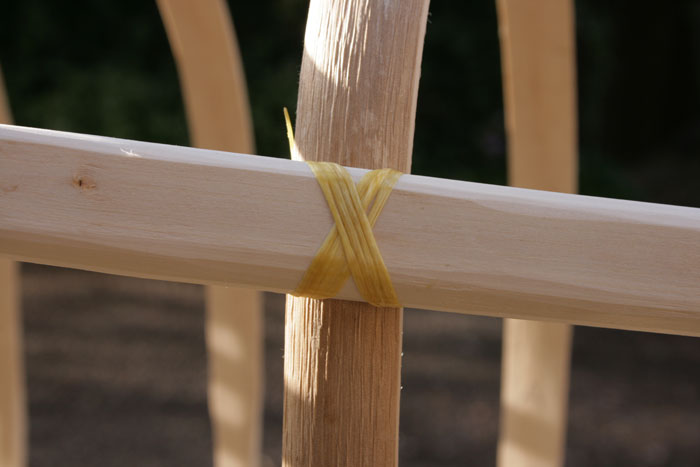
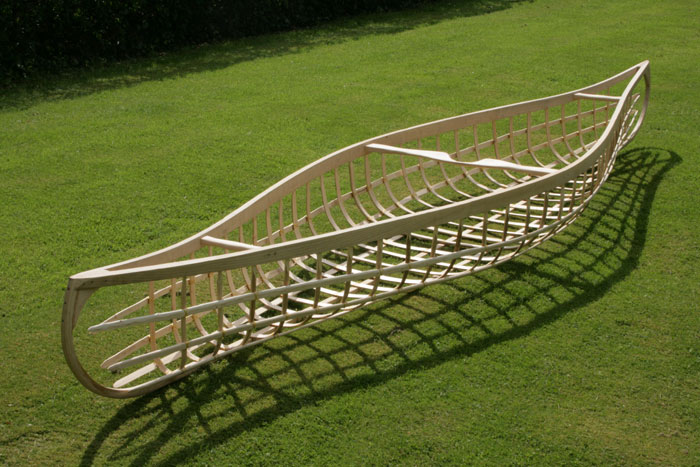
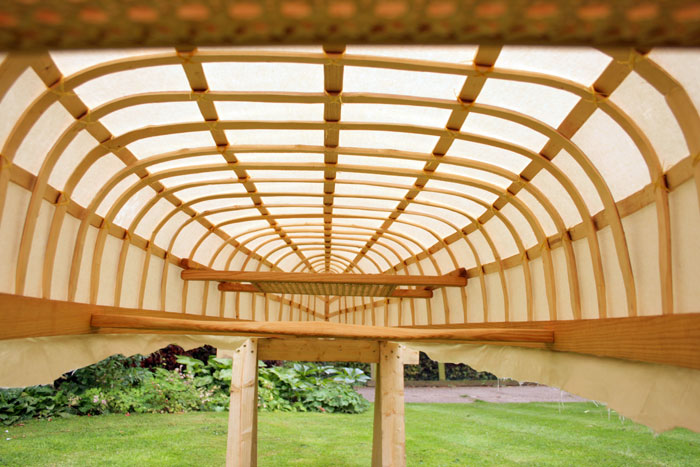
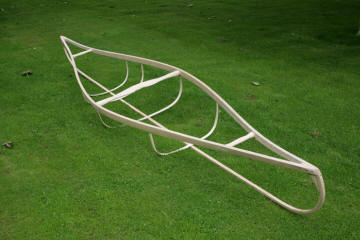
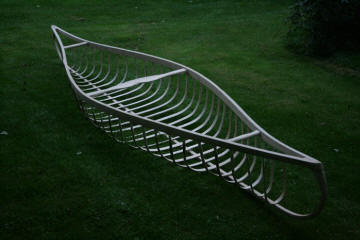
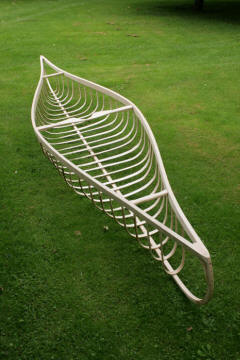
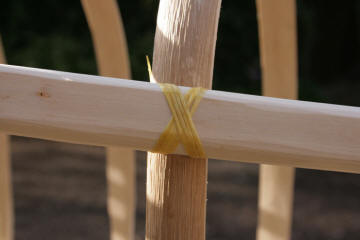
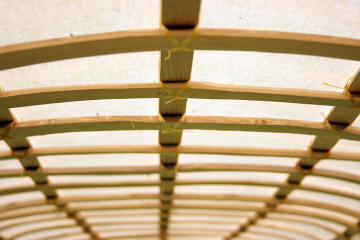
| Longitudinals
are now added from front to back. I carved them in the same
way as with the ribs from Hazel wood. Some lengths were not
long enough and needed to be spliced together. They are
clamped in place first and then tied at every point where
they cross each rib. |
| |
|
|
 |
 |
|
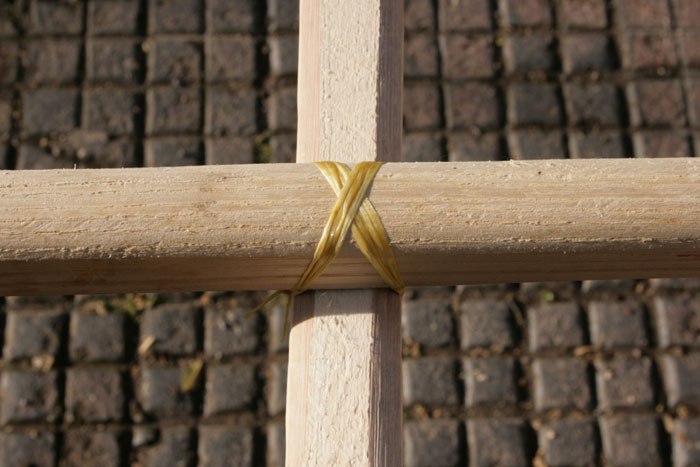
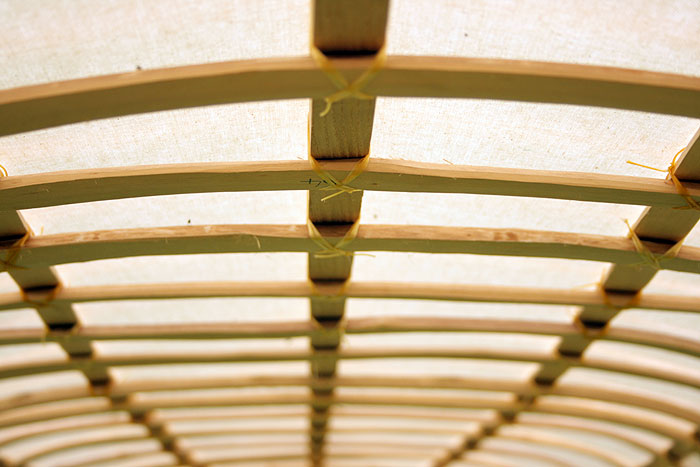
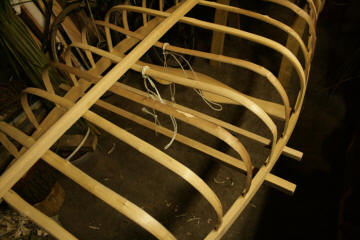
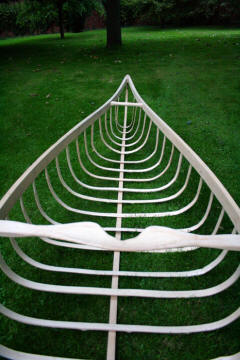
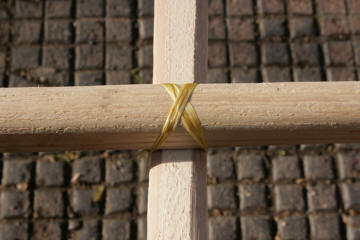
The keel baton is bound into place to
start |
I used artificial sinew for the
bindings as it is strong and quite flat and wont show up
much as a bump under the canvas covering later...
|
|
|
|
 |
 |
|
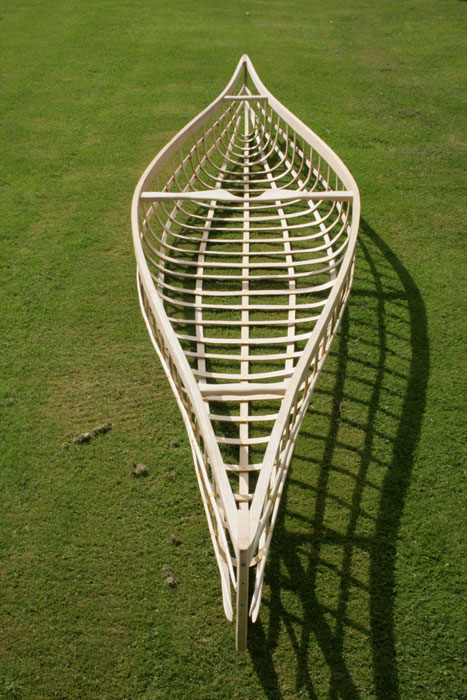
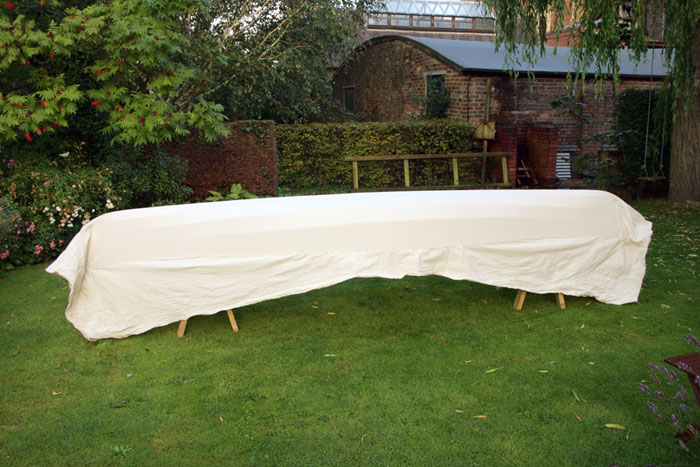
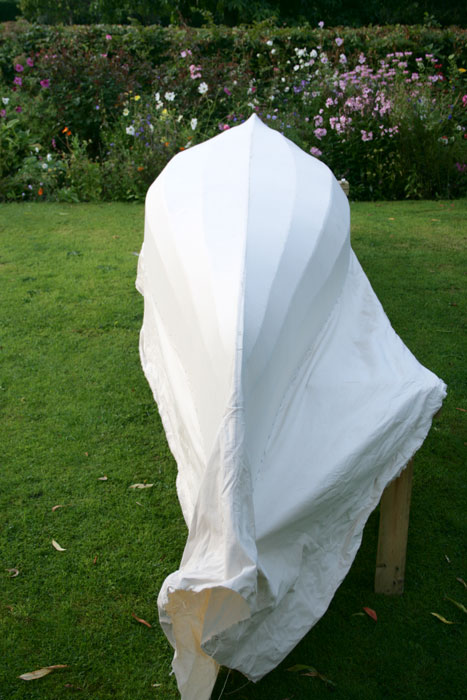
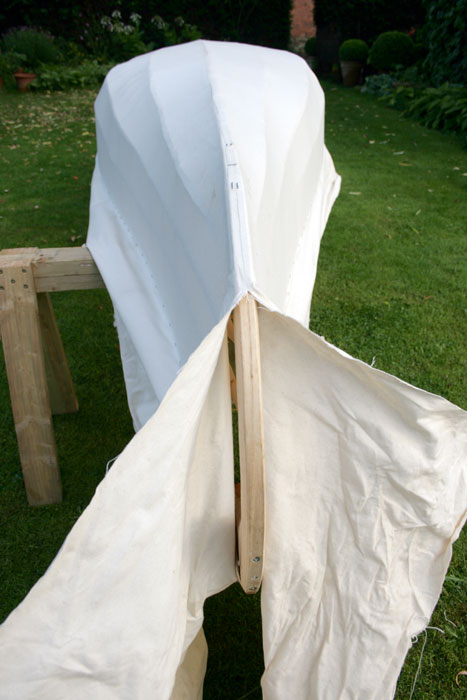
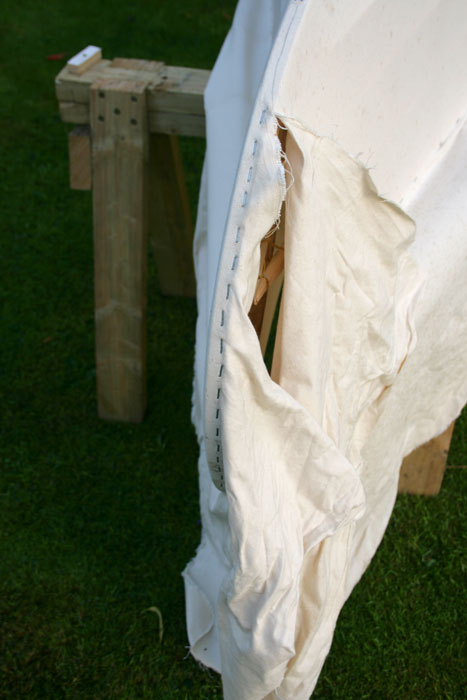
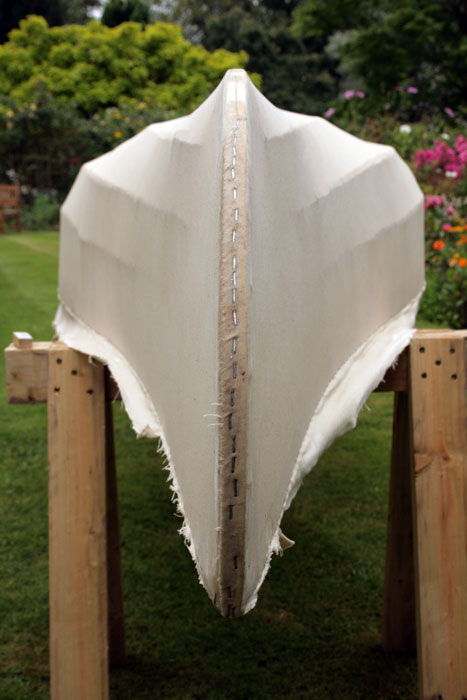
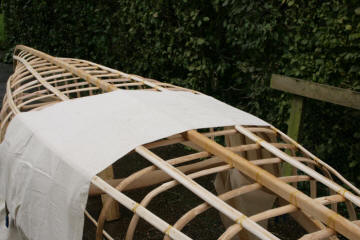
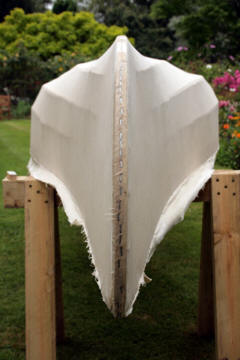
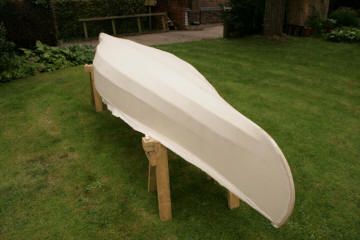
A temporary check of the bottom profile of
the canoe using an off-cut of canvas from my last canoe
project. The bottom needs to be relatively flat for
stability |
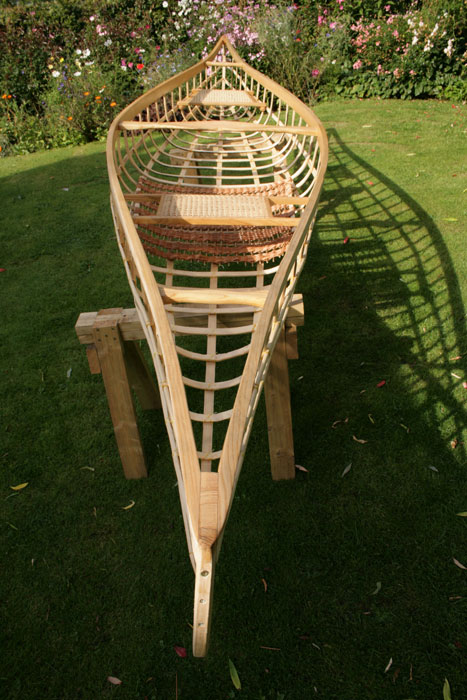
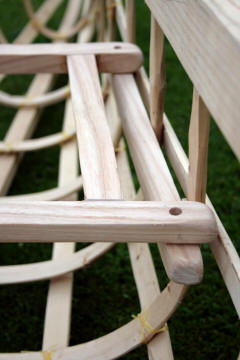
It was time for making the frame work for
the two seats...It's a long job and could take a whole
article in itself to explain how to make these.
The seats fit onto rails which are attached to the rib and
longitudinal framework. I used screws and bindings to attach
the rails. The seats are removable - they slot onto pegs
fitted into the rails. |
 |
The woven matting will be explained later... |
 |
 |
|
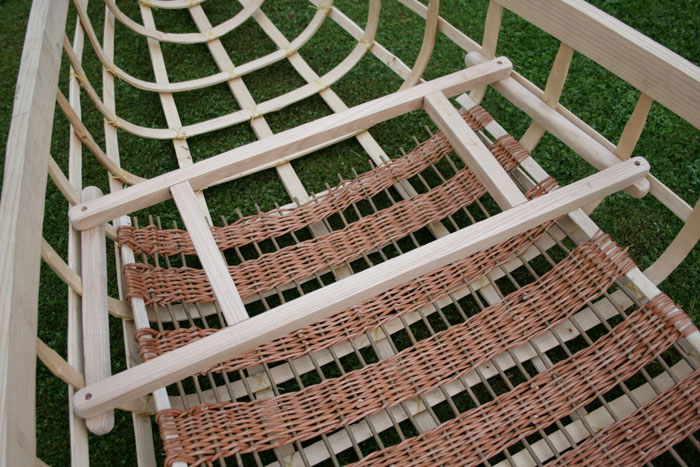
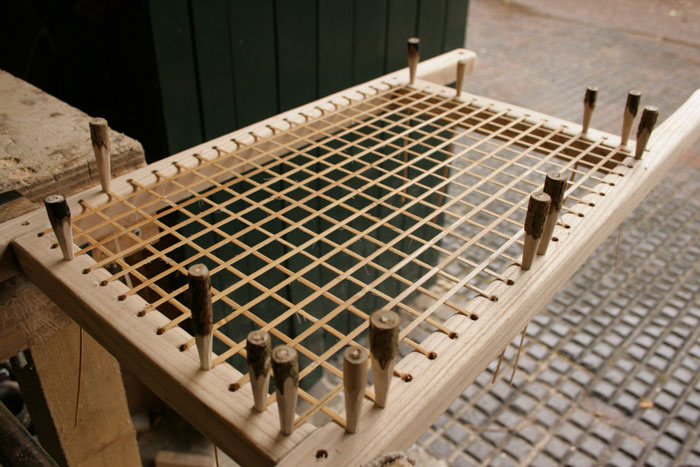
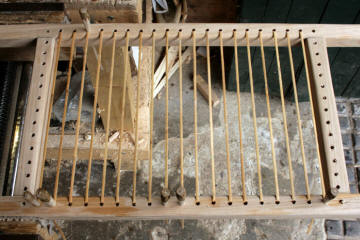
Using chair cane purchased from this
company:
http://www.willowgrowers.co.uk/prod/1828/29mm-chair-cane
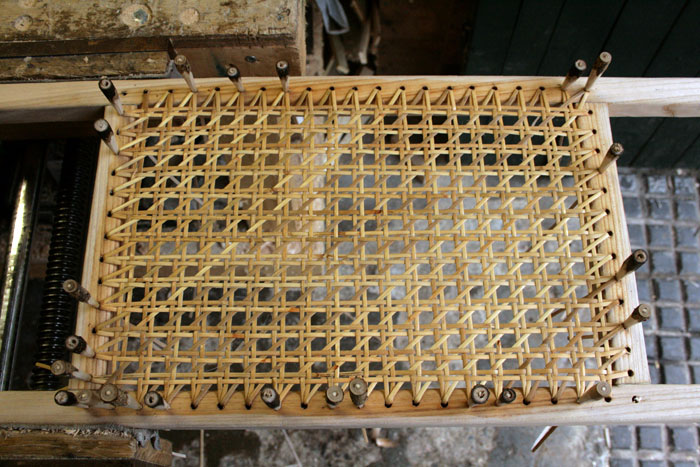
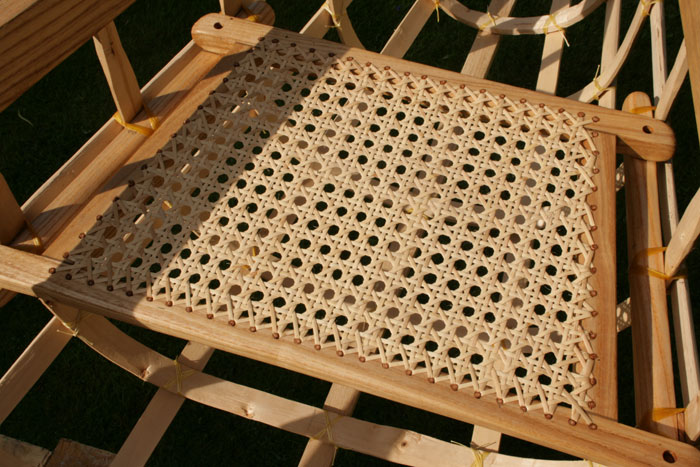
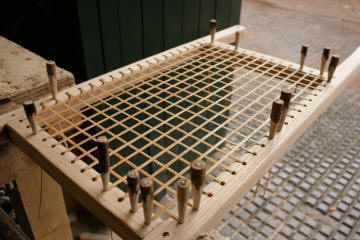
I wove onto the seat frames using
2.9mm cane. A few pics of some stages...
There is an excellent video tutorial on
how to weave a seat like this here on youtube:
http://www.youtube.com/watch?v=wv7YfDIsjtE
|
 |
 |
 |
| |
|
| |
|
|
 |

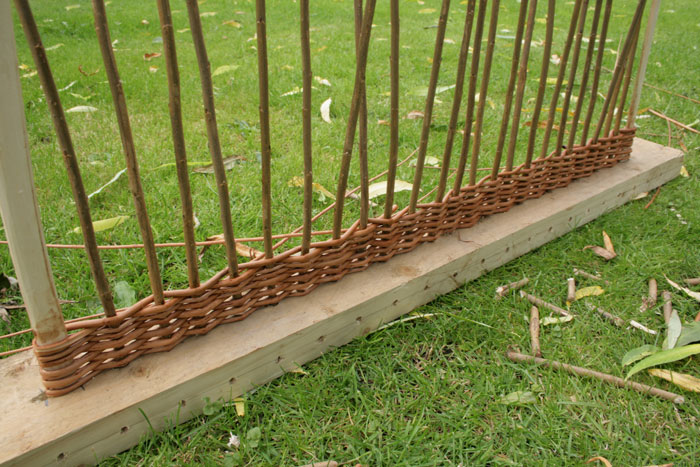
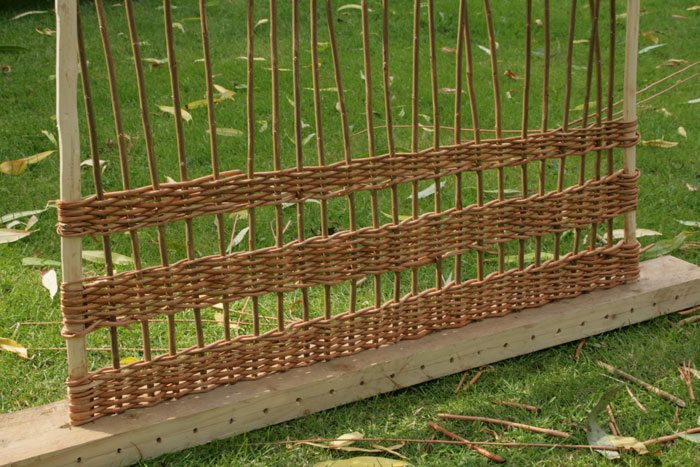
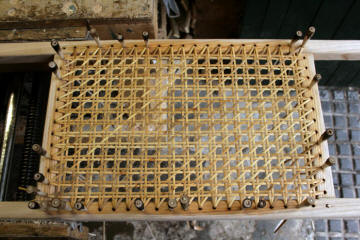
It was then pretty straight forward to weave back and forth
- in and out, in and out. |
|
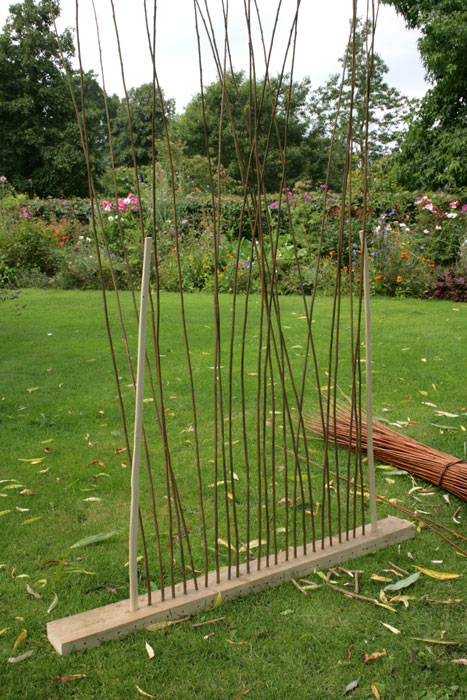
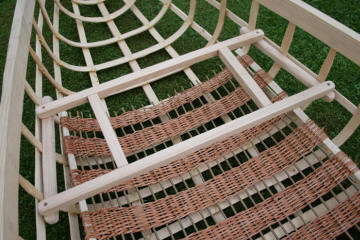
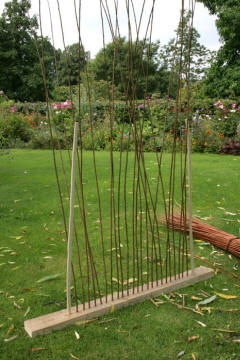
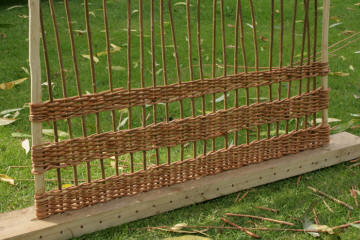
Rather than having small planks/ slats of
wood in the bottom of the canoe to stand on i decided to
weave some mats from willow
I drilled holes into a length of wood to
hold the thick uprights to start with. The two outermost
uprights are slats of Hazel; This is for strength.
|
 |
| |
|
|
 |
 |
|
A lick of linseed oil on some of the wood
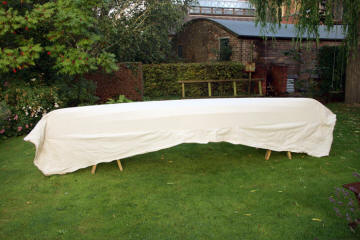
work and I was ready to cover it with canvas! |
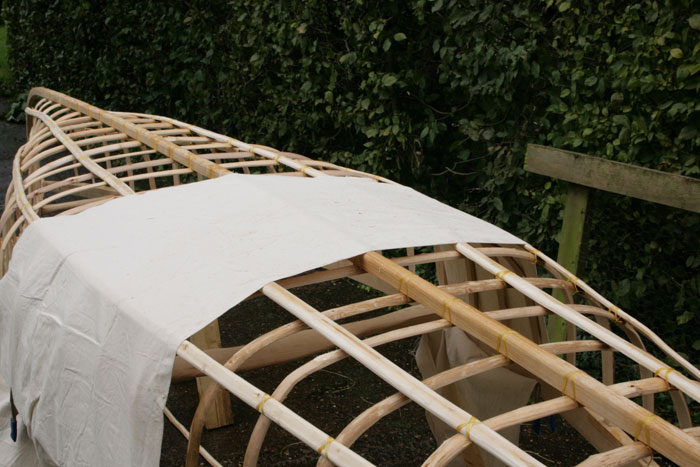
covering the canoe with 9.5 oz canvas
purchased from:
http://www.whaleys-bradford.ltd.uk/
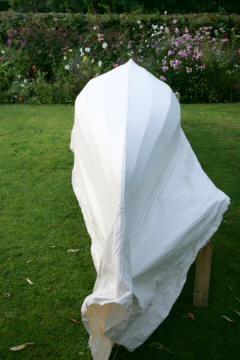
I decided that using a staple gun and
heavy duty staples was the best option for attaching the
canvas. This way I could pull the canvas tight with one hand
and secure it in place with the stapler in the other hand.
Staples are inserted along the outside of the gunnels close
to the top. (and are covered up with a strip of wooden
beading after painting)
The canvas has to be stretched as tight as
possible. To explain briefly; one or two staples are
inserted on one side, then the canvas pulled over tight and
stapled on the other side... back and forth. Also try to
stretch canvas length ways some too. |
| |
|
|
 |
 |
 |
|
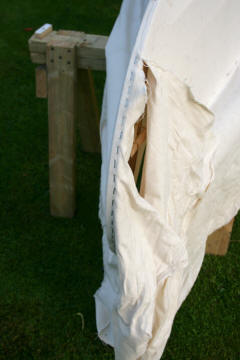
Canvas fixed around edges first |
Cut the canvas ready for fitting
around the end stem pieces. |
One side stapled along the stem piece first then
excess canvas trimmed off |
|
| |
|
|
 |
 |
|
Then other side stapled and all excess
canvas trimmed away. I then sealed the seam up with epoxy
glue for a 100% watertight finish. |
Before painting excess canvas is trimmed
off all the way around except for a small 'skirt' of
material 3 or 4 inches wide. (I've found It's easier to do
the final trim of the canvas when it has been painted. The
paint seals up the fibres and prevents it fraying.)
once fitted, wetting the canvas helps to
tighten it slightly. |
| |
|
 |
 |
|
 |
|
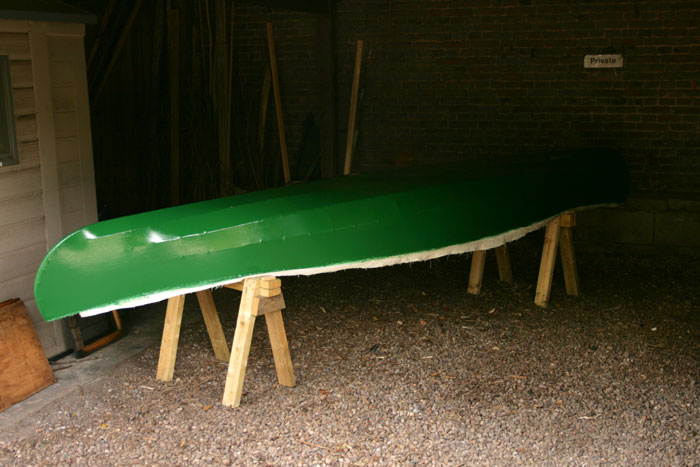
Paint the canvas with exterior grade
paint. Firstly two coats of primer undercoat, then two coats
of your coloured overcoat.
It was then just a case of trimming the
canvas level with the top of the gunnels. Then I could make
and apply a strip of oak beading around the edge (which also
covers up the staples) to complete the canoe... exciting!
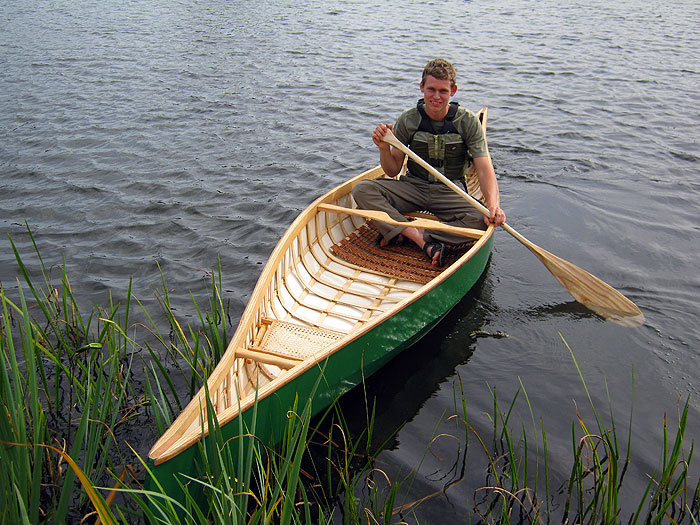
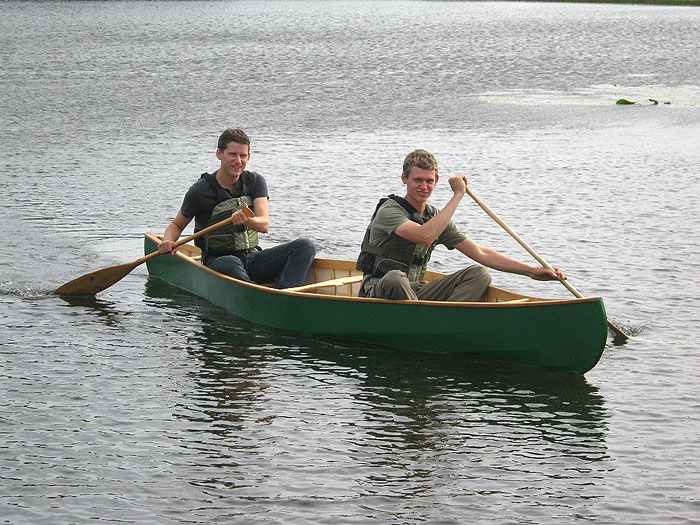
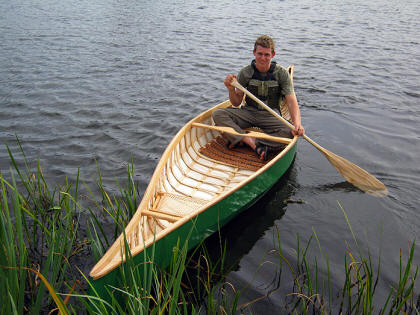
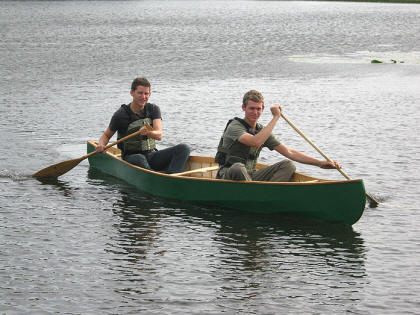
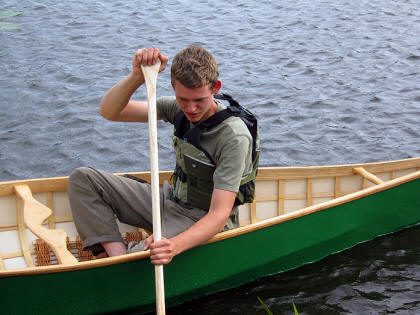
And finally the moment I had been waiting
for... I cant put into words how satisfying it feels to step
into and paddle a canoe you have made. Canoeing is the
nearest thing to physical poetry that I know...
|
 |
 |
 |
| |
|
I hope this article has inspired to you
have a go at making your own canoe... Have fun and enjoy
every stage. |
| |
|
| |
|
| |
|
| |
|