| |
Surely one of the best cordage materials; Willow
bark is both abundant and relatively easy to process. This article
will describe how to strip the bark (in Summer or Winter) and turn
it into supple fibre strands ideal for cordage making. There is an
accompanying tutorial which shows the techniques you'll need to
transform these fibres into cordage or rope, to see this click
here.
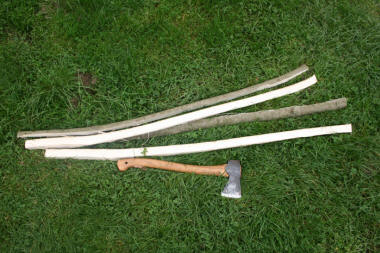
Firstly you need to find and cut down a living shoot/ branch of
Willow between 4cm and 10cm thick. Look out for tall relatively
straight 'poles' of willow that have as few side branches as
possible. Willow will tolerate many growing conditions, but it
prefers damp/wet places, so lake sides and river banks are good
places to look. A coppiced woodland is a good place to find the
straightest wood with few side branches. There are many varieties of
Willow, Goat Willow and Crack willow are likely the most common. I
have never tried processing Weeping Willow, although this would
probably work too.
When to gather:
Spring and Summer time
It is best to collect your willow between Spring time and mid Summer
(when the sap is up), this is when the bark will separate from the
wood without much work. Strip the bark in the same way as for Lime
bark (Basswood), click
here
to see the process
Autumn through Winter
Collecting your bark from late Summer/
Autumn and through the Winter time is a little more trouble since
the bark sticks to the wood and can't be removed without the
application of heat from the camp fire. This method is not well
known and is a handy trick for gathering the bark if your Spring/
Summer supply has run out. The following steps show the process... |
|
| |
 |
|
When first experimenting with
this technique I started by trying to heat the
complete log over the fire, then lifting up
strips of bark at one end and pull them off,
however I found that it's a lot easier to split
the wood into quarters and heat each piece
separately. You get nice even strips of bark
this way too. |
|
 |
|
Heating the bark side over the
fire... |
|
|
|
| |
|
|
| |
 |
|
 |
|
Work each piece over the fire from one end
to the other until suitably toasted. (this picture gives you
some idea of the level of toasting, it's not burn so much to
become crusty). If you listen closely you will hear a faint
hissing sound when the bark is good and hot. |
|
This was my favourite way to
remove the bark... while still hot, folding each piece of
wood so that only the wood snaps. |
|
|
| |
|
|
|
|
 |
|
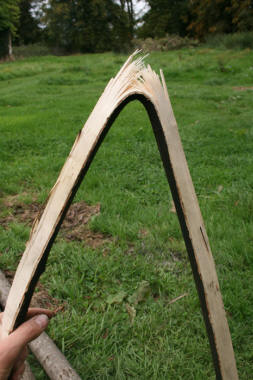
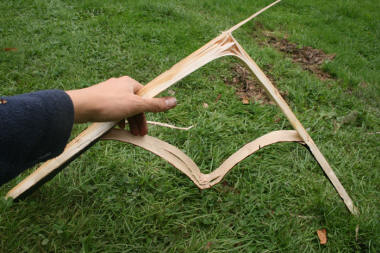
You can completely snap the
wood through and then pull the bark from each
half of wood |
|
 |
|
Or, you can snap, then pull the
bark down from under the hinged area. (Be careful
not to burn yourself). |
|
|
|
| |
|
|
| |
|
 |
|
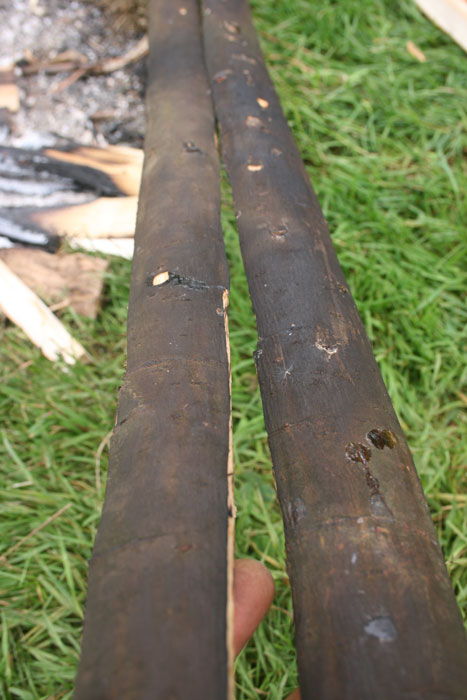
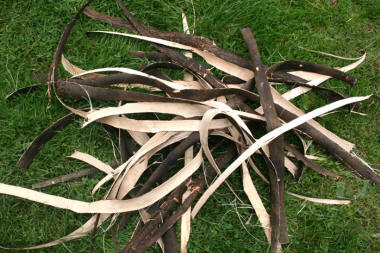
Bark strips from several staves of wood. |
|
|
| |
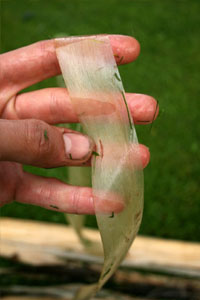
| Processing the bark:
The rest of the process is the same no matter what the
season... We need to remove the outer bark as this is a weak
useless layer. What we are after is just the stringy
leather-like inner bark |
|
|
 |
 |
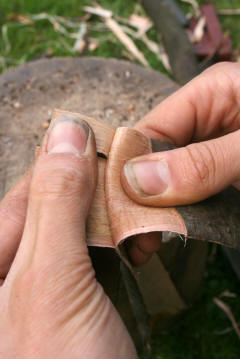 |
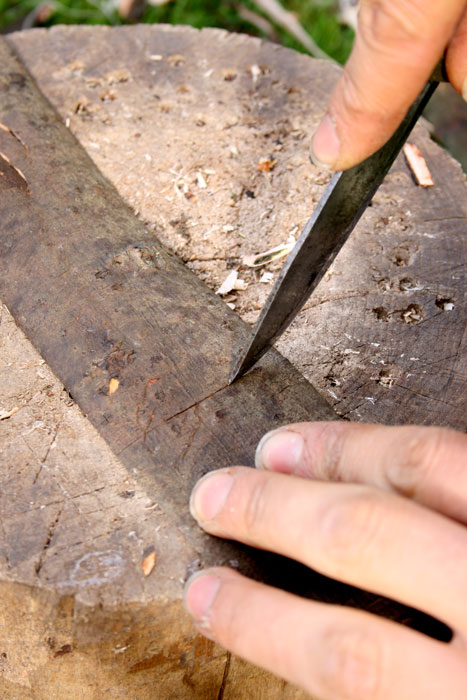
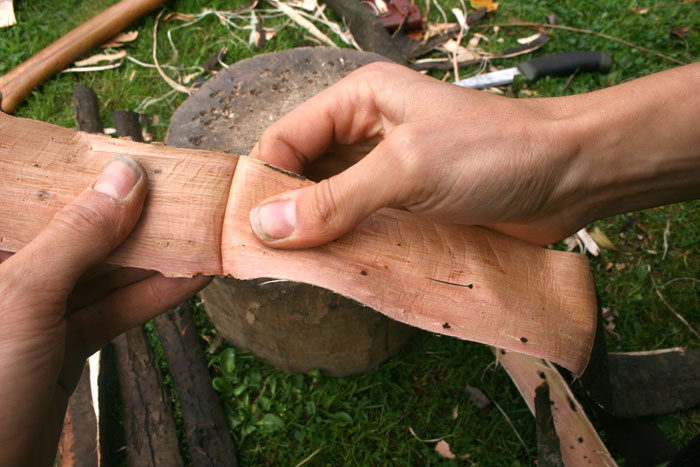
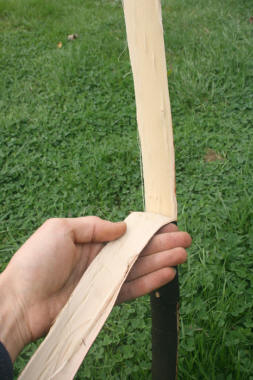
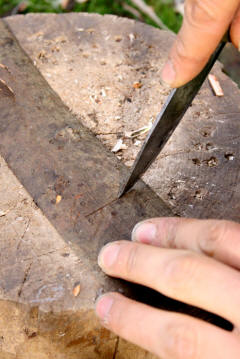
| at the middle of each strip
score lightly through just the outer bark with a
sharp knife, beware not to cut too deeply |
|
| Fold the bark at this point |
|
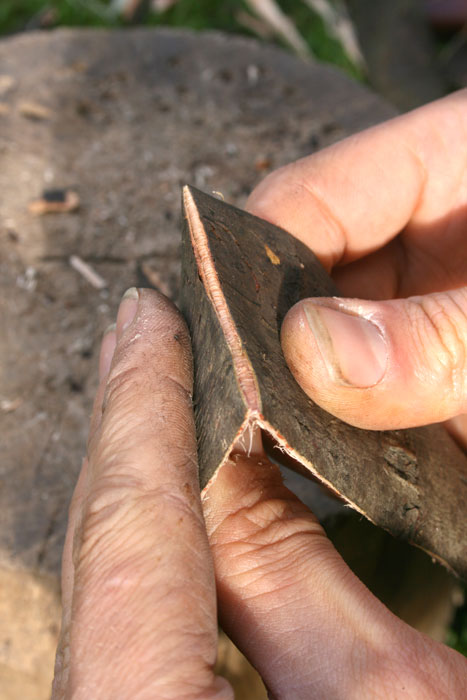
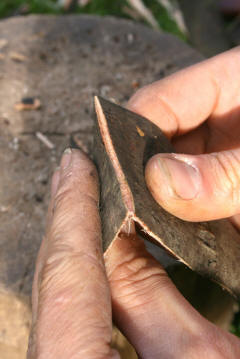
| Pull the inner bark away from
the outer bark. You'll find that to begin with
the inner bark needs to be pulled backwards at
quite an angle to separate it. Any strips of
outer bark that get left behind will need to be
separately peeled up and pulled pulled off along
with the rest. |
|
|
| |
 |
|
continuing to separate the layers... With
practice you'll get relatively quick at this. |
|
|
| |
 |
|
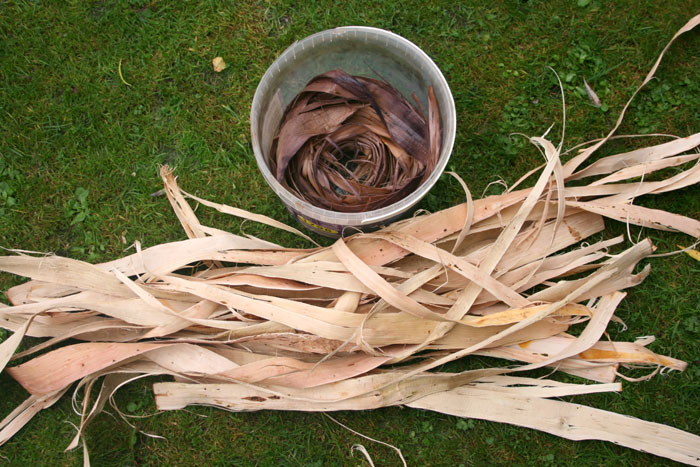
I didn't have time to process all this
bark in one day, so to save one batch from drying out I
stored it in a bucket of water until I was ready to do the
next stage. |
|
|
| |
 |
|
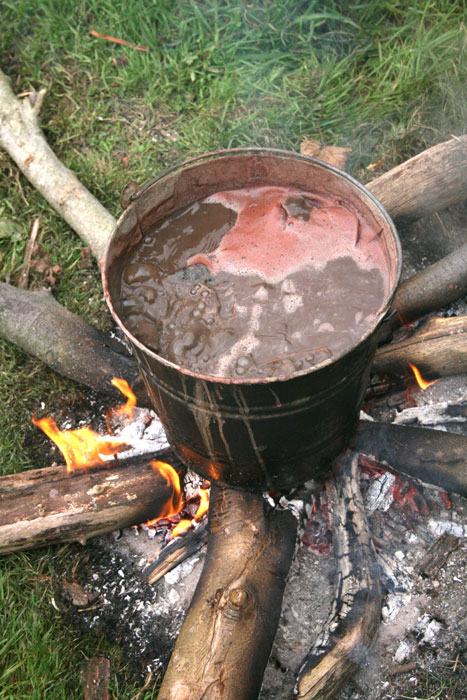
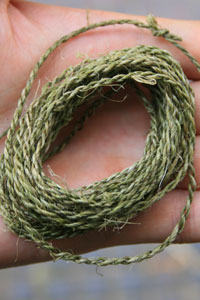
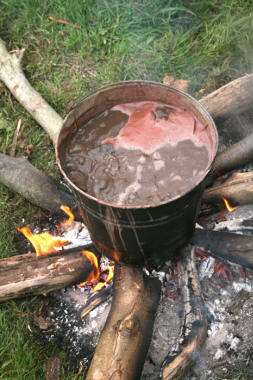
The bark now needs to be Boiled in
a mixture of wood ash and water. This average sized
metal bucket has about 5 or 6 good handfuls of ash
in. |
|
 |
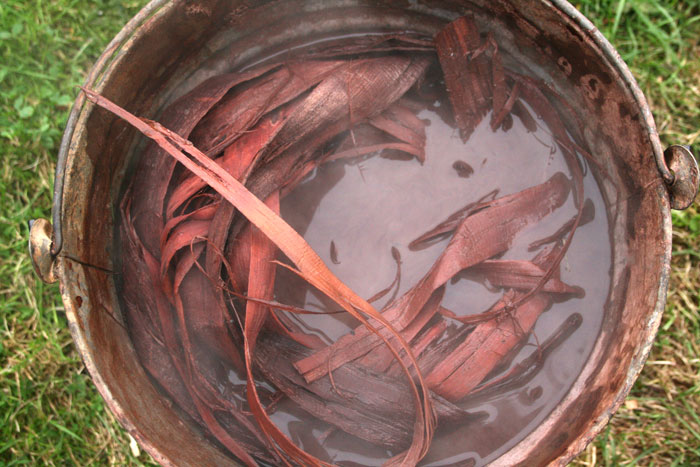
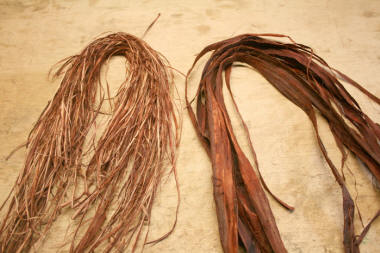
| (Above - The bark after boiling turns red.)
The boiling time varies depending on how soft you
want the fibres to be. The more time the softer the
fibres become, but also the weaker the fibres
become. Some people suggest boiling for one
hour, personally I'd rather boil for 15 mins and
have much stronger fibres. Later on when these bark
strips are pulled apart into finer fibres and then
twisted into cordage they will become soft enough... |
|
|
|
| |
|
|
| |
 |
|
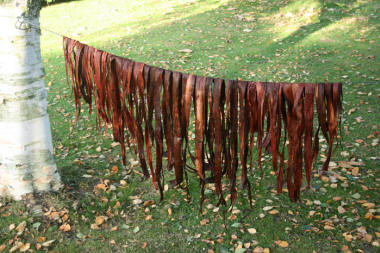
Now, hang the bark out to dry before
storing away. |
| |
|
|
| |
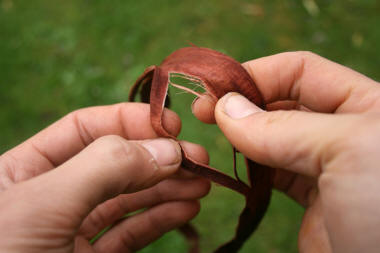 |
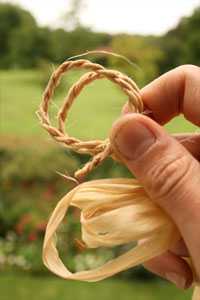
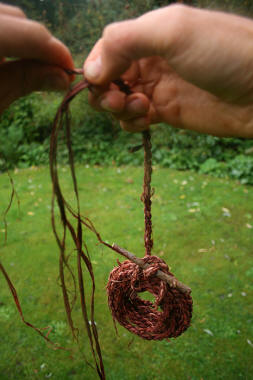
| When you're ready to make cordage, briefly soak the
bark strips in water until soft, then split the strips
down into finer lengths of fibre. Simply pull the strip
apart, the split will usually run straight from one end
to the other. |
| |
|
|
| |
 |
|
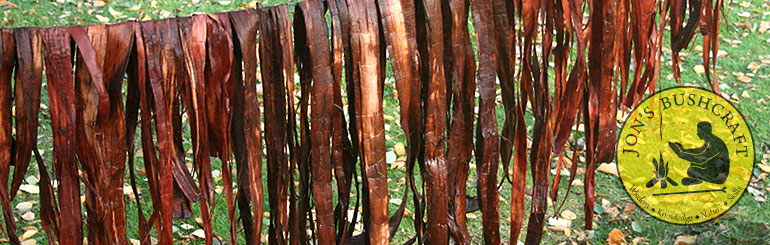
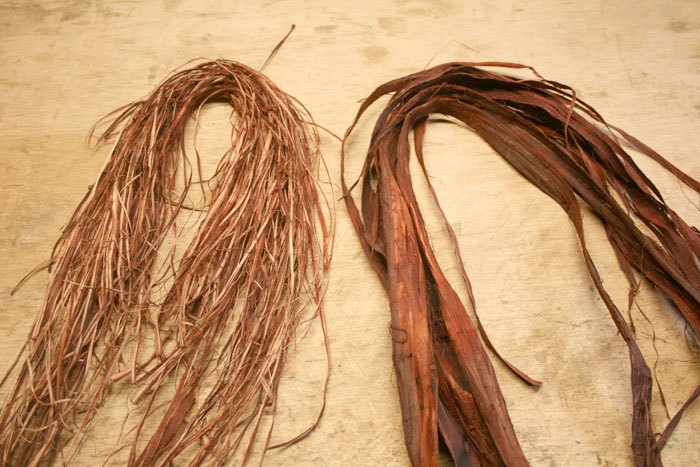
From thick straps to fine fibre
strips.
For a full article
on cordage making techniques
click here
|
|
|
| |
 |
|
| |
|
|
| |
|
|