| |
|
|
|
|
| |
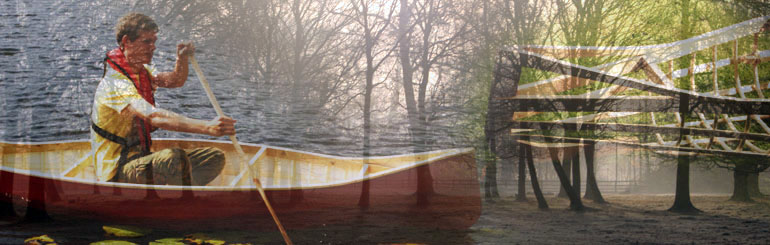
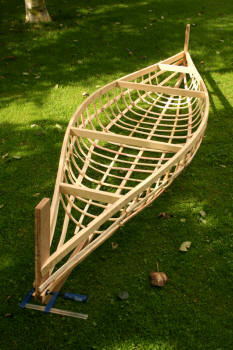
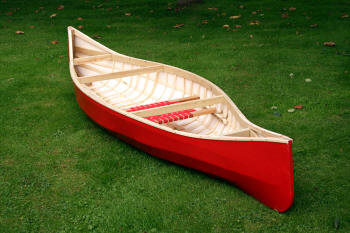
Solo Skin On
Frame Canoe |
|
| |
After my previous
success at canoe building I couldn't wait to to get
cracking with the next one.
The main lesson I learnt from my
previous experience was that a flatter bottom would be needed
for a canoe with good stability on the water.
In this article I hope to show you the main steps towards creating a
finished canoe. Hopefully there is enough detail for anyone to feel they
can have a go at this project.
The design will vary according to the
intended use of the canoe and the materials you have available. In this
example I did not work to a plan, there is however a basic methodology
which the canoe evolves from.
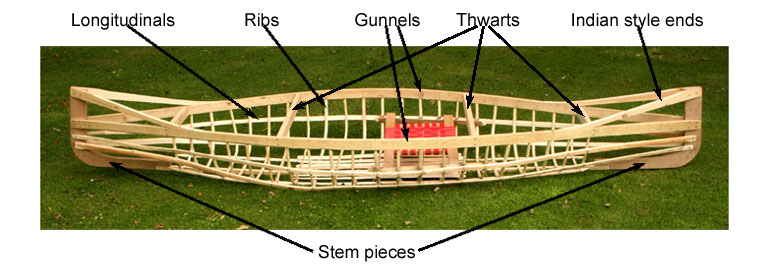
Terminology of parts...
|
|
 |
| |
|
|
|
|
| |
 |
|
 |
|
| |
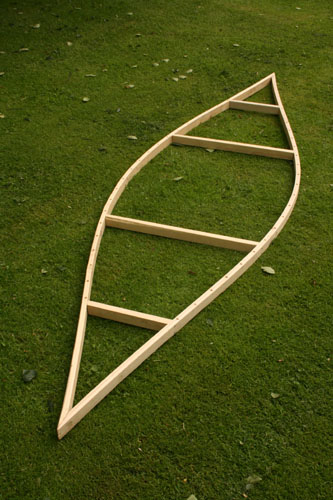
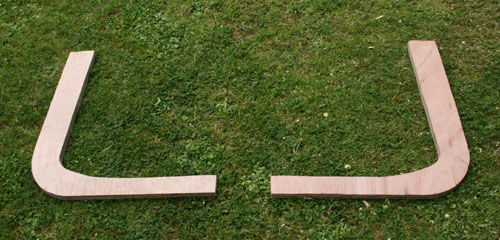
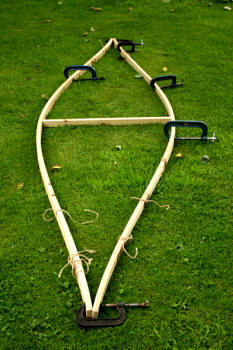
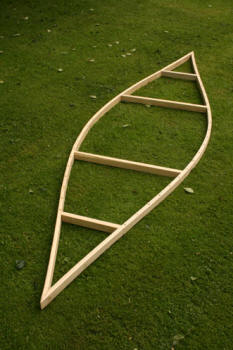
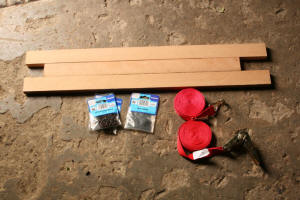
For
each gunnel I laminated two slats of wood together to make them
1 inch x 1.5 inch each. They
could easily have been made from a single piece of wood each,
however I found that by making them from two pieces and
laminating them I could more easily create a slightly fancy
shape. It's quite subtle to see but the space between both
gunnels gets narrower sooner towards the ends.
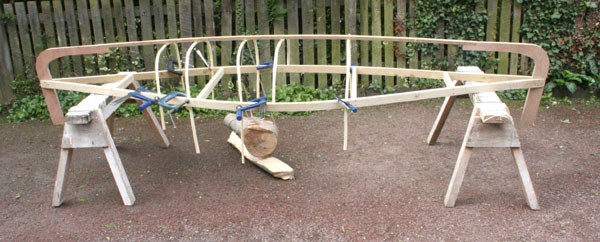
While the glue is still liquid, the gunnels
are bent into shape, clamped and left to set. A temporary thwart at the
centre holds the shape open.
|
|
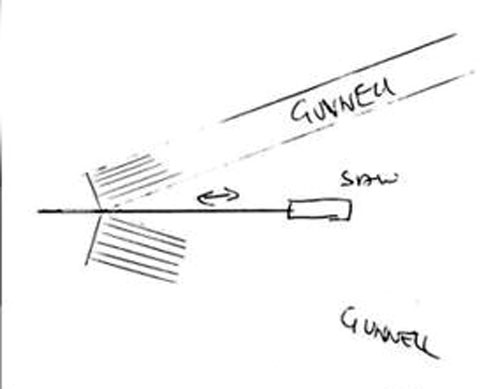
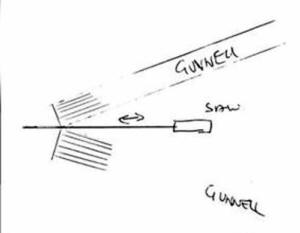
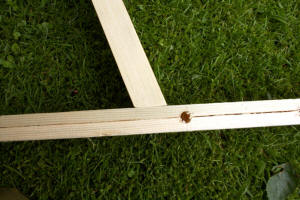
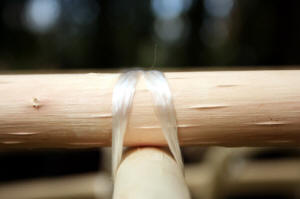
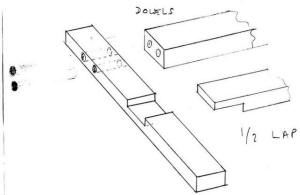
The next job was to make the ends of the gunnels fit flush
together. I did this by using various straps and clamps to hold the gunnel
ends together whilst I used a hand saw to to shape the ends to the right
angle as shown in the diagram. If you
push the saw between the two ends repeatedly you eventually get
flat surfaces. To begin with, because there is quite a bit of
wood to remove you can estimate the angle and cut a reasonable
amount of wood straight off.
|
|
| |
|
|
|
|
| |
 |
|
 |
|
| |
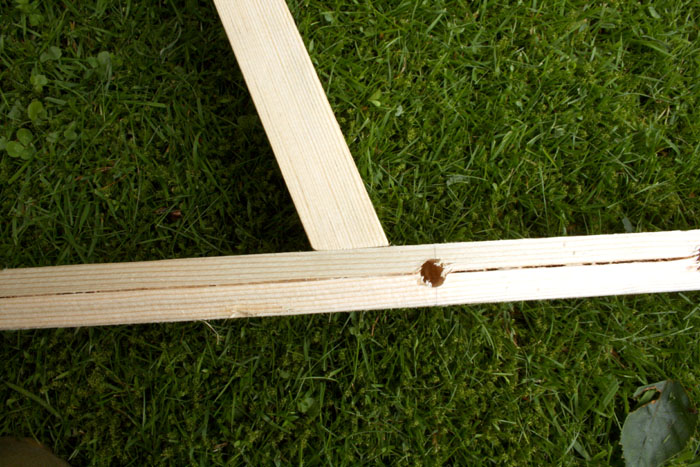
Time to fit the thwarts...
(It's not quite time to fix the ends together yet) They need to be strong as they help to Keep the
boat in shape. Make sure they are
perfectly aligned before fixing into place. Rather than using mortise and
tenon joints I felt wood screws would be better, this would save
chiselling holes through Gunnels. |
|
I now needed to drill holes along the
undersides of the gunnels into which the ribs would later be
fitted. I used a drill piece 3/4" wide (1 cm) and made a hole
every 4 inches (10cm). |
|
| |
|
|
|
|
| |
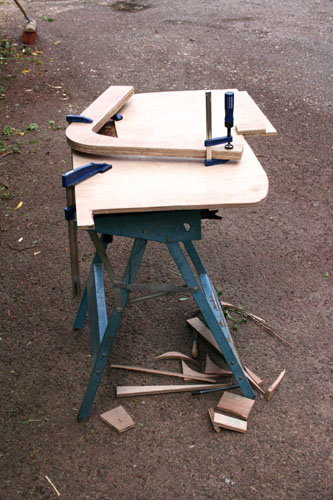
Now to make the stem pieces for the ends of
the canoe... I used 0.5" (12mm) exterior ply wood to make these. I needed them to
be 1" thick so for each I cut two identical pieces with a jigsaw and stuck them together.
Use external wood glue. Before fitting them it's a good idea to
give them a coat of external grade varnish such as yacht
varnish, this will ensure the laminations of plywood do not
separate if they become wet.
|
|
| |
|
|
|
|
| |
 |
|
 |
|
| |
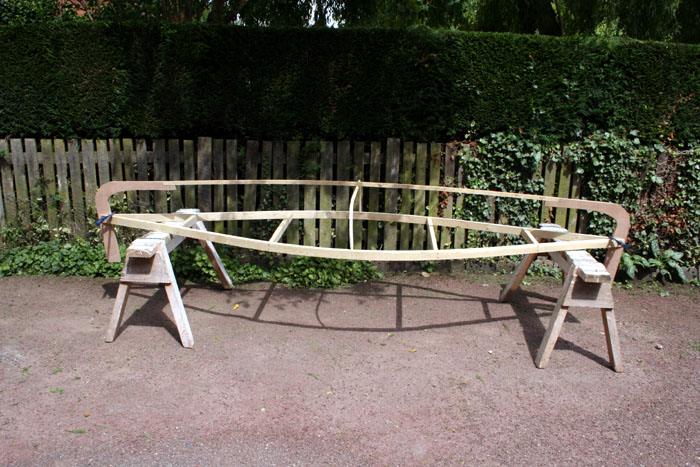
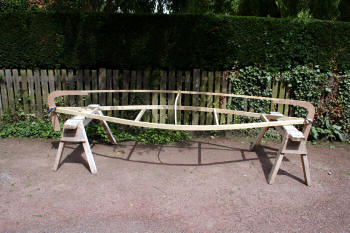
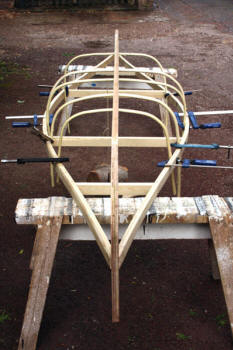
For the following work propping
up either end of the canoe on trestles will make
life so much easier. If you don't have trestles consider making
or buying some.
I made the first rib to the correct depth and fitted it at the
centre of the canoe. (Fitting ribs is described later. I
wanted the canoe to be around 12 inches (30cm) deep at the
centre) This first rib will hold the keel batten at the correct
height while we work things out. The keel batten is like the
back bone which is secured between the two stem pieces along the
bottom of the canoe, it should be quite strong and perfectly
straight (I used 1" x 1" wood).
The stem pieces are clamped in place between the ends of the
gunnels while the keel batten is sized up and cut to length.
When I was happy with the whole assembly and it was perfectly
aligned the pieces could be permanently fixed together with
screws.Note: Making the centre of the canoe slightly deeper
than the ends will enable the canoe to turn more easily in the
water. This is called 'rocker'.
|
|
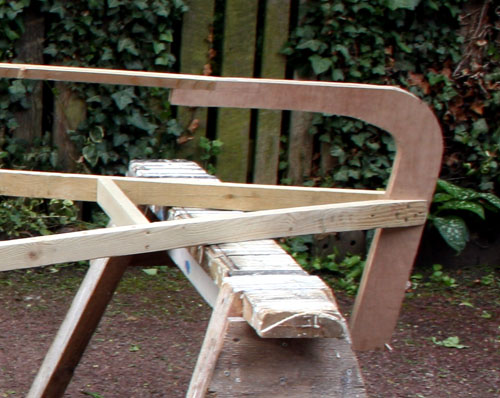
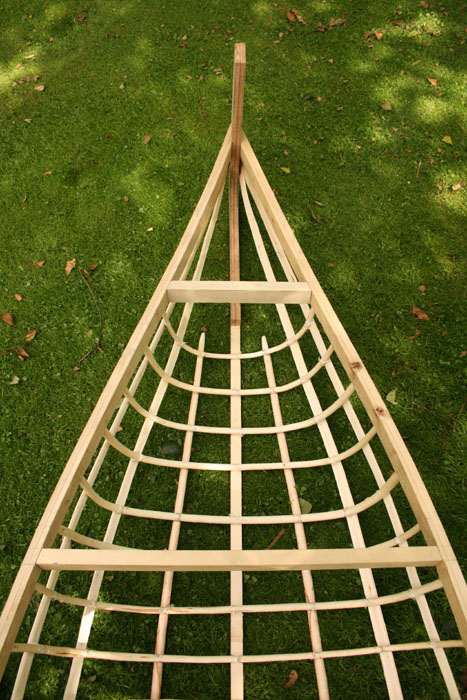
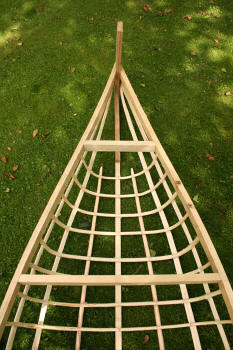
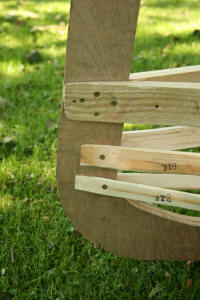
You can see in this picture how a
piece of the stem piece was cut out to accommodate the end of
the keel batten. The tops of
the stem pieces are left long so that 'Indian ends' can later be
made. These will rise up from the gunnels towards the ends
creating an iconic shape.
|
|
| |
|
|
|
|
| |
 |
|
 |
|
| |
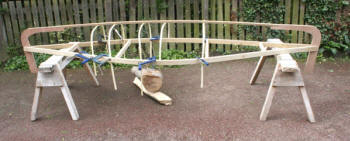
Now It's time to make and fit the rest of the ribs. I used
Willow shoots about 0.5" thick, I chose the lengths of willow that were as
straight and even as possible. (Willow is plenty strong enough with a rib
spacing of 4") I bent them to shape whilst still fresh and
green. To bend a rib like this you need to be careful and bend them
gradually. The Willow is very flexible but does have it's limits and can
be brittle when freshly cut.
(The shoots that appear around fallen willow trees are often ideal.)
Gradually coax the wood into shape bending it
between your hands or around your knee. Make two bends on each rib the
correct distance apart, leaving the centre portion straight and quite
flat. This will give the canoe a flatter bottom which means more
stability.
It is inevitable that some ribs will break while
shaping, gather surplus wood for this reason. (Although not totally
necessary for Willow shoots like this, a wood steamer would help
greatly, see how I steamed the ribs when making my latest canoe on
here)
After bending each rib into shape, clamp them
temporarily in place, If the centre portion is bowing out too much you
can hang a weight from it to pull it down flatter. Leave the wood
clamped in place until it has completely dried, the wood will have then
shrunk a little and have kept it's new shape.
When the ribs are totally dry, any excess length can be cut from the
ends (remembering to leave some wood to fix into the gunnels.) Fit them
by carving down the ends slightly with a knife until they fit snugly
into their holes in the gunnels. |
|
| |
|
|
|
|
| |
 |
|
 |
|
| |
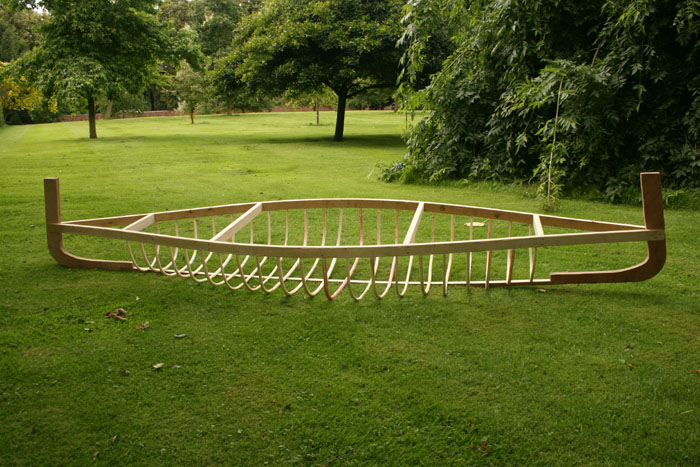
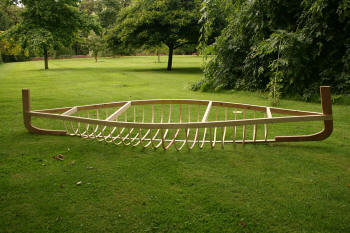
When I was happy with how all the ribs
looked I glue them into place. |
|
The next job was to make the Longitudinals. (the canoe was
really taking shape by now!) I made the longitudinals from Willow wood
too. I used long lengths of straight willow that I carved flat. I clamped
the wood to the ribs and stems so that they take their new shape. When the
wood dries they will not spring back straight again.
|
|
| |
|
|
|
|
| |
 |
|
 |
|
| |
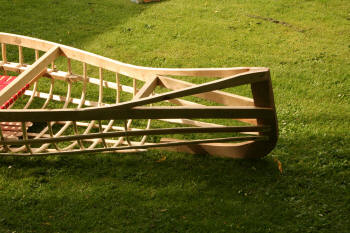
I made 6 longitudinals in total. The bottom two
longitudinals are left round and they end about 3" past the last ribs. |
|
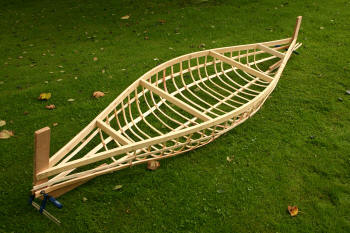
For
then next job you need patience... The ribs and Longitudinals
need to be tied tightly together at the points where they cross.
I recommend using waxed artificial sinew because it is not
bulky. Average string would create a bump which would show up on
the outside of the canoe when it's covered. |
|
| |
|
|
|
|
| |
 |
|
 |
|
| |
Detail showing rib tied to
longitudinal. Make knots on the inside. |
|
The four longitudinals that extend to the stem pieces are
screwed in place.
|
|
| |
|
|
|
|
| |
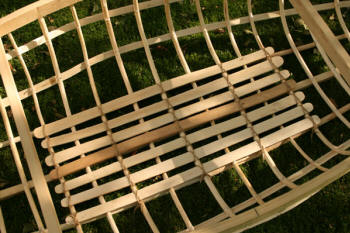
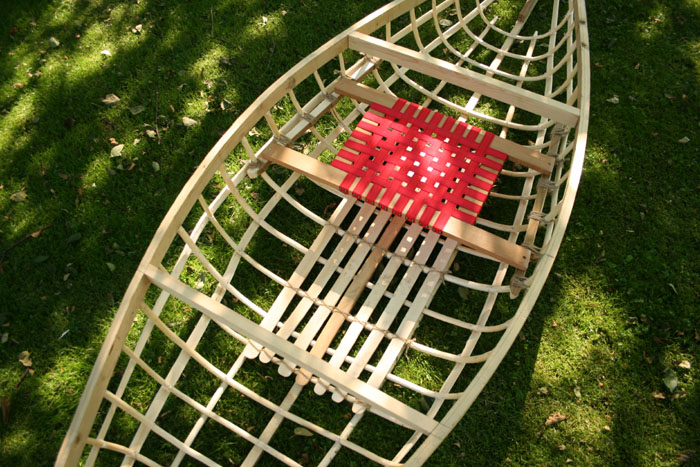
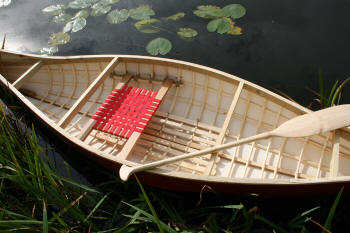
I also carved some decking slats and
tied them at the place where I would be sitting. This
prevents your feet coming into contact with the ribs and the
canvas.The structure will now feel very strong now that
everything is tied.
|
|
| |
|
| |
|
|
|
|
| |
 |
|
 |
|
| |
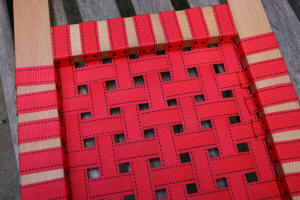
I now began to work on
the seat. I had some nice strong Beech wood and some webbing
from some ratchets; perfect. |
|
You can use either of these kinds of joints to join the
wood together. |
|
| |
|
|
|
|
| |
 |
|
 |
|
| |
This is the finished seat. the way it is
constructed if
easy to see from the pictures. |
|
It is tacked on the underneath with
'blue tacks'. |
|
| |
|
|
|
|
| |
 |
|
 |
|
| |
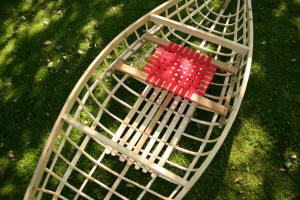
If the ends of the seat were each attached to
a single rib this
would put considerable strain on these ribs. To overcome this problem the
seat is attached to a batten of wood on each side. Each batten is then
tied to six ribs so that your weight will be distributed better. The ends of the seat are cut to the exact length and angle to fit
the canoe. The front edge of the seat should be located at the centre of
the canoe so that your weight is slightly to the back. |
|
The seat is attached to dowel pegs that are glued into the
the edge battens but not the seat so that the seat can be removed. You
will have the choice to kneel or sit in your canoe this way. |
|
| |
|
|
|
|
| |
 |
|
| |
The last thing
I did before attaching the canvas was to
make those Indian style ends. I simply used some straight sections of
wood for these and cut a curve in the top edge. I then had to cut the
correct angles on either end so that they connect to the top of the stem
and gunnels correctly. They were then permanently attached with screws. |
|
| |
|
|
|
|
| |
 |
|
 |
|
| |
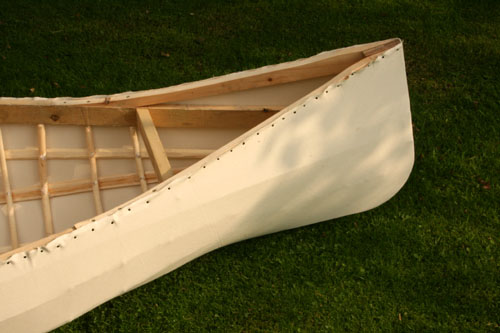
Now the fun part! I used 9.5oz
cotton canvas from:
http://www.whaleys-bradford.ltd.uk/
Make sure you buy canvas with plenty of extra length and width. Its
better to have too much than not enough.
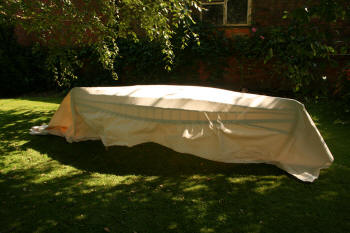
When it came to stretching the canvas over
the canoe asked a fellow friend canoe builder for some advice. He told me:
"You will have to split the canvas to do the stems. Put that
beautiful canoe frame upside down on some trestles, preferably tie the
frame to the trestle so it does not move too much. Fold your canvas along
the length to give yourself a centreline you can mark that with a marker
of some description, drape your canvas over the whole thing and put your
centreline on the keel, you can put a few tacks to hold the canvas in
place along the keel, start one end with a couple of tacks then go to the
other end, stretch the canvas and tack, then put a few tacks every foot or
so. Then from the middle of one side you can pull the canvas tight and
tack it along the gunnel, start in the middle, level with a tack on the
keel, so you can stretch the canvas without distorting it too much: like
that: tack 1 then 2 then 3 then 4 then 5, 1 being the middle. Make sense?
4 2 1 3 5
Then do the other side in similar fashion and so on along the whole
length. You probably will need to adjust by removing some tacks every so
often to pull creases out You can cut the canvas along the gunnells (
don't split the ends yet) but give yourself enough of it to be able to
grip and pull tight. When its tacked along both sides, say every 4" you
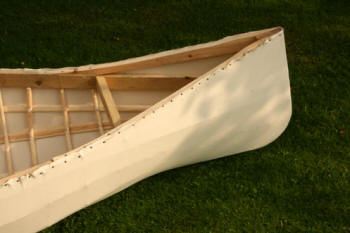
can start doing the ends. By then you should see how to finish the stems,
cut the canvas , giving yourself enough to pull and tack one side along
the stem, then the other side. Be careful that you may have problems with
splitting the ply, try to stagger the tacks so they don't all end up in
the middle layer of the ply. It may be worth your while to put a few
screws through the tickess of the ply to prevent it from splitting. As
they will have to stay there try using brass screws so they won't rust."
If you follow this you shouldn't go wrong...
|
|
| |
 |
|
| |
|
|
|
|
| |
 |
|
 |
|
| |
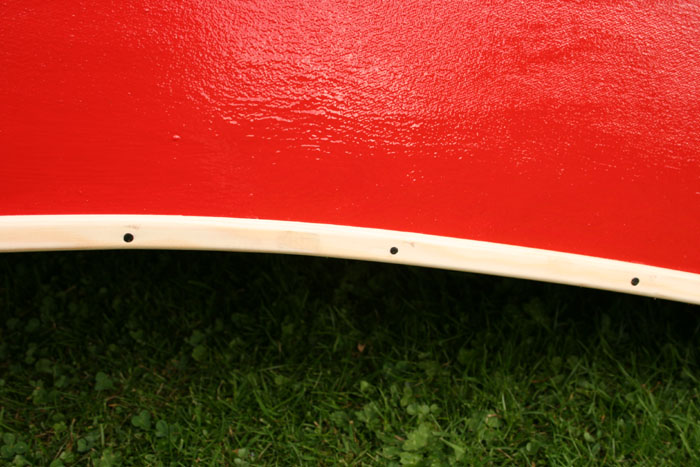
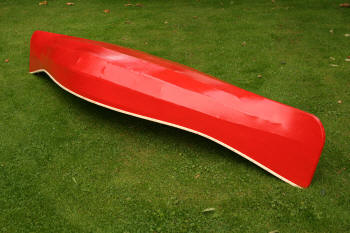
All that was left to do was to paint the canvas and fit a
strip of wooden trim along the edge (known as beading) to
give a nice finish to the edge.
You should give the canoe two coats of undercoat and two coats of over
coat. Just use enough paint to fill the weave of the canvas. Use paint
suitable for external use on wood. Between coats I gave the
canoe a light sanding with very fine sand paper.
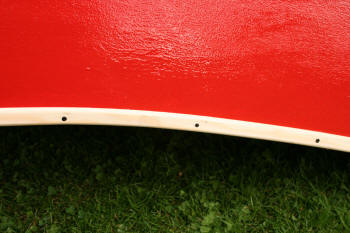
The last job was to fit the wooden beading along the edge of the canoe
to cover up the edge of the canvas. Use galvanised nails to attach this
otherwise you may get rust stains in the future. With a bit of persuasion
and help from some clamps the beading bent to the shape of the Indian style
ends. |
|
| |
 |
|
 |
|
| |
|
|
|
|
| |
 |
|
 |
|
| |
|
|
|
|
| |
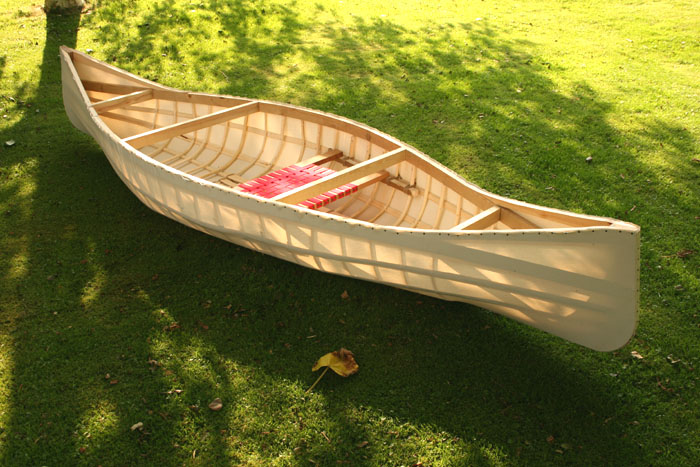
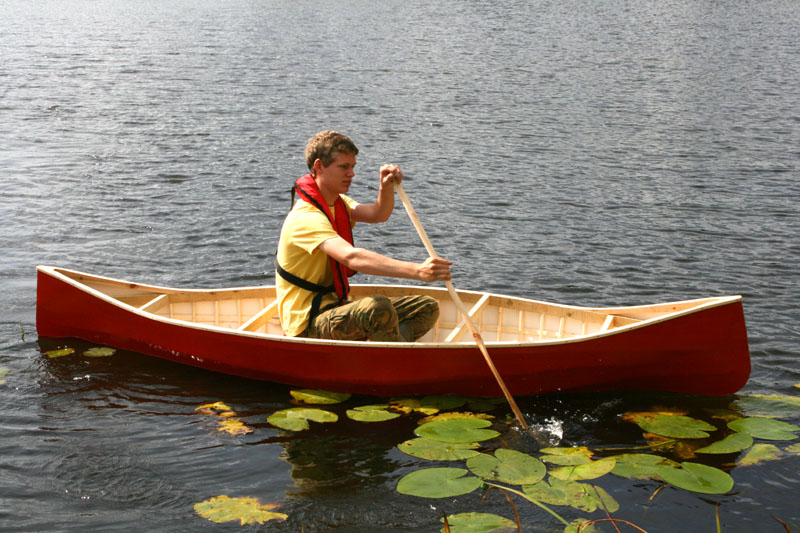
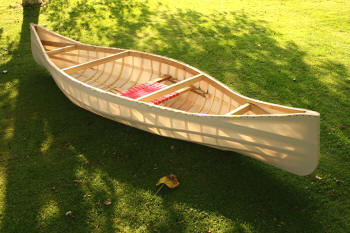
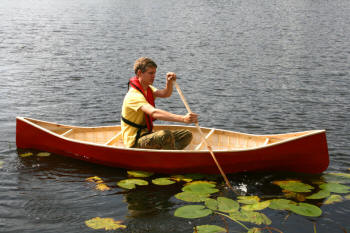
Canoe finished! I
can't tell you how satisfying it is to step into a hand
crafted canoe you have made with your own hands, and then
paddle it away... It's a truly beautiful feeling. Have
fun!
For reference purposes:
| Canoe Length: |
3.16 meters |
| Width at centre: |
87 cm |
| Depth at centre: |
34 cm |
| Bottom moderately 'rockered' for
easier turning |
| weight: |
17.8kg |
|
|